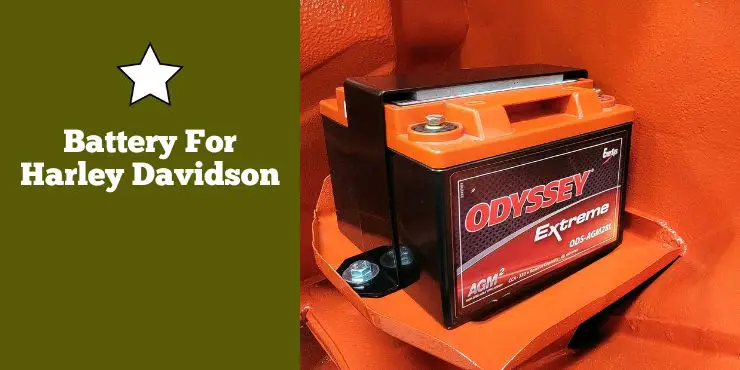
The battery plays a significant role in the working of Harley-Davidson motorcycles. It is responsible for starting the engine and powering the electrical systems within the bike. It provides that initial burst of energy required for igniting the combustion process and ensures a reliable and efficient ride. Moreover, a motorcycle battery also supports the operation of various components such as lights, indicators, audio systems, and advanced technologies, enhancing the overall functionality and safety of the motorcycle. It also maintains the health of the charging system, ensuring a consistent power supply.
Harley-Davidson typically uses 12V batteries designed for motorcycle use, like lithium-ion or AGM batteries, which provide strong cranking power and durability.
If you’re a Harley-Davidson rider looking to learn more about battery for Harley-Davidson bikes, then this blog will be really informative. In this blog, you will get to know everything you need to know about battery for Harley-Davidson bikes.
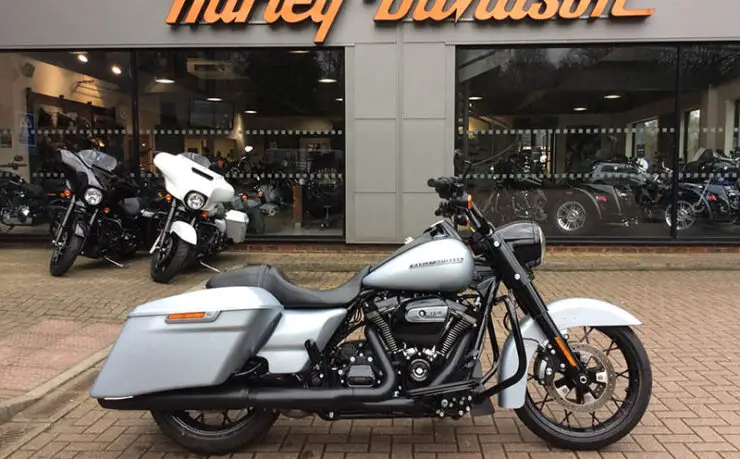
What type of battery is used in a Harley-Davidson motorcycle?
Harley-Davidson bikes are known for their powerful engines and distinctive designs and they rely on a robust and reliable battery for providing the necessary electrical power. Harley-Davidson batteries play a key role in starting the engine, powering the electrical systems, and ensuring a smooth and efficient ride.
>>> Click here to read our review of the Best Battery For Harley-Davidson <<<
Conventional lead-acid batteries have been the standard choice for Harley-Davidson bikers for many years. These batteries consist of lead plates immersed in a sulfuric acid electrolyte solution. They are known for offering a reliable and cost-effective power source to start the engine and power the Harley-Davidson bike. While these batteries might require periodic maintenance, they are widely used and trusted for their performance and durability.
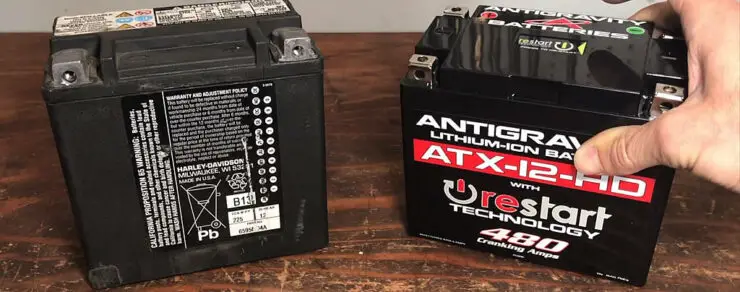
Absorbed Glass Mat or AGM batteries have gained popularity in recent years in the motorcycle industry, especially Harley-Davidson bikes. These batteries come with a unique design that incorporates a fiberglass mat soaked in electrolytes between lead plates. The AGM design offers numerous advantages, including enhanced vibration resistance and maintenance-free operation. They’re known for their exceptional reliability, long service life, and ability to deliver high-cranking power, which is why they are a great option for Harley-Davidson motorcycles.
Lithium-ion battery is another type of battery for Harley-Davidson bikes. With advancements in motorcycles and battery technology, some Harley-Davidson bikes have started incorporating lithium-ion batteries. Li-ion batteries offer numerous advantages over traditional lead-acid batteries, including lighter weight, high energy density, and faster charging times. These batteries deliver consistent performance and reliable starting power even in extreme temperature conditions. They are also renowned for their long service life and low self-discharge rate, which makes them an appealing option for riders looking for advanced battery technology.
It is worth noting that the specific type of battery used in a Harley-Davidson bike might vary depending on the model, year of manufacture, and specific electrical requirements. The company ensures that the battery type and specifications are tailored to the unique characteristics and demands of each motorcycle model.
How long does a Harley-Davidson battery last?
Once you have an insight into the types of batteries used for Harley-Davidson bikes, the next obvious question would be how long does a Harley-Davidson battery last. The answer is, it depends on you and the way you maintain the battery.
On average, you can expect your Harley-Davidson battery to last between two to seven years before it has to be replaced. Usually, Harley-Davidson batteries can last for a long time. Most bikers replace their Harley batteries once every two to seven years. However, some batteries can also last between nine to fifteen years if properly taken care of. On the other hand, there are also situations where the battery could die in less than a year. Defective Harley-Davidson batteries won’t last that long and may die within a few months.
Moreover, if not used regularly, motorcycle batteries might not last long. Without starting, batteries are unlikely to last more than 3-5 months before completely discharging. Allowing your battery to fully discharge affects its life expectancy negatively. If you aren’t going to use your bike for extended periods of time, you should prefer using a battery tender.
Lead-acid batteries can last between 2 to 10 years in general. How long the lead-acid batteries last will entirely depend on the care and maintenance as well as how frequently it is being used. Motorcycle batteries that are used more typically last longer.
Lithium batteries can also last a long time, somewhere around four to ten years. However, poor care and maintenance or leaving the battery to discharge fully can damage it and make it useless within a few months. Although there isn’t enough study on this subject, it is believed that lithium batteries are capable of lasting longer than lead-acid batteries. This is one of the reasons why lithium batteries are more expensive.
>>> READ MORE – How long does a Harley-Davidson battery last?
Does a Harley-Davidson battery need to be replaced periodically?
Harley-Davidson bikes are famous for their powerful and exhilarating rides. These bikes rely on a robust battery for providing the necessary electrical power. As a Harley-Davidson rider, you may have the question of whether your battery needs to be replaced periodically. The answer is that you only have to replace them once over several years. Harley-Davidson batteries last a long time unless you’re slacking in terms of maintenance.
Like any other brand, the lifespan of a Harley-Davidson battery can vary depending on different factors, such as the type of battery, maintenance, usage pattern, riding conditions, and more. Generally, a well-maintained battery will last for several years before needing replacement. However, it is important to keep in mind that batteries, over time, naturally experience a decline in performance and capacity.
Conventional lead-acid batteries, commonly used in Harley-Davidson motorcycles, typically have a lifespan of around 2 to 10 years, although this can vary depending on different factors. These batteries will require periodic maintenance, such as cleaning terminals, checking fluid levels, ensuring proper charging, and more.
AGM batteries, which have grown in popularity in recent years due to their enhanced performance and maintenance-free operation tend to have a longer lifespan. These batteries can last anywhere from 5 to 10 years or more with proper care.
Lithium-ion batteries, another type of battery used in Harley-Davidson bikes offer exceptional performance and longevity. These batteries can have a significantly longer lifespan compared to conventional lead-acid batteries, lasting up to 10 years or more with regular care and maintenance.
It is important for Harley-Davidson riders to be mindful of certain signs that might indicate the need for battery replacement. If your bike struggles to start, the lights appear dim, or the battery fails to hold a charge despite proper charging, it might be an indication that the battery is reaching the end of its lifespan and needs to be replaced. Regular battery maintenance will be important for extending its lifespan. This includes keeping the terminals clean, checking the fluid levels, and ensuring proper charging.
>>> READ MORE – Does a Harley-Davidson battery need to be replaced periodically?
How do you maintain a Harley-Davidson battery?
The motorcycle battery is a key component of any Harley-Davidson motorcycle, providing the electrical power needed for starting the engine and powering various electrical systems. To make sure that the Harley-Davidson battery remains reliable and performs optimally, regular maintenance will be important. By following a few simple guidelines, you’ll be able to maximize the lifespan of your battery and avoid potential issues. Here are some of the key tips for maintaining your Harley-Davidson battery –
#1. Keep the battery terminals clean
Regularly inspect the battery terminals for any signs of dirt, corrosion, or grime. Corrosion on the terminals can impede the flow of electricity and affect the battery’s performance. If you’re noticing any buildup, clean the terminals using a mixture of baking soda and water or a dedicated battery terminal cleaner. Make sure that the terminals are thoroughly dry before reconnecting them.
#2. Check fluid levels in conventional lead-acid batteries
If your Harley-Davidson bike comes equipped with a conventional lead-acid battery, you should periodically check the fluid levels for ensuring they are within the recommended range. Make use of distilled water for topping up the levels if needed. Be cautious that you don’t overfill the cells as this can result in electrolyte overflow during charging.
#3. Maintain proper charging
Maintaining the battery’s charge is important for its longevity. If you aren’t riding your bike regularly, you should consider using a maintenance charger or a smart trickle charger designed for motorcycle batteries. These chargers help in maintaining the battery’s charge level and prevent it from discharging over extended periods of inactivity.
#4. Avoid deep discharges
Try to avoid fully discharging your battery whenever possible. Deep discharges can shorten the battery’s lifespan. If you’re anticipating that you won’t be using your bike for an extended period, such as during winter, you should remove the battery entirely and store it in a cool and dry place or use a smart battery maintainer for keeping the charge level stable.
#5. Be mindful of any electrical accessories
While Harley-Davidson motorcycles can accommodate various electrical accessories, such as audio systems or additional lighting, it is important to ensure that the combined electrical load doesn’t exceed the battery’s capacity. Excessive electrical demands can strain the battery and result in quicker depletion. You should consider upgrading to a higher-capacity battery or consult with a professional if you’re planning on installing multiple accessories.
#6. Protect from extreme temperatures
Extreme temperatures can affect battery performance and lifespan. If possible, you should try to park your bike in a sheltered area away from direct sunlight or extreme cold. Extreme heat can accelerate battery fluid evaporation while extreme cold can reduce its capacity. If you are riding in extremely cold conditions, you should consider using a heated battery cover or heated grips for maintaining optimal battery performance.
>>> READ MORE – How do you maintain a Harley-Davidson battery?
How do you check the voltage on a Harley-Davidson battery?
Checking the voltage of your Harley-Davidson motorcycle’s battery is an important maintenance task that allows you to monitor its health and performance. By regularly checking the voltage, you’ll be able to ensure that the battery is charged adequately and identify any potential issues before they become significant problems. Here is how you can check the voltage on your Harley-Davidson battery –
Step 1: Prepare the necessary tools and safety gear
Before starting work on your bike’s battery, make sure that the engine is off and the key is removed from the ignition. This step will be important for preventing any accidental electrical discharge or injury during the voltage -checking process.
For checking the voltage on your Harley-Davidson battery, you’ll require a digital multimeter or voltmeter. Make sure that you’ve got a reliable and properly functioning voltmeter on hand before proceeding.
Step 2: Locate the battery
The battery on Harley-Davidson motorcycles is generally located under the seat or within a battery box. You should refer to the owner’s manual or consult a service manual specific to your bike’s model for the exact location.
Step 3: Set the multimeter and make the connections
Now, set the multimeter or voltmeter to the DC voltage setting. Most Harley-Davidson batteries operate on a 12V system, so choose the appropriate voltage range on your multimeter to get an accurate reading.
With the multimeter set to the appropriate voltage range, you can start connecting the positive (red) probe of the multimeter to the positive terminal of the battery. The positive terminal will be marked with a “+” symbol. After that, connect the negative (black) probe of the multimeter to the negative terminal of the battery, which will be marked with a “-“ symbol.
Step 4: Check the voltage
Once the multimeter is connected properly, you can observe the voltage reading displayed on the multimeter. A healthy and fully charged Harley-Davidson battery will read around 12.6 to 12.8 volts. If the voltage reading is significantly lower than this range, it indicates that the battery might be discharged and need charging. Meanwhile, if the voltage reading exceeds 12.8 volts, it’ll suggest an overcharged battery or an issue with the charging system.
Based on the voltage reading obtained, you can assess the condition of your Harley-Davidson battery. If the reading falls within the expected range, it indicates a healthy battery. However, if the voltage is consistently low or fluctuates significantly, it might indicate a weak or failing battery that needs further attention or possible replacement.
>>> READ MORE – How do you check the voltage on a Harley-Davidson battery?
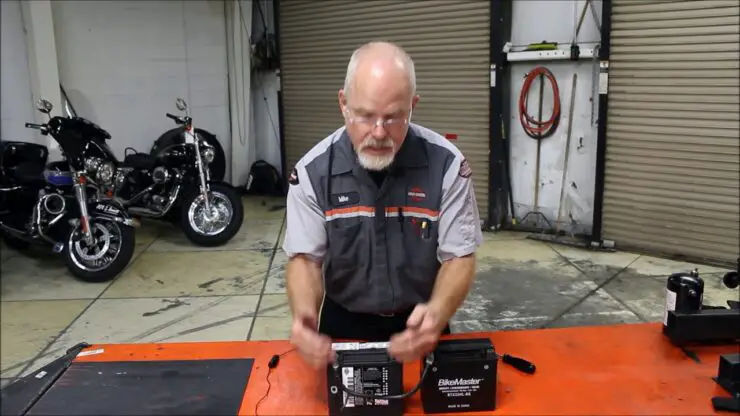
How do you charge a Harley-Davidson battery?
Properly charging a Harley-Davidson battery will be important for maintaining its health and ensuring reliable performance. Whether you are preparing for a ride or storing your bike during the off-season, it will be handy to know how to charge the battery.
Step 1: Select the right charger
Before you start the charging process, make sure that your bike is turned off, the key is removed from the ignition and you’re in a well-ventilated area away from any flames or sparks.
The first step will involve choosing a charger specifically designed for motorcycle batteries, preferably a smart charger that automatically adjusts the charging rate based on the battery’s needs. This type of charger will help prevent overcharging and prolong the battery’s life.
Step 2: Locate the battery and connect the charger
Now, you should identify the location of the battery on your motorcycle. Typically, it’ll be located under the seat or within a battery box. Refer to your bike’s owner’s manual or consult a service manual specific to your bike’s model for the exact location.
Connect the charger to the battery by following the manufacturer’s instructions. It’ll be important to connect the positive (red) charger lead to the positive terminal on the battery (which will be marked with a “+”). Meanwhile, connect the negative (black) charger lead to the negative terminal (which will be marked with a “-“).
Step 3: Verify the settings and start the charging process
Make sure that the charger is set to the appropriate charging process for your battery type. Some chargers have multiple modes for different battery chemistry (e.g. AGM, lead-acid, lithium-ion) so choose the mode that matches your battery.
Once the charger is connected and set up, you can begin the charging process. Depending on the charger and the battery’s condition, it might take several hours to fully charge the battery. Follow the charger’s instructions and keep on monitoring the charging process.
Step 4: Monitor the charging process
Keep a close eye on the charging process and observe any indicator lights or displays on the charger that provide status updates. Smart chargers often have features like float or maintenance modes that automatically switch to a lower charge rate once the battery reaches its optimal charge level. This will help maintain the battery’s health without overcharging.
Step 5: Disconnect the charger
Once the battery is fully charged, you should carefully disconnect the charger from the battery terminals. Start by disconnecting the negative (black) charger lead followed by the positive (red) charger lead. Make sure that the charger is turned off and safely stored.
How do you jump-start a Harley-Davidson battery?
Similar to car batteries, motorcycle batteries might also need a change from time to time if they’re drained of power. You can easily jump-start a Harley-Davidson motorcycle battery with a battery from another bike or car in 5 to 10 minutes with a set of jumper cables. This will deliver enough power to your Harley-Davidson bike’s battery to start it and get back on the road. Here are the steps you should follow to jump-start a Harley-Davidson battery –
Step 1: Turn off the engine and remove the battery cover
First, you should turn off the engine of your Harley-Davidson bike and the bike or car that you’ll be using to jump-start your bike. After that, remove the seat of your Harley-Davidson bike using a Phillips screwdriver and then unsnap the battery cover on the left-hand side of your bike.
Step 2: Make the connections
Connect the positive or red clamps marked with a “+” sign to the positive terminals of your bike’s battery and the battery of the other car/bike. After that, connect one end of the negative or black cable marked with “-“ to the negative terminal on your Harley-Davidson battery. Connect the other end of the negative cable to an unpainted metal surface of the car/bike engine. Make sure that you don’t connect it to the negative terminal of the car/bike battery itself.
Step 3: Jump-start the battery and remove the cables
Keep the connection in place for a few minutes and then start your Harley-Davidson bike. Try it once more after a few minutes if the bike does not start the first time.
Once you have jump-started your bike, remove the cables and then put back the battery cover into place. Replace the motorcycle seat using a Phillips screwdriver.
How do you recharge a Harley-Davidson battery?
Keeping your Harley-Davidson bike charged all the time will come down to how often you ride your bike. For people who ride their Harley on a daily or even weekly basis, you will not have to do anything special to recharge the battery. Your bike’s battery will automatically get recharged until its manufacturer-detailed lifespan ends. For bikers who don’t go out for rides on the open road regularly, you might have to charge your battery once every other month to make sure it is rideable the next time you get the urge to head out. Keeping your Harley on a trickle charger will be a great way of ensuring it remains charged.
>>> READ MORE – How do you recharge a Harley-Davidson battery?
How do you know when your Harley-Davidson battery needs to be replaced?
The battery is an important component of your Harley-Davidson bike, providing the electrical power needed for starting the engine and powering various electrical systems. Over time, batteries can wear out and lose their effectiveness, which can only be resolved with a replacement. It is important for Harley-Davidson riders to be aware of the signs that indicate a failing battery. By recognizing these symptoms, you’ll be able to avoid unexpected breakdowns and ensure a reliable riding experience. Here are some of the common symptoms that will help you know your Harley-Davidson battery needs to be replaced –
#1. Difficulty starting the engine
One of the most apparent signs of a failing battery is difficulty starting the motorcycle. If you’re noticing that the engine is slow to crank or requires multiple attempts before it starts, it might indicate a weakened battery. While other factors like spark plugs or fuel delivery might also contribute to starting issues, a weak battery should be considered as the primary culprit.
#2. Dimming lights
Pay close attention to the brightness of your bike’s lights, including the dashboard lights, indicators, and headlights. If these lights appear noticeably dimmer than usual, especially when idling or at low RPMs, it might be a sign of a battery nearing the end of its lifespan. Dim lights typically indicate that the battery is struggling to provide sufficient power to the electrical system.
#3. Electrical system malfunctions
A failing battery can result in various malfunctions in your bike’s electrical system. You might experience issues like malfunctioning indicators, erratic gauge readings, flickering lights, or the audio system cutting in and out. These problems may occur due to insufficient power supply from a weakened battery.
#4. Swollen or leaking battery
Physical changes in the battery can also indicate the need for battery replacement. If you notice any swelling or bloating of the battery case, it might be a sign of internal damage or excessive heat, which can greatly affect its performance. Moreover, visible leaks or corrosion around the battery terminals suggest a problem and must be addressed promptly.
#5. Age and maintenance history
You should keep track of the age and maintenance history of your Harley-Davidson battery as well. Harley-Davidson batteries typically have a lifespan of around two to seven years or more depending on various factors. If your battery is reaching or surpassing this age range, or if you haven’t followed regular maintenance practices, it might be time to replace it proactively.
It is important to note that these symptoms can sometimes be attributed to other issues with the bike’s electrical system as well. Therefore, it is important to have a thorough diagnosis conducted by a qualified technician or an authorized Harley-Davidson service center to confirm the battery’s condition.
If the symptoms are indicating that your Harley-Davidson battery is failing, it is recommended that you should invest in a high-quality replacement battery that matches your bike’s specifications. Consult your bike’s owner’s manual or seek professional guidance to make sure you get the right compatibility and choose a battery that meets your specific needs.
>>> READ MORE – How do you know when your Harley-Davidson battery needs to be replaced?
How do you install a battery on a Harley-Davidson?
Replacing the battery in your Harley-Davidson motorcycle is a rather straightforward process that ensures reliable power and performance. Whether you are upgrading to a higher-capacity battery or replacing an old one, knowing how to install a battery will be important. Here are the steps you’ll need to follow to install a battery on your Harley-Davidson bike.
Step 1: Locate the battery
First, you’ll need to identify the location of the battery on your Harley-Davidson bike. Depending on the model, the battery can be located under the seat, in a side compartment, or within the battery box. Refer to your bike’s owner’s manual or the service manual specific to your bike for the exact location and model-specific instructions.
Step 2: Disconnect and remove the old battery
Start off by disconnecting the negative terminal (which will be marked with a “-“ sign) of the old battery. Loosen the nut securing the cable to the terminal using the appropriate size wrench or socket. Once the nut is loose, wiggle and slide the cable off the terminal. Repeat this process for the positive terminal (which will be marked with a “+”).
After you have disconnected the terminals, you should carefully remove the old battery from its location. Pay close attention to the battery’s weight and size as some batteries might be heavier or larger than others. Take note of the battery’s orientation, ensuring that you install the new battery in the same position.
Step 3: Prepare the new battery
Inspect the new battery to make sure it is in good condition and matches the specifications required for your Harley-Davidson motorcycle. Check the terminal orientation to align with the old battery’s positioning. If needed, you should transfer any battery acid or electrolyte from the old battery to the new one by adhering to the manufacturer’s instructions.
Step 4: Install the new battery
Now, position the new battery in its designated location, making ensure that it is secure and properly aligned. Connect the positive cable to the positive terminal of the new battery and tighten the nut using the appropriate tool. Then, repeat the same process for the negative cable and the negative terminal.
Step 5: Secure the battery
Make sure that the battery is securely mounted in its designated location. Some Harley-Davidson models might have a battery strap or hold-down bracket that has to be fastened to keep the battery in place. Make use of appropriate tools, such as bolts or screws to make sure the battery is secure.
Once it is installed and securely fastened, double-check the cable connections. Make sure that they are tight and properly seated on the terminals to provide a reliable electrical connection.
Step 6: Test the installation
Before you close any compartments or panels, you should turn on the bike’s ignition and check that the electrical systems are functioning properly. Verify that the lights, indicators, and other electrical components are working as expected. If everything is in order, turn off the ignition and proceed to close any access panels or compartments.
>>> READ MORE – How do you install a battery on a Harley-Davidson?
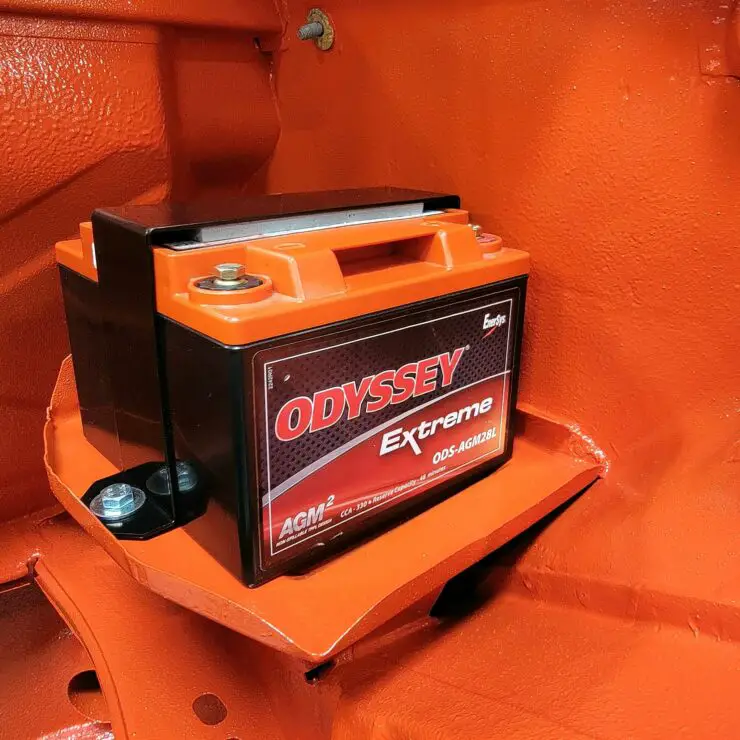
Best batteries for Harley-Davidson motorcycles
When it comes to Harley-Davidson bikes, a reliable battery will be important for ensuring smooth starts, efficient performance, and overall ride enjoyment. Choosing the best battery for your Harley-Davidson motorcycle requires consideration of factors like battery type, capacity, and overall quality. To help you make a better choice, here are some of the best batteries for Harley-Davidson motorcycles that you can go for.
#1. Yuasa YIX30L-BS
The Yuasa YIX30L-BS is an incredibly popular choice among Harley-Davidson riders. This high-performance AGM battery offers tremendous cranking power and is maintenance-free, which means you won’t have to worry about checking fluid levels. Moreover, it boasts a durable construction, vibration resistance, and long service life, which makes it ideal for various Harley-Davidson models.
#2. Shorai LFX Lithium Battery
For bikers seeking advanced battery technology, the Shorai LFX Lithium Battery is a tremendous option. These lightweight lithium-ion batteries deliver exceptional starting power, extended cycle life, and faster recharging times compared to traditional lead-acid batteries. Moreover, they also offer improved cold-weather performance and have a low self-discharge rate, which means they are perfect for riders who value performance and reliability.
#3. Odyssey PC925
The Odyssey PC925 is a robust and high-performance AGM battery known for its reliability and longevity. This battery features a unique design with thin plates and high surface area, which results in increased cranking power and excellent deep-cycling capabilities. Moreover, it is resistant to vibration and offers a longer service life compared to conventional batteries, making it one of the best batteries for Harley-Davidson motorcycles.
#4. Deka ETX30L
The Deka ETX30L is an incredibly popular option among Harley-Davidson enthusiasts. This AGM battery is capable of delivering reliable starting power and exceptional durability. With its maintenance-free design, you’ll be able to expect hassle-free operation and peace of mind. The Deka ETX30L is well-suited for a wide range of Harley-Davidson models and provides consistent performance under various riding conditions. This is why it ranks as one of the best batteries for Harley-Davidson motorcycles.
#5. Energizer ETX20L
Known for their expertise in battery technology, Energizer offers the amazing Energizer ETX20L, which is a reliable option for Harley-Davidson riders. This AGM battery provides strong starting power, reliable performance, and excellent resistance to vibration. Moreover, this battery is designed for durability and requires no maintenance, which makes it an incredibly convenient choice for bikers looking for a hassle-free battery solution.
>>> Read more about Harley-Davidson Parts & Maintenance <<<

