Do you own a Harley-Davidson and want to know if you can replace the rear shocks yourself?
Yes, you can replace the rear shocks on a Harley-Davidson yourself with basic tools. However, it requires careful alignment and torque adjustments to ensure proper fit and safety.
If so, then this article is for you! This informative article will provide you with all the information you need to know about replacing the rear shocks on your Harley-Davidson, from what tools you need to the step-by-step instructions. So if you’re ready to get started, read on and find out how easy it can be to replace the rear shocks on your Harley-Davidson all by yourself!
What are rear shocks?
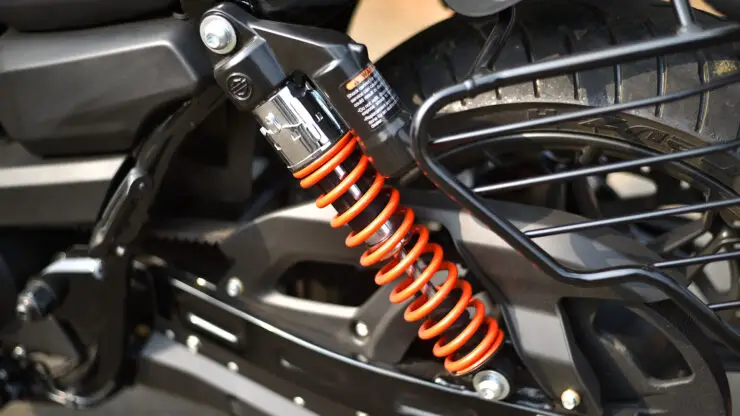
Rear shocks play a key role in the suspension system of a motorcycle, including those from the iconic Harley-Davidson brand. As important components for a smooth and comfortable ride, rear shocks absorb shocks and vibrations from the road, providing stability and control to the rider. Harley-Davidson offers a wide range of rear shock options, each designed for different riding styles, preferences, and motorcycle models.
>>> Click here to read our review of the Best Rear Shocks For Harley-Davidson <<<
Rear shocks or rear shock absorbers are hydraulic or pneumatic devices that connect the motorcycle frame to the rear wheels. They work in conjunction with the front forks to absorb and dampen the impact of bumps, potholes, and irregularities on the road surface. This ensures that the rear wheel maintains contact with the ground, providing better traction and control for the rider.
Harley-Davidson offers a wide variety of rear shock options to cater to the diverse needs and preferences of riders. Here are some of the most common types of rear shocks available for Harley-Davidson bikes.
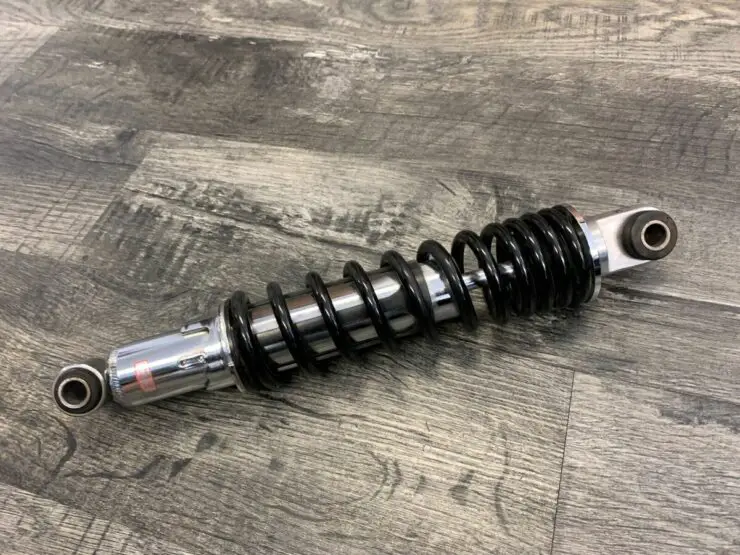
Standard rear shocks are the most basic and commonly used type. They offer a straightforward and reliable solution for riders looking for a comfortable ride without any advanced features. These rear shocks are pre-set and offer a balanced level of compression and rebound damping, providing a smooth and controlled ride for most riding conditions.
Adjustable rear shocks or also known as performance shocks allow riders to fine-tune the suspension settings to match their individual preferences and riding style. These rear shocks come with various adjustments, such as preload settings and adjustable damping. By adjusting these settings, riders can optimize the suspension to suit their weight, road conditions, and desired level of comfort or performance.
Air suspension shocks use air pressure instead of hydraulic fluid for damping and rebound. They offer a more customizable suspension setup as riders can adjust the air pressure to achieve the desired level of stiffness or softness. Air suspension shocks are popular among touring riders who might need to adjust their suspension settings to accommodate varying loads, such as when carrying luggage or a passenger.
Emulsion shocks are a type of rear shocks that combine air and hydraulic damping. They feature a piston design that separates the air and hydraulic fluid, resulting in a more stable and controlled ride. Emulsion shocks are known for their reliability and excellent performance in various riding conditions.
Remote reservoir shocks have a separate reservoir that houses the hydraulic fluid, allowing for increased fluid capacity and improved cooling. This design helps maintain consistent damping performance even during prolonged or demanding rides. Remote reservoir shocks are often found on high-performance and custom Harley-Davidson models.
Progressive shocks make use of a unique spring design that provides varying rates of compression depending on the shock’s stroke. This progressive spring design allows the rear shocks to provide a softer ride during initial compression for small bumps and a firmer ride as the shocks compress further to handle larger impacts.

What you need to know before replacing rear shocks on your Harley-Davidson
Replacing the rear shocks on your Harley-Davidson bike is a significant maintenance task that impacts your riding experience greatly. There are a lot of things that you need to know so that you can carry out the necessary preparation before replacing the rear shocks. Moreover, it will help you get the best possible results in terms of safety and performance. Taking the time to adequately prepare will help you avoid potential issues and ensure a successful rear shock replacement. Here are some of the things you must know about preparation before you can replace the rear shocks on your Harley-Davidson bike.
Research and select the right pair of rear shocks
Start off by researching the different rear shock options available for your specific Harley-Davidson model. Determine your style, riding preferences, and the type of riding you most commonly engage in (such as cruising, touring, or performance riding). Based on your research, you must select the right type of rear shocks that best suits your needs, such as standard, adjustable, air suspension, or other types of shocks. You should make sure that you are choosing rear shocks that are compatible with your motorcycle’s year, make, and model.
Rear the manufacturer’s instructions
Carefully read and familiarize yourself with the manufacturer’s instructions that come with the rear shocks. Pay close attention to any specific guidelines or torque values mentioned in the instructions. Following the manufacturer’s guidelines will ensure a proper and safe installation of the rear shocks.
Secure a suitable work area
You should choose a well-lit and spacious work area to perform the rear shocks replacement. You should make sure that you have ample room to move around the bike and access the rear suspension without any obstructions. If possible, you should use a motorcycle lift or jack for elevating the rear of the bike for easier access to the rear shocks.
Inspect existing rear shocks and suspension components
Before you remove the old rear shocks, inspect them for any signs of wear, damage, or leakage. Examine the suspension components and mounting points for any issues. This inspection will give you an idea of the condition of your current shocks and will help you identify any additional parts or components that might need replacement or adjustment during the process.
Have a clean and organized workspace
You should keep your work area clean and well-organized to prevent misplacing any tools or parts during the installation. Having a clutter-free workspace will make the process much more efficient and minimize the risk of any misplaced or lost components.
Plan for adequate time
Replacing rear shocks on a Harley-Davidson can be a highly time-consuming process, especially if it is your first time doing it. You must plan for adequate time to complete the installation, ensuring that you have enough time without feeling rushed. Rushing this process can result in mistakes or oversights, so you should allow yourself ample time to perform the task properly.
Tools and equipment needed for replacing rear shocks
The process to replace the rear shocks on your Harley-Davidson bike can be a simple and straightforward as long as you’ve got a basic idea of the tools and equipment needed. To ensure you can carry out a successful and smooth installation process, it is important to have the right tools at your disposal. Having the right tools will not only make your job easier but it’ll also ensure that you can perform the task safely and efficiently. Here are some of the tools needed for replacing the rear shocks on your Harley-Davidson bike.
#1. Socket set
A high-quality socket set is an important tool for any motorcycle maintenance task, including replacing rear shocks. Look for a set that includes both metric and standard sizes to accommodate various bolt sizes on your Harley-Davidson bike. Having a variety of sockets will help ensure that you can easily remove and install the bolts securing the rear shocks.
#2. A set of wrenches
Aside from a socket set, you will also require a set of wrenches for tasks that require more leverage or where a socket might not fit. Combination wrenches (open-end wrenches on one side and a box-end on the other side) are commonly used for general applications. Make sure that you have the right sizes to fit the nuts and bolts on your bike.
#3. Motorcycle lift or jack
For safely accessing and working on the rear shocks, you will require a motorcycle lift or jack to elevate the rear end of your Harley-Davidson bike. This will provide sufficient clearance and make it easier to remove and install the rear shocks. You should make sure that the lift or jack is stable and secure before starting the work.
#4. Pliers and screwdrivers
Pliers are versatile tools that can help in holding or manipulating various components while working on the rear shocks. Long-nose pliers, in particular, can help reach tight spaces and grip small parts effectively.
Meanwhile, a set of flathead and Phillips-head screwdrivers will come in handy for various tasks during the rear shocks replacement. They can be used for removing screws, adjusting components, or prying open covers or panels if needed.
#5. Rubber mallet or soft-faced hammer
A rubber mallet or soft-faced hammer is useful for tapping or gently persuading components into place without causing any damage. It can help with aligning and seating the rear shocks properly during installation.
#6. Allen (Hex) key set
Many Harley-Davidson bikes use Allen (hex) bolts for certain components, including the rear shocks. Make sure that you have a set of Allen keys to fit the specific bolt sizes on your bike.
Can I replace the rear shocks on my Harley-Davidson myself?
Replacing the rear shocks on your Harley-Davidson bike can be a highly rewarding and transformative upgrade. It can significantly improve your riding experience and overall comfort on the road. However, if you’re a novice or combatively inexperienced Harley rider, you might wonder, can I replace the rear shocks on my Harley-Davidson myself. The good news for you is yes, you can replace the rear shocks on your bike yourself as long as you know the right steps. While it might seem like a daunting task at first but with the right tools, knowledge, and attention to detail, you will be able to replace the rear shocks on your bike successfully. Here are the steps you will need to follow for replacing the rear shocks on your Harley-Davidson bike yourself.
Step 1: Elevate the rear of your Harley-Davidson bike
Using a motorcycle lift or jack, you should elevate the rear of your Harley-Davidson motorcycle to provide easy access to the rear shocks. Make sure that the lift or jack is securely positioned to prevent any accidents during the installation process.
Step 2: Remove the old rear shocks
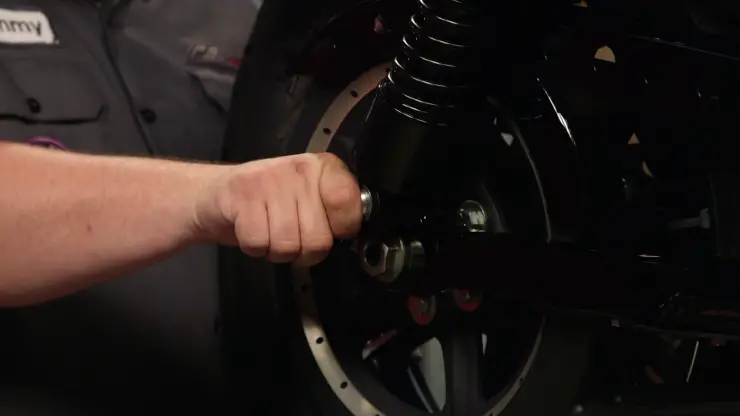
With the rear of the motorcycle elevated, you should start removing the old rear shocks. Use your socket set and wrenches to carefully remove the nuts and bolts securing the shocks to the frame and swingarm. Take note of the order in which the components are removed as you’ll have to reinstall them in the same sequence, with the new rear shocks.
Step 3: Prepare the new rear shocks
Before you install the new rear shocks, you should prepare them for installation. Check the manufacturer’s instructions and apply grease to the threads and contact surfaces of the bolts as recommended. This will help with ease of installation and prevent corrosion.
Step 4: Install the new rear shocks
Position the new rear shocks into place, aligning them with the mounting points on the frame and swingarm. Insert the bolts and hand-tighten them to properly secure the shocks. Use a torque wrench for tightening the bolts to the manufacturer’s recommended specifications. Proper torque will be important for safety and optimal performance.
Step 5: Adjust the rear shocks
If your new rear shocks come with adjustable features, such as damping or preload settings, you will need to make the necessary adjustments. You should consult the manufacturer’s instructions or take guidance from experienced riders or mechanics to set the shocks to your desired preferences.
Step 6: Check for proper alignment and clearance
After you have installed the new rear shocks, you should check for proper alignment and clearance. Make sure that the rear shocks aren’t interfering with any other parts of the motorcycle. The shocks should have enough clearance to compress and rebound freely without any obstructions.
Step 7: Lower the motorcycle and test ride
Once you have completed the installation and checked for proper alignment, you need to carefully lower your Harley-Davidson bike back to the ground. Before you embark on longer rides, you should take your motorcycle for a test ride in a safe and controlled environment. Pay close attention to the handling, comfort, and stability of the bike to ensure that the new rear shocks are performing optimally.

How to clean and maintain the newly replaced rear shocks?
Replacing the rear shocks on your Harley-Davidson bike is a significant maintenance task that can greatly impact your overall riding experience. Once you have successfully installed the new rear shocks, it is important to take proper care of them to ensure optimal performance and longevity. Regular cleaning and maintenance will be important to keep your rear shocks in top condition and enjoy a smoother and more comfortable ride. Here are some of the essential steps that you should take for cleaning and maintaining your newly replaced rear shocks.
Clean the rear shocks
Regular cleaning will help remove dirt, debris, and grime that gets accumulated on your rear shocks during long rides. Here is how you can clean the rear shocks on your Harley-Davidson bike –
- Start off by spraying a mild cleaning solution or soapy water onto the shocks
- Use a soft brush or sponge to gently scrub the rear shocks, paying close attention to hard-to-reach areas and crevices
- Rinse off the cleaning solution with clean water, making sure that there is no soap residue remaining
- Dry the rear shocks thoroughly using a clean, dry cloth or air blower
Inspect for damage and leaks
After you have cleaned the rear shocks, you should inspect the rear shocks for any damage, wear, or leaks. Look for oil or fluid leaks around the seals and dampening components. Check for any loose or damaged parts and ensure that all mounting bolts are securely tightened to the manufacturer’s recommended torque specifications.
Lubrication
Proper lubrication will be important to ensure smooth operation and prevent corrosion. Apply a small amount of silicone-based lubricant to the shock’s moving parts, such as the seals and bushings. Be cautious that you don’t over-apply as excess lubricant can attract dirt and debris.
Check and make adjustments periodically
If your new rear shocks come with adjustable features such as damping or preload settings, you should make sure that you periodically check and adjust them to suit your riding preferences and conditions.
Establish a regular maintenance schedule
You need to establish a regular maintenance schedule for your bike’s rear shocks. Depending on your riding frequency and conditions, you should aim to inspect and clean the rear shocks at least once every few months or as recommended by the manufacturer. Regular maintenance will help identify and address any issues promptly, ensuring the longevity and performance of your rear shocks.
Professional inspection
While you can perform basic maintenance yourself, you should consider getting your rear shocks professionally inspected at a Harley-Davidson dealership or by a qualified mechanic at regular intervals. A professional inspection will ensure that your rear shocks are functioning optimally and any potential problem get addressed promptly.
Ride responsibly
While proper maintenance will be important, riding responsibly is equally important for the longevity of your rear shocks. You should avoid aggressive riding, especially over rough terrains, as this can put excessive stress on the suspension components. You must ride within the weight and load capacity limits specified for your bike.

Troubleshoot common issues in Harley-Davidson rear shocks
Rear shocks are essential components of a Harley-Davidson bike’s suspension system. They essentially absorb shocks and vibrations from the road, resulting in a smooth and more controlled ride. However, like any mechanical part, rear shocks can experience issues over time. Identifying and troubleshooting these issues promptly is important to maintain the optimal performance and safety of your Harley-Davidson bike. Here are some of the common issues that might arise in rear shocks and how to troubleshoot them.
Stiff or unresponsive suspension
A stiff or unresponsive rear suspension can result in a harsh and uncomfortable ride, especially over rough terrain.
For troubleshooting this issue, you need to check the preload settings and make sure that they are not overly firm. Reduce the preload if needed to soften the ride. After that, adjust the damping settings to find the perfect balance between comfort and responsiveness. Insert the internal components of the rear shocks for signs of wear or damage that might affect its performance.
Oil leaks
Oil leaks are a prevalent issue with rear shocks. If you notice oil pooling around the shocks or dripping onto the ground, it indicates a leak in the shock’s seals or internal components.
To troubleshoot this issue, you need to first inspect the rear shocks for visible signs of oil leakage. Check the seals and gaskets for any damage or wear. If the rear shocks are adjustable, you should make sure that the adjustment knobs or screws are properly tightened. If the leak still persists, the rear shocks might need professional servicing or replacement of damaged components.
Excessive bouncing or bottoming out
If your Harley-Davidson motorcycle bounces excessively over bumps or bottoms out easily, then it suggests that the rear shocks aren’t providing enough damping and compression.
To troubleshoot this issue, you need to first check the rear shock’s preload settings. If they are too soft, you should increase the preload to provide more support. Adjust the damping settings to control the rebound and compression of the rear shocks. Make sure that the rear shock’s spring and damping components are not worn or damaged. If the problem still persists, you should consider upgrading to aftermarket shocks with adjustable features for better customization.
Noisy shocks
Another common issue that pops up from time to time is rattling, clunking, or knocking noises from the rear shocks. It can indicate loose or worn-out components in the rear shocks.
To troubleshoot this issue, you must first inspect all mounting bolts and fasteners for tightness. Tighten any loose bolts as needed. Check for any worn bushings or bushing inserts and then replace them if needed. If the noise still persists, the internal components of the rear shock might be damaged or worn, requiring professional attention.
Uneven suspension
If one side of the rear suspension seems higher or lower than the other, it might indicate an imbalance or sag in the rear shocks.
To troubleshoot this issue, you need to measure the sag on both sides of the bike. Adjust the preload settings and try to achieve a balanced sag. Make sure that the shocks’ mounting points and bushings are aligned correctly. if the suspension still remains uneven, it might be a sign of damaged or worn shocks that require replacement.
FAQ
What is involved in replacing the rear shocks on a Harley Davidson?
Replacing the rear shocks on a Harley Davidson can be a difficult and time-consuming task. It is important to have a detailed understanding of the bike’s rear suspension system and a set of proper tools and instructions before attempting to replace the shocks. It’s also important to ensure that the new shocks are compatible with the bike and are properly installed.
What are the benefits of replacing the rear shocks on a Harley Davidson?
Replacing the rear shocks on a Harley Davidson can improve the overall performance of the bike, as well as the comfort and handling. New shocks can provide a smoother ride, reduce vibration and fatigue, and improve traction and stability.
What are the risks of replacing the rear shocks on a Harley Davidson?
Replacing the rear shocks on a Harley Davidson can be a difficult and potentially dangerous task. If done incorrectly, it can lead to mechanical failure, damage to the bike, and even injury. It’s important to be aware of the risks and to have the necessary knowledge, tools, and instructions before attempting to replace the shocks.
>>> Read more about Rear Shocks for Harley-Davidson <<<

