Welcome Harley-Davidson riders! Have you ever wondered if your Harley battery needs to be periodically replaced? If so, you’ve come to the right place! In this article, we will answer this important question and provide some helpful advice along the way. Read on to find out if a Harley-Davidson battery needs to be replaced periodically and how to keep your Harley-Davidson running optimally.
Yes, a Harley-Davidson battery should be replaced periodically every 3-5 years, or sooner if it shows signs of diminished performance.
Overview of Harley-Davidson batteries and their maintenance
Harley-Davidson bikes are known for their style and power-packed performance. Behind every roaring engine, there is a reliable Harley-Davidson battery that ensures smooth starts and consistent electrical power. As a Harley-Davidson rider, knowing and understanding the different types of batteries available for your powerful beast will help you make a better decision when it comes to battery maintenance and replacement.
>>> Click here to read our review of the Best Battery For Harley-Davidson <<<
Conventional lead-acid batteries
Conventional lead-acid batteries have long been the standard option for Harley-Davidson bikers. These batteries consist of lead plates immersed in an electrolyte solution of sulfuric acid. They are reliable, cost-efficient, and widely available. They come in two variations – conventional wet-cell batteries and maintenance-free batteries.
Wet-cell batteries are traditional lead-acid batteries that need regular maintenance. Periodic checks of the electrolyte levels and adding distilled water when needed are important for maintaining their performance and lifespan.
Maintenance-free acid batteries or sealed lead-acid batteries are designed to be hassle-free. These batteries are sealed, which eliminates the need for electrolyte level checks and water refills. They’re generally more durable and vibration-resistant than their wet-cell counterparts.
Absorbed Glass Mat (AGM) batteries
AGM Batteries have become popular in recent years for their maintenance-free design and enhanced performance and durability. These batteries come with a fiberglass mat soaked in an electrolyte, which is absorbed between the battery plates. The absorbed glass mat serves as a separator, which prevents acid spillage and enhances the battery’s resistance to vibration and shock.
These batteries offer several advantages for Harley-Davidson riders. They offer excellent starting power, need no maintenance, and are less prone to internal damage. Moreover, they’re more resistant to leakage, which makes them an ideal choice for bikers who want a hassle-free and reliable power source.
Lithium-ion (Li-ion) batteries
Lithium-ion batteries have also become popular in different industries recently, including automotive and motorcycles. These motorcycle batteries are known for their high energy density, lightweight construction, and extended lifespan compared to traditional lead-acid batteries. While these batteries were initially used for high-performance applications primarily, they’ve become much more accessible for everyday riders.
Li-ion batteries offer numerous advantages over traditional options. They’re significantly lighter, which can contribute to improved handling and overall motorcycle performance. Li-ion batteries also come with a higher discharge rate, providing reliable power even in extreme weather conditions. However, it is important to note that these batteries might require specific chargers designed for their unique characteristics.
Maintenance of the battery
A reliable battery will be an important component for the optimal performance of your Harley-Davidson bike. By understanding the different battery options available and selecting the one that best suits your needs, you’ll be able to ensure a smooth start, consistent power, and an enjoyable overall riding experience. However, you should treat your battery with proper care and maintenance for improved longevity.
You should perform routine visual inspections of the battery for ensuring that it is in good condition. Look for any signs of corrosion or damage to the terminals, cables, and connections. Clean any corrosion with a mixture of baking soda and water, followed by a thorough rinse.
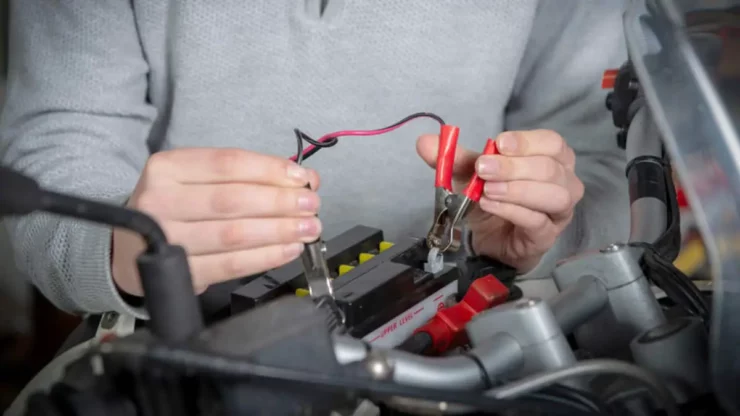
Maintain the battery’s charging to prolong its lifespan and prevent it from discharging completely. Use a high-quality battery charger designed for motorcycle batteries and follow the manufacturer’s instructions. Avoid using automotive chargers as they could deliver excessive voltage and damage the battery.
Apply a thin coat of dielectric grease or petroleum jelly to the battery terminals for protecting them from corrosion. This will help maintain good electrical conductivity and prevent the buildup of oxidation.
If you’re planning on storing your bike for an extended period, it’ll be important to keep the battery charged. Use a battery maintainer or trickle charger specifically designed for motorcycle batteries to maintain an optimal charge level. This will help prevent the battery from discharging and ensure it remains ready for your next ride.

Does a Harley-Davidson battery need to be replaced periodically?
Once you know the different types of batteries available and their maintenance, you’ll want to know does a Harley-Davidson battery need to be replaced periodically. Harley-Davidson bikes use batteries made by Deka-East Penn Manufacturing, their official manufacturer. The cost of a battery ranges from $60 to $400 depending on the Harley-Davidson model you’re riding and the specifications you are after.
Conventional lead-acid batteries in Harley-Davidson motorcycles come with a lifespan of 2 to 10 years. Meanwhile, AGM batteries can last anywhere from 5 to 10 years or more with proper use. Lithium-ion batteries come with a significantly longer lifespan compared to the other two options, lasting up to 10 years or more with regular care and maintenance.
Generally, there is no guaranteed timescale for the replacement period as it’ll depend on a variety of factors. However, many riders believe that you should replace the battery once every 2-3 years or more frequently if you ride frequently or ride a lot in rough weather.
The company offers lithium, lead-acid, and AGM batteries, although lithium batteries are typically recommended. The only restriction relative to lithium batteries is that if you are riding a vintage Harley built before 1980, some of the charging specifications will be slightly different so you must check them carefully and check with the local dealership when you’re in the market for a new battery.
If you’re confused about the type of battery you need, you must visit your local dealership. They will talk to you about your specific model and make the appropriate recommendations and they’ll ensure that you get the best battery that will give you the best performance.
Reasons for replacing a Harley-Davidson battery
As a Harley-Davidson rider, you’ll have to rely on your bike’s battery to power the electrical systems and ensure smooth starts. However, like any other battery, your Harley-Davidson battery will eventually reach the end of its lifespan and need replacement. Understanding different reasons that affect battery longevity and performance can help you recognize when it is time for a new battery. Here are the different reasons for replacing the Harley-Davidson battery on your bike.
#1. Battery age
One of the main factors to consider when determining the need for a battery replacement will be its age. Most motorcycle batteries, including those used in Harley-Davidson models, have an average lifespan of two to ten years. However, this can vary depending on several factors, including maintenance, usage patterns, and environmental conditions.
If your battery is approaching or has exceeded its expected lifespan, it’ll become more susceptible to failure or diminished performance. While proper maintenance can prolong battery life, it is important to be proactive and consider replacing your battery after a certain number of years to avoid unexpected breakdowns and inconvenience on the road.
#2. Battery damage
Physical damage to the battery can greatly affect its performance and reliability. Damage can occur due to factors like vibrations, accidents, corrosion, or exposure to extreme temperatures. Inspect your battery regularly for signs of damage such as cracks, leakage, or swelling.
Corrosion is another common issue that can occur around the battery terminals and connections. Corrosion inhibits its proper electrical conductivity and can lead to poor battery performance. If you notice any damage or corrosion, it is advisable to replace the battery promptly to prevent further complications.
#3. Declining battery performance
As the battery ages, its performance gradually declines. You might notice signs indicating that your Harley-Davidson battery is reaching the end of its usable life, including difficulty starting, dimming lights, reduced capacity and charge holding, and failed load testing.
If you experience slow engine cranking, prolonged cranking times, or the engine fails to start consistently, it can be a sign that the battery is no longer providing sufficient power. Dim headlights, dim dashboard lights, or erratic behavior of electrical components indicate a weak battery unable to sustain the required voltage.
If the battery is unable to hold a charge for an extended period or discharges quickly even after recharging, it might be a sign that the battery cells are deteriorating. Failed load testing is another sign. Load testing is a diagnostic procedure that measures the battery’s ability to deliver sufficient power. If the battery fails a load test, it indicates a significant decline in its performance and suggests that the battery needs a replacement.
#4. Upgrading to a higher-capacity battery
If you have added extra accessories or modified your Harley-Davidson motorcycle, your power requirements might have increased. Accessories like additional lighting, heated grips, GPS systems, or audio equipment can place extra demand on your battery.
If you find that your current battery struggles to meet the increased power needs or drains quickly, it might be time to upgrade to a higher-capacity battery. A higher-capacity battery will provide the necessary power for accommodating your bike’s electrical demands and prevent potential issues.
#5. Planning for long-term storage
If you’re anticipating storing your Harley-Davidson bike for an extended period, proper battery maintenance will be important. However, even with proper maintenance, batteries can lose their charge over time, especially when stored in colder temperatures.
If you plan on storing your bike for several months without access to regular maintenance, replacing the battery before storage will ensure a fresh start when you are ready to ride again. A new battery will hold a charge better and be less prone to discharge during the storage period.
#6. Enhancing cold weather performance
Extreme cold temperatures will affect battery performance, causing it to discharge more quickly and struggle to provide sufficient power. If you frequently ride in cold climates or during the winter season, consider replacing your battery with one that has enhanced cold cranking amps (CCA).
CCA indicates the battery’s ability to start the engine in cold conditions. Choosing a battery with a higher CCA rating will provide more reliable starting power in frigid temperatures, reducing the risk of a dead battery on those chilly rides.

How to remove your Harley-Davidson battery?
Replacing the battery in your Harley-Davidson bike is a relatively simple task that can be carried out with a few basic tools and minimal effort. Whether you have to replace a worn-out battery or perform maintenance tasks, knowing the proper steps for removing the battery will be important. Here are the steps you’ll need to follow to safely and efficiently remove the battery from your Harley-Davidson bike.
Step 1: Preparation before replacing the battery
Before you start, it’ll be important to ensure your safety by wearing appropriate protective gear and disconnecting the motorcycle’s power source.
Then, start by turning off the bike’s ignition and removing the key from the ignition switch. Make sure that the motorcycle is parked on a stable and level surface to prevent any accidental movement during the battery removal process. If your bike has a security system, disarm it according to the manufacturer’s instructions.
To remove the battery, you will require the following tools and equipment –
- Appropriate socket or wrench – Depending on your Harley-Davidson motorcycle model, you might require a socket or wrench of the correct size for loosening the battery terminals
- Safety goggles and gloves – Arrange protective gear to shield your eyes and hands from any potential hazards
- Battery terminal puller – If your battery terminals are tightly secured, a terminal puller will help detach them more easily
Step 2: Locate the battery
Locate the battery on your Harley-Davidson motorcycle. The battery will be typically located under the seat behind the side panel or within the battery box. Consult your bike’s owner’s manual if you need help with finding the battery’s exact location.
Step 3: Disconnect the negative and positive terminals
Begin by connecting the negative terminal (-) of the battery. After that, loosen the nut or bolt securing the negative terminal clamp using the appropriate socket or wrench. Once loosened, you should carefully lift the terminal clamp away from the battery terminal. To avoid any accidental electrical contract, you can easily wrap the negative terminal with a cloth or insulating material.
Next up, you will need to disconnect the positive terminal (+) of the battery using the same procedure as the negative terminal. Loosen the nut or bolt securing the positive terminal clamp and carefully lift the clamp away from the battery terminal. Make sure that the terminal clamps don’t come in contact with each other or any metal surfaces during the removal process.
Step 4: Remove the battery
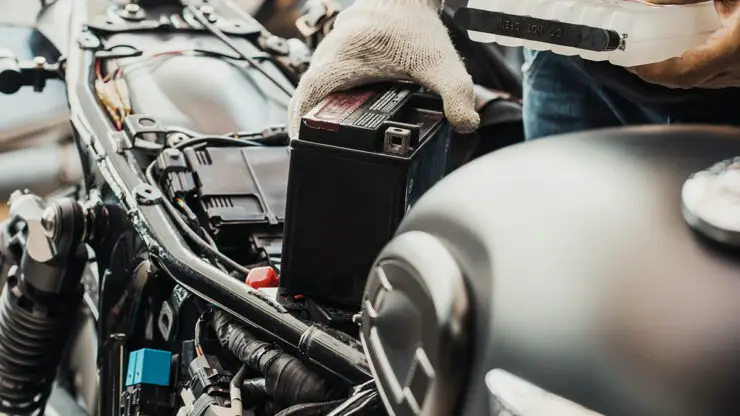
Once both terminals are disconnected, gently lift the battery out of its compartment. Be cautious when handling the battery as it might be heavy or have sharp edges. Place the battery in a safe and secure location away from flammable materials or potential sources of damage.
Take a moment to inspect the battery terminals for any signs of corrosion, damage, or loose connections. If needed, clean the terminals using a mixture of baking soda and water, or even a dedicated battery terminal cleaner. Make sure that the terminals are dry before reinstalling the battery or applying any protective coatings.
You have removed the battery from your Harley-Davidson bike. At this point, you can proceed with any necessary maintenance, replacement, or charging procedures. Remember that you should handle the old battery with care and dispose of it properly at a designated recycling facility.

How to install a new Harley-Davidson battery?
Installing a new battery in your Harley-Davidson motorcycle is also a straightforward process that needs a few simple steps. By knowing the right steps and taking the necessary safety precautions, you’ll be able to install your new Harley-Davidson battery with ease. A properly installed Harley-Davidson battery will ensure reliable power for your electrical system, allowing you to enjoy smooth starts and uninterrupted rides on your cherished Harley-Davidson motorcycle.
When you have to install a new Harley-Davidson battery, understanding the correct installation process will be important. Here are the steps you’ll need to follow for installing a new battery in your Harley-Davidson motorcycle.
Step 1: Choose the battery and other preparatory tasks
Before you start, make sure that you’ve got the appropriate tools and protective gear. Prioritize your safety by wearing safety goggles and gloves. Moreover, make sure that the motorcycle’s power source is turned off before you start the installation process.
Make sure that you have the correct replacement battery for your Harley-Davidson motorcycle. Refer to your owner’s manual or consult with a reputable dealer to identify the appropriate battery model and specifications for your specific motorcycle model.
Before you install the new battery, make sure that the motorcycle’s ignition is turned off and the key is removed from the ignition switch. If your bike has a security system, follow the manufacturer’s instructions to disarm it. Moreover, ensure the motorcycle is parked on a stable and level surface.
Step 2: Position the battery
You should carefully position the new battery in the battery compartment. Pay attention to the correct orientation, ensuring the positive terminal (marked with “+”) aligns with the positive cable and the negative terminal (marked with “-“) aligns with the negative cable.
Step 3: Connect the terminals
Start by connecting the positive terminal (+) of the new battery. Then, slide the positive terminal clamp over the battery’s positive terminal and ensure a secure fit. Tighten the nut or bolt on the terminal clamp using the appropriate socket or wrench. Make sure that the connection is tight but avoid overtightening as it could damage the terminal or lead to electrical problems.
Next up, you should connect the negative terminal (-) of the new battery. Then, you need to slide the negative terminal clamp over the battery’s negative terminal and get a secure fit. Tighten the nut or bolt on the terminal clamp. Once more, make sure that the connection is tight without overtightening.
Step 4: Double-check connections
Once both terminals are securely connected, you can double-check that the connections are tight and that there is no movement or play in the terminal clamps. Make sure that the positive and negative terminals aren’t touching each other or any metal surface as this could cause a short circuit.
Step 5: Inspect and test the installation
Take a moment to inspect the battery terminals for any signs of corrosion or loose connections. If needed, you should clean the terminals using a mixture of baking soda and water or a battery terminal cleaner. Make sure that the terminals are dry before proceeding.
Before you start the motorcycle, turn on the ignition switch and then verify that the electrical systems are functioning correctly. Check that the lights, indicators, and other electrical components are operating as expected. If everything is functioning properly, turn off the ignition switch.
You have installed the new battery in your Harley-Davidson bike. Make sure that the battery is securely in place and that the terminals are connected tightly before starting your bike. Moreover, remember to make sure that you’re disposing of the old battery at a designated recycling facility. Proper battery disposal will help protect the environment and ensure compliance with local regulations.
FAQ
How often should a Harley Davidson battery be replaced?
Harley Davidson recommends replacing the battery every three to five years, depending on its usage and the type of battery. It is important to regularly check the battery’s charge level to ensure it is properly functioning, as well as to replace corroded or damaged parts.
What types of batteries are used in Harley Davidson motorcycles?
Harley Davidson generally uses either sealed lead acid (SLA) batteries or lithium ion batteries. SLA batteries require regular maintenance and should be replaced every three to five years. Lithium ion batteries are more expensive but have a longer lifespan and require less maintenance.
What is the benefit of replacing a Harley Davidson battery periodically?
Replacing a Harley Davidson battery periodically is important for ensuring the motorcycle is running properly and safely. Regularly replacing the battery can also prolong its lifespan and keep it running at peak performance. Additionally, replacing the battery can help avoid any potential issues such as failure or corrosion.
>>> Read more about Battery for Harley-Davidson <<<

