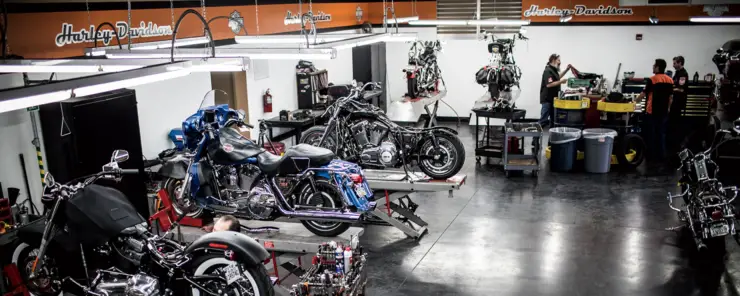
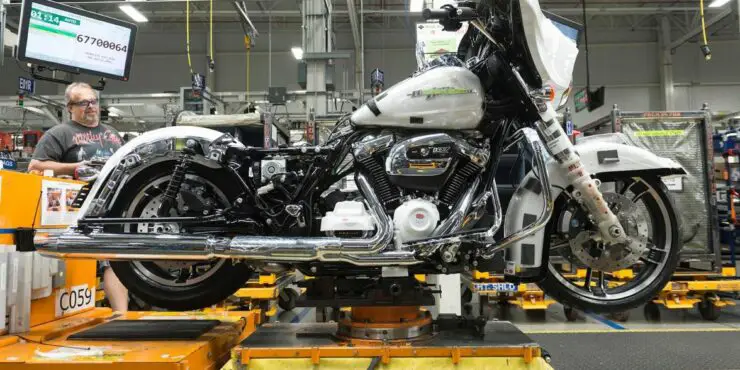
Harley-Davidson bikes are known for their iconic designs, powerful performances, and evergreen appeal. To make sure your precious Harley continues to deliver a tremendous riding experience, proper maintenance of its various parts will be important. By understanding the key components and implementing regular maintenance practices, you’ll be able to keep your bike in top shape, enhance its longevity, and enjoy memorable performances year in and year out.
Routine Harley-Davidson maintenance includes oil changes, brake checks, battery inspection, and replacing wear parts like tires and brake pads. Genuine parts ensure performance and longevity.
In this article, you will get to read about different Harley-Davidson parts and maintenance of those parts to keep your bike in top shape.
Batteries for Harley-Davidson Bikes
The battery is seen as the lifeblood of a Harley-Davidson motorcycle. It provides the necessary power to start the engine and operate various electrical components. To ensure reliable performance and longevity, proper battery maintenance will be essential. By following the necessary maintenance steps, you’ll be able to maximize the lifespan of your bike’s battery and avoid unexpected breakdowns.
You should ensure you’re performing visual inspections of the battery carefully. Check for signs of corrosion, loose connections, or physical damage. Be on the lookout for leaks or bulging cases, which might indicate a faulty or damaged battery. Address the issues promptly.

Keep the battery terminals clean and free from corrosion. Corrosion can often impede the flow of electricity and affect the battery’s performance. Use a mixture of baking soda and water or a specialized battery terminal cleaner to remove corrosion. Gently scrub with a wire brush or toothbrush and then rinse with clean water before drying thoroughly.
Make sure that the battery terminals are securely tightened. Loose connections can result in poor electrical contact and prevent the battery from charging properly or delivering power to the bike’s electrical system. Use a wrench or socket for tightening the terminal nuts snugly but avoid overtightening as it might damage the terminals.
Some Harley-Davidson batteries need regular maintenance of fluid levels. If your battery isn’t a sealed maintenance-free type, check the electrolyte levels periodically. If the levels are low, carefully add distilled water to the appropriate level, ensuring that you do not overfill. Follow the manufacturer’s instructions and take precautions as battery acid could be hazardous.
Make sure that the battery receives regular charging to maintain its optimal charge capacity. Use a quality smart battery charger that is compatible with your battery type. Avoid using trickle chargers for extended periods as they could overcharge and damage the battery.
>>> READ MORE – Battery for Harley-Davidson: Everything You Need to Know
Rear Shocks for Harley-Davidson Bikes
The rear shocks for your Harley-Davidson motorcycle play an important role in providing a comfortable and controlled ride. These components absorb bumps and vibrations, ensuring a smooth journey on various road surfaces. To preserve optimal performance and extend the lifespan of the rear shocks, regular maintenance will be needed.
Perform visual inspections of your Harley’s rear shocks regularly. Look for any signs of leakage, such as oil seepage or wetness around the shock body or seals. Check for any physical damage, dents, or bent components. Pay close attention to worn or damaged bushings and mounting bolts.
Keep the shock absorbers clean by regularly removing dirt, mud, or debris that might accumulate on them. Use a mild detergent and water to clean the shocks, and rinse thoroughly. Avoid using harsh chemicals or high-pressure water that could damage the seals or components.
Lubricate the pivot points, bushings, and linage associated with your rear shocks. Use a suitable lubricant recommended by the manufacturer for minimizing friction and ensuring smooth operation. Be cautious that you do not over-lubricate as excessive lubrication could attract dirt and debris
Check the integrity of the dust seals and rubber boots covering the shock shafts. Make sure they are free from tears, cracks, or other damage. Damaged seals can allow dirt and moisture to enter, resulting in accelerated wear and potential damage to the shock internals.
Periodically check the suspension rag, which is the amount the rear end settles under the weight of the bike and rider. Follow the manufacturer’s guidelines to set the correct sag. Adjusting the preload or looking for professional assistance might be needed to achieve the desired sag measurement.
>>> READ MORE – Rear Shocks for Harley-Davidson – The Ultimate Guide
Oil for Harley-Davidson Bikes
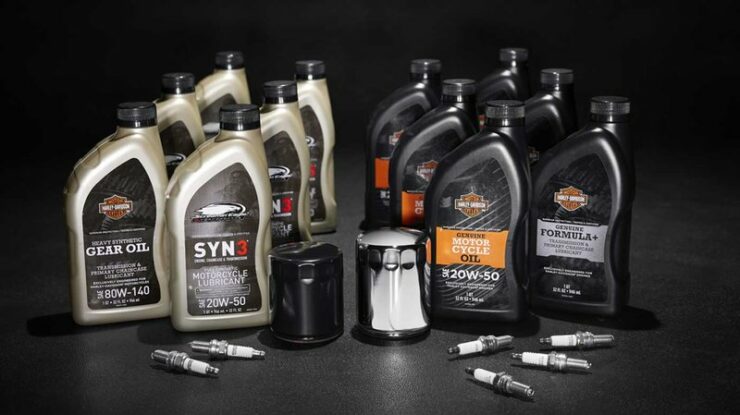
Proper oil maintenance will also be a necessity for optimal performance and longevity of your Harley-Davidson motorcycle’s engine. The oil acts as a lubricant, reducing friction and heat within the engine, ensuring smooth operation, and protecting critical components. To keep your bike running smoothly and efficiently, regular oil maintenance will be important.
Firstly, you should make sure you carry out regular oil changes. Follow the manufacturer’s recommended oil change intervals for your Harley-Davidson motorcycle. Regular oil changes will ensure the oil remains clean and effective in providing lubrication and protection. Consider factors like riding conditions, mileage, and oil type when determining the frequency of oil changes.

Monitor the oil level regularly using the bike’s dipstick or oil level gauge. Maintain the oil level within the recommended range, neither underfilling nor overfilling. Excessive oil can result in foaming whereas insufficient oil can cause inadequate lubrication. Refer to the owner’s manual for instructions on checking and maintaining the correct oil level.
Replace the oil filter during every oil change to ensure there is efficient filtration of contaminations. The oil filter captures impurities that can accumulate in the oil over time, preventing them from circulating through the engine. Follow the manufacturer’s recommendations for the specific filter type and replacement intervals.
If your bike is equipped with an oil cooler, inspect it regularly for debris buildup or damage. Clean the cooler with compressed air or a mild detergent solution to remove dirt and debris that might hinder heat dissipation.
Inspect the engine and oil lines for any signs of oil leaks. Check the gasket and seals regularly to make sure they are intact and not deteriorated. Address any leaks or seal issues promptly to prevent oil loss and potential engine damage.
>>> READ MORE – Oil for Harley-Davidson – A Comprehensive Guide
LED Headlights for Harley-Davidson Bikes
LED headlights have become more and more popular among Harley-Davidson bike owners due to their brightness, energy efficiency, and long lifespan. To ensure optimal visibility and maximize the benefits of LED headlights, proper maintenance will be important. By following a few simple maintenance tips, you will be able to prolong the life of your LED headlights and enjoy safe and clear rides on your Harley-Davidson adventures.
Regularly clean your LED headlight to remove any dirt, dust, and debris that might accumulate on the lens. Use a mild soap or automotive glass cleaner and a soft cloth or sponge to gently wipe the surface. Avoid using harsh chemicals or abrasive materials that might scratch or damage the lens.
Periodically inspect the LED headlights for any signs of physical damage, such as cracks or chips in the lens or housing. Damaged headlights could compromise the performance and durability of the LEDs. If you notice any significant damage, consider replacing the headlight unit or seeking professional assistance.
Properly aligned headlights will ensure optimal visibility without causing glare for oncoming drivers. Check the beam alignment of your LED headlights as per the manufacturer’s instructions. Make necessary adjustments as needed to ensure the beam is focused and correctly aligned.
LED headlights are designed to be weatherproof but it is important to periodically check the seals and gaskets to ensure they are intact and free from damage. Damaged seals can allow moisture or dirt to enter the headlight unit, potentially affecting the performance of the LEDs. Replace any compromised seals promptly.
If you experience persistent issues with your LED headlights, such as uneven brightness, flickering, or water intrusion, consult a professional technician. They can perform a thorough inspection of the headlight system, diagnose any underlying issues, and provide appropriate repairs or replacements.
LED headlights tend to rely on a stable power supply to function optimally. Make sure that the bike’s electrical system is in good condition, with proper voltage and grounding. Regularly check the connections and wiring related to the LED headlights to ensure they are secure and free from corrosion.
>>> READ MORE – LED Headlights for Harley-Davidson
Touring Seat for Harley-Davidson Bikes
The touring seat on your Harley-Davidson motorcycle is designed to provide maximum comfort and support for both the biker and the passenger during long-distance rides. To ensure a pleasurable and enjoyable touring experience, proper maintenance of the touring seat will be important. By taking proper care of the seat’s condition and cleanliness, you’ll be able to enhance comfort and extend its lifespan.
Regularly clean the touring seat to remove dirt, dust, and debris that might accumulate over time. Make use of a mild detergent or specialized upholstery cleaner and a soft cloth or sponge to gently scrub the seat surface. Avoid using any harsh chemicals or abrasive materials that could damage the seat’s upholstery or finish. Rinse thoroughly and allow the seat to dry completely before using it.
Protect the touring seat from harsh weather conditions like excessive sunlight, rain, or extreme temperature. When parking your Harley, consider using a cover or parking it in a shared area to minimize exposure to UV rays and moisture. Using a seat over or protective spray designed for motorcycle seats can also help prevent fading, cracking, and damage caused by the elements.
Inspect the touring seat for signs of wear, tear, or damage. Check the seams, stitching, and upholstery for any fraying, rips, or loose threads. Inspect the seat pan and mounting hardware for stability and integrity. Address any underlying issues promptly, such as replacing damaged upholstery or tightening loose bolts.
Depending on the type of touring seat, it might feature cushioning materials like foam or gel inserts. Over time, these materials might compress or lose their original shape, compromising comfort. If you notice a significant decrease in cushioning or support, consider replacing the inserts or looking for professional help to restore the seat’s original comfort.
If the touring seat’s upholstery shows signs of wear or fading, you could consider reconditioning or reupholstering. Consult a professional upholster or authorized Harley-Davidson dealer for advice and assistance in restoring the seat’s appearance and comfort.
>>> READ MORE – Harley-Davidson Touring Seat
Stage 1 Air Cleaner for Harley-Davidson Bikes
The Stage 1 Air Cleaner is a popular aftermarket upgrade for Harley-Davidson motorcycles, offering improved airflow and enhanced performance. Proper maintenance of the Stage 1 Air Cleaner will be important to ensure optimal filtration, maximum airflow, and overall engine efficiency. By taking proper care of the air cleaner and keeping it clean, you’ll be able to enjoy the full benefits of this upgrade and keep your Harley-Davidson bike running smoothly.
Periodically inspect the Stage 1 Air Cleaner for any signs of dirt, debris, or damage. Check the air filter element, the air cleaner cover, and the mounting hardware. Look for tears, holes, or loose connections that could compromise the air cleaner’s effectiveness. Address any issues promptly to ensure optimal performance.
Follow the manufacturer’s instructions for cleaning the air filter element. Typically, this involves gently tapping the filter to dislodge loose debris and using compressed air to blow away the remaining particles. Be cautious that you don’t damage the filter element during the cleaning process. If the filter is excessively dirty or damaged, consider replacing it with a new one.
Depending on the type and condition of the air filter, it might require periodic replacement. Follow the manufacturer’s recommendations for the specific filter type and replacement intervals. Regularly inspect the filters for signs of excessive wear, damage, or clogging. A clean and well-maintained filter will ensure optimal airflow and engine protection.
Make sure that the air cleaner cover and mounting hardware are properly sealed and tightened. Loose connections or gaps can allow unfiltered air to bypass the air cleaner, compromising its effectiveness. Check the gaskets or seals and replace them if needed to maintain a secure and airtight fit.
If you aren’t sure about performing maintenance on your Stage 1 Air Cleaner or if you encounter any significant issues, seek assistance from a professional technician or an authorized Harley-Davidson dealer. They have the expertise and specialized tools required for performing thorough inspections, cleaning, and necessary repairs or replacements.
>>> READ MORE – Stage 1 Air Cleaner For Harley-Davidson
Stage 2 Air Cleaner for Harley-Davidson Bikes
The Stage 2 Air Cleaner is a high-performance aftermarket upgrade for Harley-Davidson motorcycles designed for delivering increased airflow and enhanced engine performance. To ensure optimal filtration, maximum power gains, and overall engine efficiency, proper maintenance of the Stage 2 Air Cleaner will be important. By keeping the air cleaner clean, well-maintained, and operating at its peak, you will be able to unleash the full potential of your Harley-Davidson bike’s performance.
Periodically inspect the Stage 2 Air Cleaner for any signs of dirt, debris, or damage. Check the filter element, the air cleaner housing, and the mounting hardware from time to time. Look for any holes, tears, or loose connections that could compromise the air cleaner’s effectiveness. Address any issues promptly to maintain optimal performance.
Follow the manufacturer’s instructions for cleaning the air filter element. Typically, this will involve removing the air filter from the housing and cleaning it with compressed air or a specialized air filter cleaner. Take care that you do not end up damaging the filter during the cleaning process. If the filter is excessively dirty or damaged, consider replacing it with a new one.
Depending on the type and condition of the air filter, it might require periodic replacement. Follow the manufacturer’s recommendations for the specific filter type and replacement intervals. Regularly inspect the filters for any signs of wear, damage, or clogging. A clean and well-maintained filter will ensure optimal airflow and engine protection.
Make sure that the air cleaner housing, cover, and mounting hardware are properly sealed and tightened. Loose connections or gaps can allow unfiltered air to bypass the air cleaner, compromising its effectiveness. Check the gaskets or seals and replace them if needed to maintain a secure and airtight fit.
If you aren’t certain about performing maintenance on your Stage 2 Air Cleaner or if you encounter any significant issues, seek assistance from a professional technician or an authorized Harley-Davidson dealer. They have the experience, expertise, and specialized tools to perform thorough inspections, cleanings, and necessary repairs or replacements.
>>> READ MORE – Stage 2 Air Cleaner For Harley-Davidson

Tires for Harley-Davidson Bikes
The tires on your Harley-Davidson motorcycle play a key role in ensuring safety, performance, and overall riding experience. Proper tire maintenance will be important for optimal grip, handling, and longevity. By taking care of your motorcycle’s tires, you’ll be able to ride with confidence and enjoy the exhilaration of the open road.
To take care of the tires of your Harley-Davidson bike, you must conduct visual inspections of the tires before every ride. Check for signs of wear, cuts, bulges, or embedded objects. Inspect the tread depth using a treat depth gauge or the built-in wear indicators. If you notice any abnormalities, you should look for professional assistance or replace the tire if needed.
Maintain the correct tire pressure as recommended by the motorcycle manufacturer. Underinflated or overinflated tires can affect handling, traction, and fuel efficiency. Use a reliable tire pressure gauge to check the pressure when the tires are cool. Inflate or deflate as needed, ensuring equal pressure on both tires.
Monitor the tread depth regularly to ensure adequate traction. Most tires have built-in wear indicators and small raised bars within the grooves. If the tread depth reaches or falls below these indicators, it’ll be time to replace the tire. Alternatively, use a treat depth gauge to measure the depth accurately.
To ensure even wear and maximize tire life, consider rotating the tires at regular intervals. The front and rear tires wear differently due to varying loads and braking forces. Consult your bike’s owner’s manual or seek professional advice for the recommended rotation pattern and frequency.
If you’re experiencing vibrations or irregular tire wear, it might be necessary to balance the tires or have the wheel alignment checked. Proper balance and alignment contribute to smoother rides, improved handling, and extended tire life. Consult a professional technician or authorized Harley-Davidson dealer for these services.
Keep the tires clean by regularly washing them with mild soap and water. Avoid harsh chemicals that can deteriorate the rubber. Apply tire protection to maintain flexibility and prevent cracking caused by UV rays. Avoid parking your bike on surfaces that can damage the tires, such as sharp objects or prolonged exposure to heat.
>>> READ MORE – Tires For Harley-Davidson Touring
Equipped with knowledge about Harley-Davidson parts and maintenance? It’s time to ensure your ride stays in prime condition. Before you get your hands dirty, don’t forget to check out our Homepage for more valuable resources, tips, and content that’ll keep your Harley roaring down the road. Let’s keep the heart of your bike strong!

