If you’re looking to upgrade your Harley-Davidson with a performance enhancing Stage 2 air cleaner, then you’ve come to the right place! Installing a Stage 2 air cleaner on your Harley-Davidson is a relatively straightforward process, and in this article we’ll be taking you through the steps of how to do it. We’ll also be examining the advantages of having a Stage 2 air cleaner installed and provide some tips on how to get the most out of your new setup.
To install a Stage 2 air cleaner, remove the stock air cleaner, mount the new backing plate, attach the Stage 2 air filter, and secure the cover. Recalibration or tuning may be needed for optimal performance.
So, let’s get started and get you that sweet performance upgrade you’ve been dreaming of!
Overview of Stage 2 Air Cleaners
For over a hundred years, Harley-Davidson bikes have been associated with the power, style, and iconic rumble of their engines. To further enhance the performance of these bikes, many Harley-Davidson riders turn to aftermarket upgrade. One of these upgrades is the Stage 2 Air Cleaner.
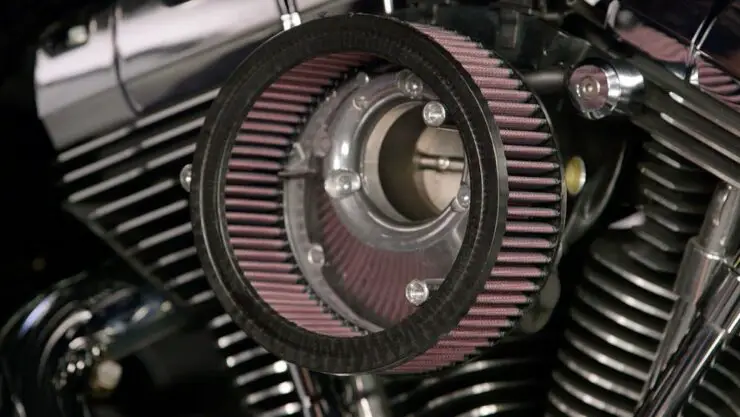
A Stage 2 Air Cleaner or a high-flow air cleaner is an aftermarket component designed to replace the stock air cleaner assembly on a Harley-Davidson bike. This upgrade is part of a multi-stage process aimed at improving the bike’s air intake and exhaust systems to maximize engine performance. Stage 2 Air Cleaners focus largely on enhancing the air intake side of the equation.
Here are some of the primary advantages of installing a Stage 2 Air Cleaner on a Harley-Davidson bike –
#1. An increase in torque and horsepower
One of the primary benefits of a Stage 2 Air Cleaner is the significant increase in torque and horsepower. Stock air cleaners on Harley-Davidson motorcycles are designed to meet emissions and noise regulations, often restricting the engine’s ability to breathe freely.
Stage 2 Air Cleaners, with their high-flow design, allow for a greater volume of clean air to enter the engine. This results in improved combustion, translating to more power and torque. Riders can feel a substantial boost in acceleration and overall performance, especially when overtaking or climbing steep inclines.
#2. Enhanced sound
Most Harley-Davidson riders love the distinctive rumble of their motorcycles. Installing a Stage 2 Air Cleaner can enhance this signature sound. The increased airflow and improved combustion can provide a deeper and more resonant exhaust note. Many riders find this enhancement in sound to be a desirable and rewarding aspect of the upgrade, further enhancing the auditory experience of their Harley-Davidson bikes.
#3. Noticeable increase in throttle response
A Stage 2 Air Cleaner enhances throttle response, making your Harley-Davidson bike more responsive to your inputs. When you twist the throttle, the engine reacts more promptly, delivering immediate power. This improved response is especially noticeable at low RPMs and during quick acceleration, which will give you better control over your bike and make city riding more agile.
#4. Burn fuel more efficiently
Surprisingly, a Stage 2 Air Cleaner can also provide improved fuel efficiency. When the engine receives a more optimal air-fuel mixture, it can burn fuel much more efficiently. This could result in better gas mileage, making your rides more economical in the long run.
#5. Part of other performance upgrade packages
A Stage 2 Air Cleaner is often a part of a broader performance upgrade package. When combined with a high-flow exhaust system and other components, it can result in significant benefits. These upgrades work together and create a well-balanced and optimized performance package for your Harley-Davidson bike.
#6. Personalize and customize your bike
Beyond performance benefits, Stage 2 Air Cleaners offer several customization options. Aftermarket air cleaner overs and designs come in different styles and finishes, allowing riders to express their individuality and match the bike’s aesthetics to their preferences. Whether you prefer a classic look or something unique, there are options to suit everyone’s taste.

Tools and equipment needed for installing a Stage 2 Air Cleaner
Upgrading your Harley-Davidson bike with a Stage 2 Air Cleaner is an exciting step toward improving its performance and unleashing its full potential. While the installation process is manageable, having the right set of tools on hand will be important for ensuring a smooth and successful upgrade. Here are the tools and equipment you’ll need to gather before you can start the installation process.
#1. Screwdrivers
A set of quality screwdrivers is important for removing and securing various components during the installation process. Phillips and flat-head screwdrivers in different sizes will help you handle screws, clamps, and fasteners.
#2. Pliers
Pliers are versatile tools that can be used for gripping, bending, and holding parts in place. Needle-nose pliers are especially handy for reaching tight spots and securing hose clamps.
#3. Allen wrenches/hex keys
Harley-Davidson bikes typically use Allen or hex head screws and bolts. Having a set of Allen wrenches or hex keys in different sizes will ensure that you can easily loosen or tighten these fasteners.
#4. Socket set
A socket set is quite valuable when it comes to handling nuts and bolts with precision. Make sure that you have a wide range of socket sizes to accommodate various components on your motorcycle.
#5. Torque wrench
A torque wrench is important for ensuring that fasteners are tightened to the manufacturer’s specified torque settings. Proper torque will ensure that components are secure without risking damage from over-tightening.
#6. Soft-bristle brush or cleaning brush
Before installing a Stage 2 Air Cleaner, it is a great practice to clean the surrounding area to prevent any debris from entering the engine. A soft-bristle brush designed for air cleaner housing can help you remove dirt and dust effectively.
#7. Compressed air or air compressor
Compressed air or an air compressor is important for blowing away any remaining dust from the air cleaner housing and other components. It’ll help ensure a clean environment from the new air cleaner.
#8. Safety gear
You must prioritize your safety when working on your Harley-Davidson bike. Safety glasses and gloves will help protect your eyes and hands from dirt, debris, and any potential hazards.
#9. Replacement components
Depending on the specifics of your Stage 2 Air Cleaner kit and your bike, you may require replacement components like gaskets, O-rings, or hose clamps. Make sure that you have these parts ready if they aren’t included in the kit.

Preparation before installing Stage 2 Air Cleaners on Harley-Davidson bikes
Once you have arranged the tools and equipment needed for the installation of the new Stage 2 Air Cleaner, your work isn’t done. There are certain preparatory steps you will need to carry out before you are in a position to install the new air cleaner. Carrying out these steps will help you carry out the process smoothly and efficiently, ensuring you get a straightforward installation. Here are the preparatory steps you need to carry out to make sure you can easily install Stage 2 Air Cleaners on your Harley-Davidson bike.
#1. Consult the owner’s manual
Different Harley-Davidson bike models can have slight variations in the installation process for Stage 2 Air Cleaners. For ensuring you are following the correct procedure for your specific motorcycle, you must consult your bike’s manual. It will provide you with step-by-step instructions, torque specifications, and other essential information.
#2. Choose the right Stage 2 Air Cleaner kit
Harley-Davidson offers a wide range of Stage 2 Air Cleaner kits designed to fit different models and styles. You should make sure that you’re selecting the correct kit that matches your bike’s year and model. Each kit might include specific components like a high-flow filter element, air cleaner cover, and necessary hardware. Verify that the kit contains all the required parts before starting the installation process.
#3. Create a clean and organized workspace
An organized workspace is important for a successful installation. Choose a clean and well-lit area to work on your Harley-Davidson bike. Lay down a clean mat or absorbent material to catch any spills or debris. Keep the tools and supplies organized and easily accessible to avoid any confusion during the process.
#4. Disconnect the battery
To ensure safety during the installation, you should disconnect the motorcycle’s battery. This step will prevent any electrical accidents while working on the bike. Follow the manufacturer’s recommendations in your manual for proper battery disconnection procedures.
#5. Examine the existing air cleaner
Before removing the present air cleaner, take a moment to inspect it. Note how it is positioned and attached to the motorcycle. This examination will help you understand the removal process and offer a reference when installing the Stage 2 Air Cleaner.
#6. Map out the installation steps
Review the installation instructions provided with the Stage 2 Air Cleaner kit. Familiarize yourself with the steps and order of assembly. Planning the installation in advance will help you work methodically and avoid any mistakes.
How to remove the current air cleaner on your Harley-Davidson bike
Installing a new Stage 2 Air Cleaner on your Harley-Davidson bike can greatly boost performance and throttle response on your bike. However, there might come a time when you need to install a new Stage 2 Air Cleaner or replace the current one. It could either be due to maintenance, replacement, or upgrading from stock components. Before you can do that, you will first have to remove the air cleaner currently installed on your Harley-Davidson bike. Here are the steps you need to follow for removing a Stage 2 Air Cleaner on your Harley-Davidson bike.
Step 1: Identify and locate the air cleaner
The Stage 2 Air Cleaner on your Harley-Davidson bike is typically located near the engine. You must familiarize yourself with its position and how it is attached to the bike. Knowing where it is located will make the removal process more efficient.
Step 2: Loosen and remove fasteners
Use the appropriate tools for loosening and removing any clamps, bolts, or fasteners securing the Stage 2 Air Cleaner components. Depending on the design of the air cleaner kit, you might have to remove the air cleaner cover, housing, or any other associated components.
Step 3: Remove the air cleaner carefully
Once the fasteners have been removed, you should carefully lift off the Stage 2 Air Cleaner components from your bike. Pay close attention to the orientation and positioning of the parts as you remove them. Handle them gently to avoid doing any damage.
Step 4: Inspect and clean the surrounding area
Once you have removed the Stage 2 Air Cleaner, you should take a moment or two to inspect the surrounding area for any dirt, debris, or residue. Clean the area using a soft-bristle brush or a cleaning brush to ensure that no contaminants enter the engine when reinstalling different components.
Step 5: Store or replace components
If you are planning on reinstalling the Stage 2 Air Cleaner in the future, you should store its components in a clean and dry place. If you are replacing it with stock air cleaner components, make sure that you have the necessary parts ready for installation.
How do I install a Stage 2 Air Cleaner on a Harley-Davidson bike?
The roar of a Harley-Davidson bike’s engine is music to the ears of motorcycle enthusiasts. Whether you are looking to upgrade from stock or Stage 1 air cleaners or replace a Stage 2 air cleaner, you will need to know how do I install a Stage 2 Air Cleaner on a Harley-Davidson bike. After gathering tools, carrying out the necessary preparation, and removing the current air cleaner, it’ll be time to install a Stage 2 Air Cleaner. Once you know the right steps you need to follow, you’ll be able to carry out the installation smoothly and safely. Here are the steps you need to follow for installing a Stage 2 Air Cleaner on a Harley-Davidson bike.
Step 1: Connect the hose and tubes
Start by locating the hoses and tubes that are connected to the air cleaner housing. These hoses are important for proper airflow and emissions control. Carefully remove the hoses from the old air cleaner housing, taking note of their positions and connections. Make sure that you’re doing this gently to avoid damaging them.
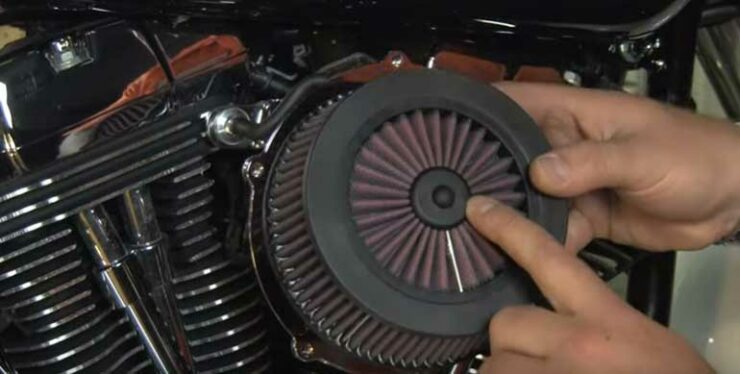
Connect the hoses and tubes to the corresponding ports on the new Stage 2 Air Cleaner housing. Match the connections appropriately depending on the way you removed them. Secure the connections using the appropriate clamps or fasteners for ensuring an airtight seal. Double-check that the connections are tight and properly seated.
Step 2: Seal the air cleaner
Make sure that the air cleaner housing gasket or seal is in prime condition. If it is worn out or damaged, you should replace it with a new one to prevent any air leaks. Carefully position the gasket or seal onto the air cleaner housing, aligning it with the mounting surface. With the gasket or seal in place, you must gently lower the air cleaner cover onto the housing. Make sure that it aligns correctly with the gasket or seal.
Step 3: Secure the new air cleaner
Depending on your Harley-Davidson bike’s model and the Stage 2 Air Cleaner kit, there might be specific brackets or mounting hardware to secure the air cleaner in place. Install the brackets or hardware as per the manufacturer’s instructions. Tighten any bolts or fasteners to the specified torque settings to secure the air cleaner firmly.
Step 4: Run your Harley-Davidson bike with the new cleaner
Reconnect the motorcycle battery that you would have disconnected earlier. Start your Harley-Davidson bike and let it run for a few minutes. This will allow you to ensure that the new Stage 2 Air Cleaner is functioning correctly and that there are no air leaks or unusual sounds.
Listen for any unusual engine noises or hissing sounds, which might indicate air leaks. Inspect the air cleaner housing and connections closely for any visible signs of leaks. If you detect any issues, you should stop the engine and make the needed adjustments to address them. Tighten any loose connections or fasteners and ensure that the air cleaner cover is seated properly.
Once you are satisfied that everything is functioning correctly, take your newly upgraded Harley-Davidson bike for a test ride. Enjoy the improved performance and enhanced horsepower that comes with your Stage 2 Air Cleaner.
Troubleshoot common issues with Stage 2 Air Cleaners for Harley-Davidson bikes
Upgrading to a Stage 2 Air Cleaner is a popular modification for Harley-Davidson motorcycles. It offers a long list of exciting benefits that riders will definitely welcome. However, like any other aftermarket upgrade, there might be occasional issues with this upgrade. You will need to know what are those issues and how to resolve them. Here are some common problems associated with Stage 2 Air Cleaners and how you can address and troubleshoot them effectively.

Air leaks
Air leaks can occur if there is a gap or improper seal between the air cleaner components, allowing unfiltered air to enter the engine.
To troubleshoot this issue, you need to check the gasket or seal between the air cleaner cover and housing. Make sure that it is properly seated and in prime condition. If needed, you should replace it. Verify that the hoses and tubes are securely connected to the air cleaner housing and that any fasteners or clamps are tightened properly. Inspect the air cleaner housing for visible gaps or loose components. Tighten any brackets, bolts, or fasteners.
Reduced performance
If you’re noticing a decrease in performance after installing a Stage 2 Air Cleaner, it might be indicative of an improper installation or other underlying issues.
To troubleshoot this issue, you need to double-check all connections, hoses, and tubes, ensuring they are properly secured and free from obstructions. Make sure that the air cleaner cover is correctly seated and that the gasket or seal is in proper condition.
Review the installation steps for confirming that you followed the manufacturer’s instructions accurately. Check for loose or disconnected components that might affect airflow.
Engine warning lights
If your Harley-Davidson bike’s engine warning light illuminates after installing a Stage 2 Air Cleaner, it can indicate a sensor issue or improper installation.
To resolve this issue, you should use an OBD-II scanner to read the error codes and identify the specific issue. Make sure that all electrical connections, especially those related to sensors, are securely plugged in and free from damage.
Re-check the installation steps for confirming that no components were inadvertently disconnected or misaligned.
Excessive noise or whistling
Unusual noises like whistling or excessive airflow sounds might occur if there is an air leak or improper seal.
For troubleshooting this issue, you need to inspect the air cleaner cover and housing for signs of gaps or misalignment. Adjust as needed to create a proper seal. Verify that all tubes and hoses are securely connected and that any clamps or fasteners are tightened adequately.
Filter contamination
If you’re noticing dirt or debris on the clean side of the air filter, it might be an indication of improper sealing or poor filtration.
You need to check the air cleaner cover and housing for signs of gaps or improper sealing. Address any issues for ensuring a tight seal. Confirm that the filter element is installed properly and seated within the housing. Replace if it is damaged or excessively dirty.
FAQs
What is a stage 2 air cleaner and why do I need it?
A stage 2 air cleaner is an upgrade for a Harley-Davidson that improves air flow and increases engine power and performance. It is designed to replace the stock air cleaner and uses a conical air filter element to allow for more efficient air flow. Installing a stage 2 air cleaner can help improve the overall performance of the engine.
What are the benefits of installing a stage 2 air cleaner on my Harley-Davidson?
The benefits of installing a stage 2 air cleaner on a Harley-Davidson include increased air flow, improved performance, and improved fuel economy. The increased air flow can help the engine run more smoothly and efficiently, resulting in better performance and improved fuel economy.
What tools do I need to install a stage 2 air cleaner?
To install a stage 2 air cleaner on a Harley-Davidson, you will need a few basic tools, including a flat head screwdriver, a ratchet and socket set, and pliers. You may also need a set of Allen wrenches depending on the type of air cleaner you are installing. Additionally, it is important to follow the instructions provided by the manufacturer for a successful installation.
>>> Read more about Stage 2 Air Cleaner for Harley-Davidson <<<

