Welcome Harley-Davidson riders! If you are looking for a straightforward guide on how to remove your Harley-Davidson Touring seat, you have come to the right place.
Remove your Harley touring seat by unscrewing the mounting bolts at the rear and under the seat, then lift it gently to detach from the bike frame.
In this article, we will take you through the steps of dismounting your seat in a few simple steps. So, if you are ready to take on this task, buckle up and let’s get started!
Preparation before you can replace your Harley-Davidson Touring Seat
The experience of driving a Harley-Davidson bike is synonymous with the idea of freedom and open roads. Upgrading or replacing the touring seat is a step toward enhancing both style and comfort. Before you can start removing your Harley-Davidson Touring Seat, it will be time to carry out the Harley-Davidson Touring Seat removal. Proper preparation will allow you to ensure you get a smooth and successful seat removal process. You should gather the necessary tools and materials for the job. Here are the steps you need to follow for preparing yourself and your bike for the removal process –
>>> Click here to read our review of the Best Harley-Davidson Touring Seat <<<
Step 1: Gather the necessary tools and materials
Here are the tools and materials you will have to arrange –
- A socket set – A socket set with different socket sizes will be an important toolset for removing seat bolts and hardware, making sure that you have both standard and metrics sizes for matching the bolts on your motorcycle
- Allen wrench set – An Allen wrench set is important for removing bolts with hexagonal heads, so make sure that you have a range of sizes for accommodating different types of bolts
- A torque wrench – A torque wrench is an indispensable tool for reassembling your touring seat later as this tool will allow you to tighten bolts to the manufacturer’s recommended torque specifications, preventing damage and overtightening.
- Pliers – Pliers come in handy for griping and maneuvering certain components during the seat removal process
- Screwdrivers – Both Flathead and Flathead screwdrivers might be needed for loosening or removing screws or fasteners on your bike
- Ratchet straps – Ratchet straps are important for stabilizing your motorcycle during the seat removal process, preventing unwanted movement of the bike
- Protective covering – A protective covering or soft cloth will prevent accidental scratches or damage to the bike’s surface while you work
- Safety gear – Wearing safety gear such as eye protection and safety gloves is important for your well-being while working with tools and components
- Workbench – Having a stable and well-lit workbench or a suitable surface for placing your tools and parts can make the removal process more efficient and organized
Step 2: Familiarize yourself with your bike
You must familiarize yourself with your bike. You need to locate the attachment points, electrical connections, and retaining mechanisms.
Identify the attachment points where the seat is secured to the motorcycle’s frame. These points might vary depending on your specific Harley-Davidson model. If your touring seat has any electrical components, familiarize yourself with the wiring connections and how they’re integrated into the seat. Understand how the stock seat is attached, whether it is through bolts and nuts, or other mechanisms.
Step 3: Obtain the necessary replacement parts
You must also obtain the necessary replacement parts so that you can replace them with compatible components. You need to choose your new seat and accessories while also checking for compatibility.
You need to research and select a replacement seat that matches your comfort preferences, and style, and fits your specific Harley-Davidson model and year. If your new seat demands any additional accessories or mounting brackets, make sure that you have them ready before you start the removal process. Verify that the replacement seat is compatible with your Harley-Davidson Touring motorcycle’s design and any other customizations you have made.

Step 4: Clear your workspace
You should also choose a suitable area for working. You need to select a well-lit and spacious area where you can comfortably work on your motorcycle.
Protect vulnerable areas of your bike. Lay down a protective covering on your motorcycle’s fenders, tanks, and other areas that could get scratched or damaged during the seat removal process.
How do I remove my Harley-Davidson Touring Seat?
In the realm of personalization and adding comfort, upgrading your Harley-Davidson Touring seat is an important step. Whether you are seeking more comfort or changing for aesthetics or both, the process of removing the existing seat will require careful execution. This is the part where many beginners wonder how do I remove my Harley-Davidson Touring Seat.
The process is easier than you may think as long as you know the right steps. If you don’t, then you shouldn’t worry. Here are the steps you need to follow for removing your Harley-Davidson Touring Seat. By following these steps, you will be able to ensure a smooth and seamless seat removal process, opening the door to a much more personalized and comfortable riding experience.
Step 1: Disconnect the battery
Before you start the removal process, you need to prioritize safety by disconnecting the battery. This will eliminate the risk of electrical mishaps while working on the seat. Locate the battery by identifying the battery compartment. This will usually be located underneath the seat or within close proximity.
Then, disconnect the battery. Start by loosening the negative (-) terminal connection. After that, disconnect the positive (+) terminal. This will minimize the chances of electrical contact and ensure a safe work environment.
Step 2: Locate and remove the seat bolts
Now, you need to locate and remove the seat bolts. To do that, you should identify seat bolts. For that, you should use the right tools and gently loosen the nuts and bolts.
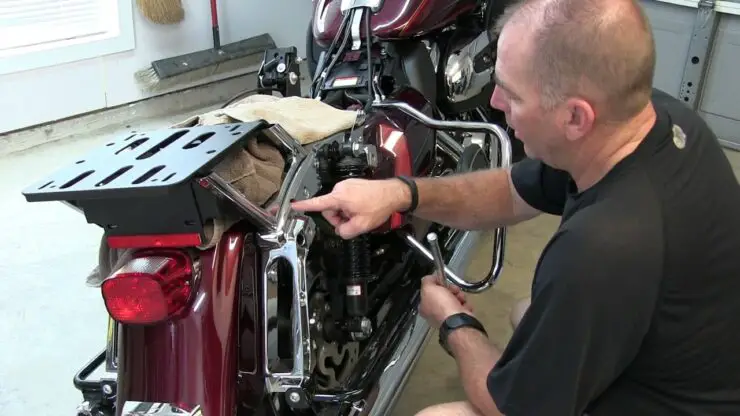
Locate the bolts that secure the seat to the bike’s frame. These bolts are typically found near the rear of the seat, where the seat meets the fender. Make use of the appropriate tools, such as a socket wrench or Allen wrench, for removing the seat bolts. Keep them in a safe place for reinstallation.
You should carefully loosen the bolts, making sure that you don’t end up damaging or stripping the threads. You might have to give them a little coaxing, especially if they haven’t been removed in a while.
Step 3: Disconnect other electrical connections
If your seat is equipped with electrical components, you should identify any additional connections that have to be disconnected. Gently disconnect the electrical connections, ensuring that you do not pull on the wires excessively. Take note of their placement and orientation for reassembly later on.
Step 4: Remote the seat
Now comes the time to remove the seat. To do that, you need to slide the seat backward, lift it, and remove it.
Once you have disconnected the electrical connections, you should gently slide the seat backward. This action should disengage the seat from any remaining attachment points. With the seat disengaged, you should carefully lift it off the bike’s frame. Now, you may store the seat in a safe and clean area for preventing any damage.
Cleaning and replacing the seat after the removal
Properly cleaning and replacing the seat will ensure that you are embarking on your journey in comfort and style. But to do that, you will need to know the right steps to properly clean and replace the seat after removal. Here are the steps you will need to follow for cleaning and replacing the touring seat after removal. By following these steps, you will be able to execute a seamless transition from the old to the new, ready to ride with renewed comfort and individuality.
Step 1: Clean the seat and hardware
You need to start by brushing off any loose debris or dust from both the seat and the bike’s frame using a soft-bristle brush.
Then, you should dampen a clean cloth with a mixture of mild soap and water. Gently wipe down the seat’s surface, paying attention to any stains or grime.
If the hardware and attachment points are dirty or rusted, you should use the soap solution for cleaning them too. This will ensure a clean and smooth surface for reinstallation.

Step 2: Install the new seat
To install the new seat, you need to align the seat and engage it securely. Position the new seat over the attachment points on the motorcycle’s frame, ensuring that the mounting holes align with the corresponding holes on the frame. Then, you should gently slide the seat forward onto the attachment points, engaging them securely.
Step 3: Reconnect electrical connections
If your new touring seat features electrical components, you should carefully reconnect the corresponding electrical connections. Follow the manufacturer’s instructions to ensure proper connections.
Then, you need to double-check that all electrical connections are secure and properly seated for preventing any issues while riding.
Step 4: Replace seat bolts and tighten
Insert the seat bolts through the mounting holes on the seat and into the frame’s attachment points. You should make sure that they are correctly aligned. Make use of the appropriate tools to gently tighten the seat bolts. You should ensure that they are snug but not overtightened as it can damage the threads or components.
Refer to your Harley-Davidson motorcycle’s manual for recommended torque specifications for the seat bolts. With the help of a torque wrench, tighten the bolts to the specified torque to ensure a secure fit.
Final checks and finishing up
Once you have removed the touring seat in your Harley-Davidson bike and replaced or upgraded the seat, the work isn’t done yet. Before you can fully embark on your journey with the newly installed seat, there are a few final steps for ensuring a safe and comfortable ride. Here are the final steps you need to take once you have installed the touring seat on your Harley-Davidson bike. Once you follow these steps, you will be able to wrap up the installation of the touring seat with confidence, ready to hit the road in style and comfort.
Step 1: Reconnect the battery
Before you proceed with the final checks, you need to double-check that you have completed all the previous steps and properly cleaned and secured the seat. You should start by connecting the positive (+) terminal followed by the negative (-) terminal. Make sure that there is a secure connection without overtightening.
Then, you should turn on the ignition and test any electrical components on the seat, such as lighting, heaters, or any other integrated features. You should make sure that they are functioning properly.
Step 2: Test the seat functionality
Sit on your bike and adjust the seat’s position for finding the most comfortable riding position. Sit on your bike and adjust the seat’s position for finding the most comfortable riding posture. Make sure that you can reach the handlebars and controls comfortably.
You should gently rock the seat back for forth for ensuring it is securely attached and does not wobble. A properly installed seat needs to be stable and immovable.
Step 3: Ensure that the seat is securely attached
You need to carefully examine the attachment points where the seat is secured to the motorcycle’s frame. Verify that the seat bolts are tight and aligned properly. Moreover, you should make sure that there are no loose parts or hardware that could potentially detach when riding.
Step 4: Put the bike back together
You should gather any parts you had previously removed during the removal and installation process. If you had to disassemble any components for accessing the seat, such as side panels or trim, you should carefully reattach them as per your bike’s manual. Take a moment or two to visually inspect your motorcycle and the seating area for ensuring that everything is in its rightful place and looks tidy.
Tips on care and maintenance of Harley-Davidson Touring Seat
The touring seat of your Harley-Davidson motorcycle plays a vital role in your riding experience, offering comfort and support during long journeys. To ensure your seat remains in optimal condition and continues providing the comfort you desire, it will be important to implement a routine care and maintenance regimen. Here are some valuable tips on how to care for and maintain the touring seat on your Harley-Davidson motorcycle, ensuring that it stays comfortable and stylish ride after ride.
Regular cleaning
You must have a routine of regular cleaning. Start by gently brushing off any surface dust or debris using a lint-free cloth or a soft-bristle cloth. This will prevent the particles from scratching the seat’s surface when you are cleaning your bike.
Create a mixture of mild soap and lukewarm water. Dampen a soft, clean cloth with this mixture and then gently wipe down the touring seat. Avoid using any harsh detergents or chemicals that could damage the seat’s material.
Once you have cleaned the seat, make use of a separate damp cloth for wiping away any soapy residue. After that, pat the seat dry with a clean, dry cloth. Avoid excessive moisture that could seep into the cushioning.
Protecting against elements
There are many ways you can protect the seat against external elements. You can do this either by using a seat over, parking in the shade, and more.
Invest in a high-quality seat cover for protecting the touring seat from exposure to harsh weather conditions, UV rays, and potential damage. A well-fitting cover can greatly extend the life of your touring seat.
Whenever possible, you should park the bike in a shaded area for minimizing direct exposure to the sun’s rays. Prolonged exposure to sunlight can cause fading and deterioration of the seat’s material.
Prevent wear and tear
When you’re sitting on the seat, you should distribute your weight evenly for avoiding putting excessive strain on specific areas. This can help prevent uneven wear over time. Be cautious when transporting items on your bike. Sharp objects or tools could potentially puncture or damage the seat’s material.
Treat leather seats
If your touring seat is made using leather, you should consider using a high-quality leather conditioner to keep the material supple and prevent it from drying out or cracking. Leather is quite sensitive to sunlight. You need to park your Harley-Davidson motorcycle in the shade or use a seat cover for shielding it from UV rays.
Periodic inspection
You need to regularly inspect the seat for any signs of wear, tear, or loose stitching. Addressing minor issues early can prevent them from worsening over time. If your seat is attached with nuts and bolts, you should periodically check their tightness to ensure that the seat remains securely in place.

Different types of Harley-Davidson Touring Seats
Harley-Davidson is a brand that is synonymous with the thrill of the open road. However, long rides demand more than style and power, they also require comfort. Touring seats play a key role in ensuring an enjoyable journey, providing riders with support and cushioning during extended rides. Here are the different types of Harley-Davidson Touring Seats, each tailored to cater to specific comfort preferences and riding styles. Whether you are a lone rider, a passenger aficionado, or looking for added features, there is a seat designed to match your individual needs.
Solo touring seats
Solo touring seats are designed for bikers who prefer to hit the road solo. These seats typically offer a sleek, minimalist appearance and prioritize comfort for the biker. They provide an uncluttered look and a more intimate connection with the bike. Solo seats are ideal for those who appreciate the classic aesthetic and seek an uncompromised riding experience.
Two-up touring seats
For bikers who often share their journey with a passenger, two-up touring seats are often the go-to choice. These seats are designed for accommodating both the rider and the passenger comfortably. They offer additional cushioning and space, ensuring that both individuals enjoy a comfortable and enjoyable ride. Some models also come equipped with adjustable backrests for added passenger support.
Heated touring seats
Heated touring seats are a true blessing for bikers who have to drive in cold weather. Equipped with integrated heating elements, these seats offer warmth during chilly rides, extending your riding season into colder months. Heated seats are ideal for bikers who refuse to let the weather dictate when they can hit the road.
Air-adjustable touring seats
Air-adjustable seats offer a dynamic comfort solution. These touring seats feature an adjustable air bladder that allows bikers to customize the level of firmness and support to suit their preferences. This flexibility makes them a highly versatile option for bikers who frequently embark on varying distances and terrain types.
Custom touring seats
Custom touring seats offer the ultimate in terms of personalization. These touring seats will give you the power to choose materials, designs, and features that align with your unique style and comfort needs. From selecting the upholstery and stitching patterns to adding integrated gel padding, custom seats are tailored to your comfort.
FAQs
What tools are needed to remove a Harley-Davidson Touring seat?
In order to remove a Harley-Davidson Touring seat, you will need a few basic tools, including a ratchet, a socket set, and a flathead screwdriver. You may also need an Allen wrench depending on the model of your motorcycle.
Are there any safety precautions I should take when removing the seat?
Yes, it is important to take safety precautions when removing the seat from your Harley-Davidson Touring. Always make sure the motorcycle is secure and the engine is off and cooled before attempting to remove the seat. Wear protective gloves and goggles to protect your hands and eyes, and be sure to follow the instructions in the owner’s manual for the correct removal procedure.
What should I do if I cannot remove my Harley-Davidson Touring seat?
If you are unable to remove your Harley-Davidson Touring seat, it is best to take the motorcycle to a professional. A certified technician can identify any issues and safely remove the seat for you.
>>> Read more about Harley-Davidson Touring Seats <<<

