Installing a battery on a Harley-Davidson is an easy task that just about any rider can take on with the right skills and tools. If you’ve recently bought a Harley-Davidson or are looking to replace the battery on your existing one, this article will guide you through the entire process. We’ll provide clear step-by-step instructions so that you can get the job done safely and quickly. So, if you’re ready to learn how to install a battery on a Harley-Davidson, keep reading and get ready to hit the road in no time.
To install a Harley-Davidson battery, locate the battery compartment, disconnect the old battery, position the new one, and connect the positive cable first, then the negative. Secure the battery and ensure connections are tight.
Preparation before installing a new Harley-Davidson battery
Installing a new battery in your Harley-Davidson bike is a simple task but it still requires some level of preparation and adherence to safety precautions. Proper preparation will ensure a smooth installation process and optimal performance of your bike’s electrical system. Moreover, following safety precautions will minimize the risk of accidents or damage during the installation. Here are the necessary preparatory steps you’ll need to carry out before you can install a new battery on your Harley-Davidson bike.
>>> Click here to read our review of the Best Battery For Harley-Davidson <<<
#1. Read the owner’s manual
Before you start any work on your bike’s electrical system, it’ll be important to consult the owner’s manual specific to your bike’s model. The owner’s manual will provide manufacturer-recommended instructions and guidelines for battery installation, ensuring that you’re following the correct procedure. You will have to familiarize yourself with the specific battery specifications, installation steps, and safety precautions outlined in the manual.
#2. Gather the needed tools and equipment
For carrying out a smooth battery installation process, gather the necessary tools and equipment beforehand. Some of the common tools you’ll need to arrange include –
- An appropriate-sized wrench or socket set
- A terminal cleaner or wire brush
- Dielectric grease
- Safety goggles
- Safety gloves
- Battery hold-down bracket or straps
- Battery terminal protectors (optional)
Having the right tools readily available will save you a lot of time and ensure that you have everything needed to complete the installation.
#3. Adhere to the safety precautions
Safety must always be a priority during battery installation. Here are some of the precautions that you need to consider –
- Make sure that you’re wearing safety goggles and gloves to protect your eyes and hands from any electrical hazards or acid hazard
- Always work in a well-ventilated area to avoid exposure to any battery fumes
- Avoid smoking or open flames near the battery to prevent the risk of explosions
- Keep jewelry or metal tools away from the battery terminals to prevent accidental short circuits
Taking these safety precautions will help create a secure environment during the battery installation process.
#4. Disconnect the power source
Before you handle any electrical components, it is important to disconnect the power source to prevent accidental short circuits or electrical shocks. For that, you’ll need to turn off the ignition switch and then remove the key from the motorcycle.
If your bike has an electric start, make sure that it is in the “OFF” position. If your bike has any auxiliary devices or accessories connected to the battery, disconnect them. Disconnecting the power source will minimize the risk of electrical accidents and protect both you and your bike.
#5. Inspect the battery compartment
Before you install the new battery, thoroughly inspect the battery compartment. Check for any signs of corrosion, damage, or loose connections. If there are any issues, make sure to address them before proceeding with the installation. Cleaning the battery compartment and tightening loose connections will help ensure a secure and optimal installation.

How to remove the old Harley-Davidson battery?
Removing an old battery from your Harley-Davidson bike is a necessary step for replacement or maintenance. Properly executing this process will ensure a smooth transition and pave the way for installing a new battery. Here are the steps you’ll need to follow for removing the old battery from your Harley-Davidson bike, allowing you to proceed with confidence and ease.
Step 1: Locate the old battery
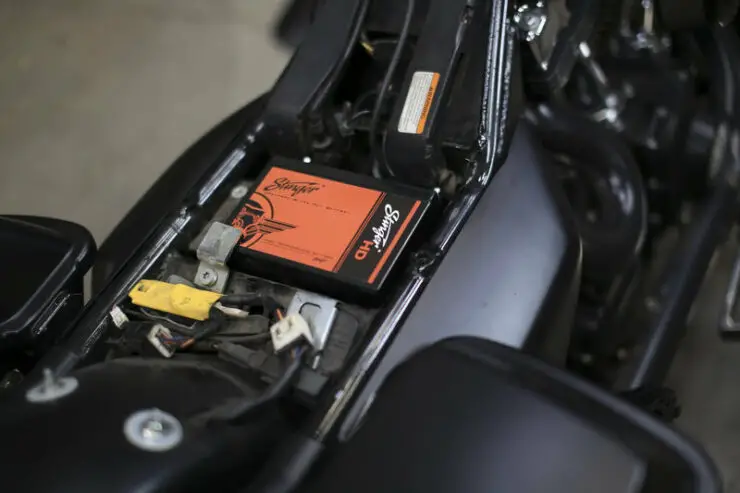
The first step in removing the old battery will be to locate its position in your Harley-Davidson bike. Depending on your bike’s model, the battery might be located beneath the seat, behind side covers, or in a specific battery compartment. You must refer to your bike’s owner’s manual for detailed instructions on locating the battery in your particular model.
Step 2: Disconnect the electrical wires
Before you remove the old battery, it is important to disconnect the electrical wires connected to it. Start by turning off the ignition switch and remove the key from the bike. Carefully inspect the battery to identify the electrical connections. A Harley-Davidson battery will have two terminals – positive (+) and negative (-). Identify the positive terminal (generally marked with a “+” symbol or colored red) and the negative terminal (generally marked with a “-“ symbol or colored black).
Make use of an appropriate-sized wrench or socket to loosen the nuts and bolts securing the electrical wires to the battery terminals. Start from the negative wire and then the positive wire. Loosen the connections enough to free the wires without removing the nuts or bolts. It is important to note that disconnecting the negative wire first will reduce the risk of accidental short circuits.
Step 3: Remove the old battery
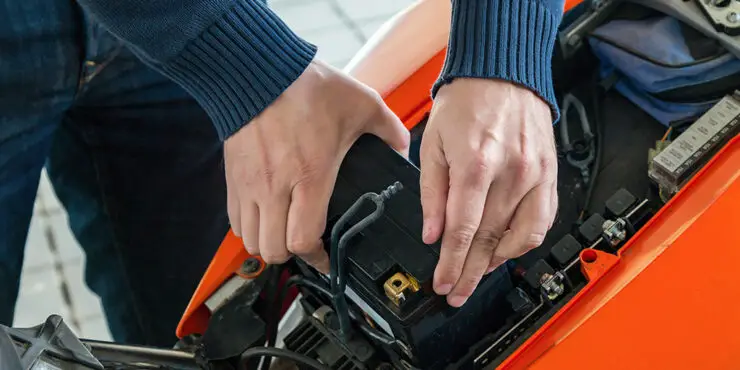
With the electrical wires disconnected, you can proceed with removing the old battery. Carefully lift the old battery out of its compartment or housing. Make sure that there is a firm grip on the battery as it might be heavy. If the battery has hold-down brackets or straps, remove them according to the manufacturer’s instructions.
Inspect the battery for any signs of leakage, damage, or corrosion. In case the battery is damaged, it is advised that you should handle it with caution and dispose of it properly as per the local regulations. Then, place the old battery aside in a safe location, away from heat or any flammable materials.
How do you install a battery on a Harley-Davidson bike?
Installing a new Harley-Davidson battery in your Harley-Davidson bike is an important step that will ensure reliable power and performance for your rides. Whether you are replacing an old battery, performing routine maintenance, or upgrading a new battery, installing a new battery correctly will be important for optimal performance. This is why you will need to know how do you install a battery on a Harley-Davidson bike. Properly selecting, installing, and connecting a new motorcycle battery will be important for a smooth and trouble-free ride. Here are the steps that you will need to follow for installing a new battery on your Harley-Davidson bike, allowing you to enjoy the ride and dependability of your motorcycle.
Step 1: Select the new battery
Choosing the right battery for your Harley-Davidson bike will be important for safe and optimal performance. There are certain factors that you’ll need to consider when selecting a new motorcycle battery such as battery type, battery size, specifications, brand, quality, and more.
Harley-Davidson bikes typically use lead-acid batteries, which can be conventional (requiring maintenance) or maintenance-free (AGM or absorbed mat glass). You need to refer to your owner’s manual or consult a professional Harley-Davidson dealer to determine the recommended battery type for your specific model.
Make sure that the new battery you’re going for matches the required size, voltage (usually 12 volts for Harley-Davidson bikes), and capacity specified by the manufacturer. These specifications can be found in your owner’s manual or by referencing the old battery’s label.
Go for a reputable battery brand whose batteries are known for their reliability and longevity. High-quality batteries are designed to withstand the demands of Harley-Davidson bikes, providing consistent power and performance.
Step 2: Prepare the new battery
Before you install the new battery, you need to prepare it for installation by following these steps –
- Inspect the new battery for potential signs of damage or leakage, making sure that it is in good condition
- If needed, you should clean the battery terminals using a terminal cleaner or wire brush to remove any corrosion or debris
- Apply a thin layer of dielectric grease to the battery terminals as it’ll prevent corrosion and ensure better electrical contact
Step 3: Install the new battery
There are a number of steps you will need to follow for installing the new battery in your Harley-Davidson bike. Start off by making sure that your bike’s ignition switch is turned off and that the key is removed. After that, position the new battery in the battery compartment, aligning it with the terminal connections. Be mindful of the orientation of the positive (+) and negative (-) terminals.
If your Harley-Davidson bike has battery hold-down brackets or straps, you should reattach them according to the manufacturer’s instructions. These brackets or straps will hold the battery securely in place, minimizing movement during rides. Check that the battery is snugly and securely positioned in the compartment. This will ensure proper electrical contact and prevent any shifting during motorcycle operation.
Step 4: Connect the electrical wires
Once the new battery is installed, it will be time to connect the electrical wires. Identify the positive (+) and negative (-) terminals on the battery. The positive terminal is usually marked with a “+” symbol or colored red while the negative terminal will be marked with a “-“ symbol or colored black.
Start by connecting the positive (red) wire to the positive terminal. Tighten the connection using the appropriate-sized wrench or socket. Make sure that you have a secure but not overly tight connection.
Then, you should connect the negative (black) wire to the negative terminal. Tighten the connection in the same manner as the positive terminal. Double-check that both connections are secure, with no loose wires or exposed terminals.
How to test the newly installed Harley-Davidson battery?
After installing a new battery in your Harley-Davidson bike, it is important to verify its functionality and ensure it is ready to power your rides. Testing the motorcycle battery will help you confirm that it is providing the necessary power to the electrical system. Here is how you can test the newly installed battery in your Harley-Davidson bike. By following these steps, you’ll be able to ensure a properly functioning battery and enjoy a reliable and powerful riding experience.
Step 1: Test the ignition
The first step in testing a newly installed Harley-Davidson battery will be to check the ignition system. Make sure that your bike is in a well-ventilated area and on a stable surface. Insert the key into the ignition switch and turn it to the “ON” position without starting the engine.
Observe the bike’s dashboard and lights. Confirm that the instrument cluster lights up and the necessary warning lights illuminate and then turn off. Engage the started switch for starting the bike’s engine. Observe the engine starting smoothly and running without any hesitations or abnormal sounds.
If your bike starts and runs smoothly, it’ll indicate that the battery is delivering power to the ignition system effectively.
Step 2: Check the voltage
Measuring the battery voltage will provide valuable insight into its charge level and overall health. There are a number of steps you will need to follow for checking the battery voltage. First, you should turn off the bike’s ignition and remove the key.
After that, set a digital multimeter or voltmeter to the appropriate voltage range for a 12V battery. Connect the positive (+) probe of the meter to the positive terminal of the battery and the negative (-) probe to the negative terminal.
Read the voltage displayed on the motor. A fully charged 12V battery must measure around 12.6 to 12.8 volts. Lower readings might indicate a partially discharged battery that might require further charging. If the voltage reading falls significantly below the expected range, you should consider recharging the battery or seeking professional assistance to diagnose any potential issues.
Step 3: Check the current flow
Assessing the current flow through the motorcycle battery will help determine if it can deliver the needed power to your Harley-Davidson motorcycle’s electrical system. You’ll need to follow these steps for checking the current flow in the battery.
Turn off your Harley-Davidson bike’s ignition and remove the key. After that, set a digital multimeter or ammeter to the appropriate current range. Connect the meter in series with the positive (+) terminal of the battery and the positive (+) cable.
Turn on the ignition switch without starting the engine. After that, observe the current reading displayed on the meter. A healthy battery will exhibit a minimal current draw in this state, indicating that the electrical system isn’t consuming excessive power when idle.
If the current draw is unusually high, it might indicate a potential issue with the electrical system, such as a short circuit or a component drawing excessive power. In such cases, you should consult a professional technician for further diagnosis and troubleshooting.

Tips for maintaining a Harley-Davidson battery
A properly maintained motorcycle battery will be important for the optimal performance and reliability of your Harley-Davidson bike. Regular maintenance will ensure that the battery is performing as expected and delivering a safe and reliable ride. Here are the essential steps you will need for maintaining a Harley-Davidson battery. By following these steps, you will be able to prolong the life of your battery and ensure a powerful and trouble-free riding experience.
#1. Cleaning the battery terminals regularly
Cleaning the battery terminals in your Harley-Davidson battery will be a fundamental aspect of battery maintenance. Over time, corrosion and dirt can end up accumulating on the terminals, hindering the flow of electrical current. For cleaning the battery terminals, here are some of the steps you need to follow –
- Put on safety goggles and a pair of gloves to protect yourself from battery acid and debris
- Mix a solution of baking soda and water or use a battery terminal cleaner specifically designed for this purpose
- Disconnect the battery cables, starting with the negative (black) cable and then the positive (red) cable
- Make use of a terminal brush or a cloth soaked in the cleaning solution to scrub the battery terminals thoroughly
- Pay close attention to removing any corrosion or buildup
- Rinse the terminals with clean water and dry them using a clean cloth
- Reconnect the battery cables, starting with the positive (red) cable and then the negative (black) cable
- Make sure that the connections are snug but not overly tightened
Regularly cleaning the battery terminals, ideally, every few months or as needed, helps maintain a solid electrical connection and ensure optimal battery performance.
#2. Perform regular voltage checks
Monitoring the voltage of your Harley-Davidson battery will be an important maintenance practice. Regular voltage checks will provide insight into the battery’s charge level and overall health. There are a number of steps that you will need for performing a voltage check. First, you should turn off your motorcycle’s ignition and remove the key.
Set a digital multimeter or voltmeter to the appropriate voltage range for a 12V battery. Connect the positive (+) probe of the meter to the positive terminal of the battery and the negative (-) probe to the negative terminal.
Read the voltage displayed on the meter. A fully-charged 12V battery will measure around 12.6V to 12.8V. If the voltage falls below the range, it might indicate a partially discharged or weak battery that needs charging or replacement.
Performing regular voltage checks, especially before long rides or after extended periods of inactivity will help ensure that your battery is adequately charged and ready for use.
#3. Replace the battery every few years
While regular maintenance can prolong the lifespan of your Harley-Davidson battery, it will eventually reach the end of its lifespan. Over time, batteries lose their capacity to hold a charge, which can result in poor performance or failure. As a general guideline, it is recommended that you should replace the motorcycle battery once every 3-5 years depending on usage and environmental factors. When replacing the battery, there are certain things that you should consider.
Refer to the owner’s manual or consult a Harley-Davidson dealer to ensure you select the correct battery type and specifications for your model. Follow the steps outlined in the manufacturer’s instructions for battery removal and installation. Dispose of the old battery in accordance with local regulations or take it to a designated recycling facility. Regularly replacing the battery will ensure reliable power and reduce the risk of unexpected battery failure during rides.

FAQ
What type of battery do I need for my Harley Davidson?
The type of battery you need for your Harley Davidson will depend on the model and year of your bike. It’s important to use the correct type of battery for your specific model, as using an incorrect battery size or type can damage your motorcycle’s electrical system. It’s best to consult your owner’s manual or contact a Harley Davidson dealer to determine the right type of battery for your bike.
What tools do I need to install a battery on my Harley Davidson?
Installing a battery on a Harley Davidson requires several tools, including a socket wrench set, screwdrivers, pliers, and a wrench. It’s also important to have a rubber mallet and a battery terminal cleaner on hand.
What steps should I take when installing a battery on my Harley Davidson?
When installing a battery on a Harley Davidson, it’s important to follow the manufacturer’s instructions and safety recommendations. Start by disconnecting the negative and positive battery cables, then removing the old battery. Next, position the new battery in the battery box and secure it with the battery hold-down bracket. Finally, connect the negative and positive cables and start the engine to ensure the battery is working properly.
>>> Read more about Battery for Harley-Davidson <<<

