Are you the proud owner of a Harley-Davidson motorcycle? Are you wondering when it’s time to swap out that battery for a new one? If so, you’ve come to the right place. In this article, we’ll explain the signs that indicate it’s time to get a new battery for your Harley-Davidson. We’ll also cover the best replacement battery options, so you can get your Harley-Davidson back on the road in no time. So, keep reading to learn more about when to replace your Harley-Davidson battery!
Replace a Harley-Davidson battery if it struggles to hold a charge, shows low voltage despite charging, or has been in use for over 3-5 years, especially if starting issues occur frequently.
How do you know when your Harley-Davidson battery needs to be replaced?
The battery is an important component of any Harley-Davidson motorcycle. It relies heavily on a properly functioning battery so that it can get the necessary electrical power to start the engine and operate different electrical systems. However, over time, the battery might start showing signs of wear and tear, potentially resulting in performance issues. This is where you might wonder how do you know where your Harley-Davidson battery needs to be replaced. Here are some of the common symptoms that will tell you how do you know when your Harley-Davidson battery needs to be replaced. Understanding these signs will help you diagnose battery-related issues and take appropriate action to ensure reliable motorcycle operation.

#1. Diminished starting power
One of the biggest indications of a failing Harley-Davidson battery is diminished starting power. If you find that your Harley-Davidson bike struggles to start or requires multiple attempts to turn over the engine, it might be a sign of battery deterioration.
>>> Click here to read our review of the Best Battery For Harley-Davidson <<<
As a Harley-Davidson battery ages, its capacity to hold a charge decreases. This results in reduced starting power. If you’re noticing a noticeable decline in your bike’s starting performance, it is important to inspect and test the battery to determine if it requires replacement.
#2. Unresponsiveness to charging
A failing battery might become unresponsive to charging attempts. If you’re connecting your Harley-Davidson bike to a charger or attempting to jump-start it, but the battery fails to regain an adequate charge, it might be a clear sign that the battery is no longer holding or accepting a charge effectively. This unresponsiveness indicates a compromised battery that might have to be replaced.
#3. Poor performance in cold weather
Motorcycle batteries, in general, are susceptible to reduced performance in cold weather conditions and the same applies to Harley-Davidson batteries. However, a failing battery might exhibit even greater difficulty in cold weather.
You might experience prolonged cranking times, sluggish engine starts, or complete failure to start in colder temperatures. Cold weather exacerbates the strain on a weak battery, highlighting its diminished capacity to deliver sufficient power. If you consistently encounter cold weather-related starting issues, it would be wise to have the battery tested and consider replacing it if needed.
#4. Corrosion around battery terminals
Corrosion around the battery terminals is a common visual sign of battery deterioration. As Harley-Davidson batteries age or get damaged, they can develop a build-up of corrosion around the terminals. This corrosion appears as a white or greenish powdery substance, often causing poor electrical connections and hindering the flow of power.
If you notice corrosion on the battery terminals, it’ll be important to clean them thoroughly and inspect the battery’s overall condition. However, excessive or recurring corrosion might indicate a deeper issue with the battery and can necessitate replacement.
#5. Dimming headlight and weak auxiliary lighting
Pay close attention to the brightness of your bike’s headlights and auxiliary lights, such as fog lights or accent lighting. A failing battery might cause a gradual decrease in the brightness of these lights over time.
If you notice that your headlights appear dimmer than usual, even after ensuring proper bulb functioning, it can indicate an insufficient power supply from the battery. Similarly, weak auxiliary lighting can also be a sign of battery deterioration.
#6. Swollen or bulging battery case
In some cases of battery failure, you may notice a swollen or bulging battery case. This swelling occurs when the battery experiences internal chemical reactions, leading to excessive heat and pressure buildup.
A visibly distorted battery case indicates a severe problem that poses safety risks and must be addressed immediately. You should not attempt to use a swollen battery as it might potentially leak, release harmful substances, or even explode. You should seek professional assistance to replace the battery safely.
How to test your Harley-Davidson battery?
Regularly testing the health of your Harley-Davidson battery is important for ensuring optimal performance and preventing unexpected breakdowns. There are numerous methods that you can employ to assess the condition of your Harley-Davidson battery. Understanding these battery testing methods will allow you to identify potential issues and take appropriate measures for maintaining a reliable power source for your bike. Here are the different ways you can test your Harley-Davidson battery –
Checking voltage
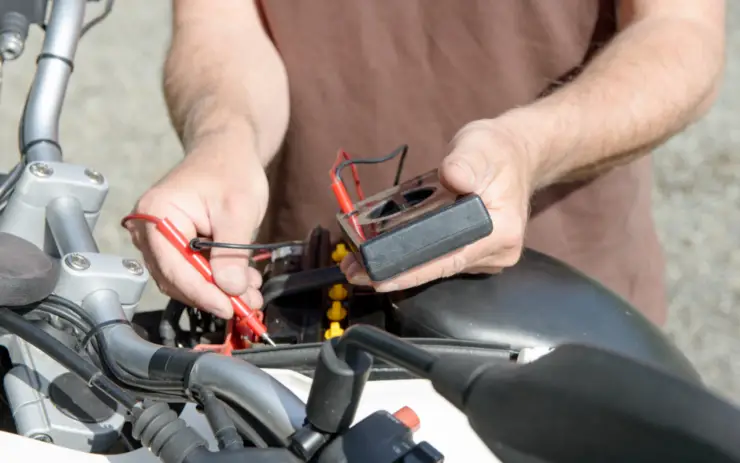
Voltage testing is a quick and straightforward way of evaluating the charge level of your Harley-Davidson battery. To perform a voltage test, first, you will need to set up the multimeter to the DC voltage setting and make sure that it is capable of measuring up to the battery’s voltage (usually 12V for Harley-Davidson motorcycles).
After that, you’ll need to connect the positive (red) lead of the multimeter to the battery’s positive terminal and the negative (black) lead to the negative terminal.
Then, you should read the voltage displayed on the multimeter. A fully charged battery will measure around 12.6 V to 12.8 V. If the reading is significantly lower, it’ll indicate a low charge or potential battery issue.
Voltage testing will provide a general indication of the battery’s charge level but might not always reveal underlying problems. If the voltage reading is low, further testing will be recommended

Load test
A load test assesses the Harley-Davidson battery’s ability to deliver power under a simulated load. This test will help determine if the battery can maintain an adequate voltage while powering the bike’s electrical systems.
Make sure that the battery is fully charged before conducting the load test. Connect a load tester to the battery as per the manufacturer’s instructions. The load tester applies a specific load to the battery and measures the voltage response.
Activate the load tester and observe the voltage reading. A healthy battery should maintain a stable voltage within an acceptable range while under load. If the voltage drops significantly, it’ll suggest a weakened battery that might require replacement.
Performing a load test will provide a more accurate assessment of your battery’s condition under operating conditions, helping identify potential issues that might not be apparent during a voltage test alone.
Specific gravity test
Specific gravity testing is largely used for flooded lead-acid batteries, which are very common in Harley-Davidson motorcycles. This test will measure the electrolyte density to determine the battery’s state of charge and overall health.
Make use of a hydrometer for extracting a small sample of electrolyte from each cell of the batter. You should avoid contact with your skin and eyes as electrolytes can be corrosive. Then, squeeze the hydrometer bulb and insert the tip into the electrolyte sample.
Release the specific gravity value displayed on the hydrometer scale. The readings need to fall within a specific range for a fully charged, partially charged, or discharged battery. You must consult the battery manufacturer’s specifications for the desired specific gravity values.
Specific gravity testing provides insights into the battery’s electrolyte condition and it can indicate if any cells are weak or damaged. It is especially useful for identifying individual cell issues in a battery with multiple cells.
Different types of Harley-Davidson batteries
When it comes to choosing a battery for your Harley-Davidson bike, you’ll have a number of options to consider. Some of the more popular types of batteries sold by Harley-Davidson are lead-acid, lithium-ion, and gel cell batteries. Each type of battery offers distinct characteristics in terms of performance, maintenance, and lifespan. Here are the different types of batteries that you should know about to make a well-informed decision based on your specific needs and preferences.
Lead-acid batteries
Lead-acid batteries have been widely used in Harley-Davidson motorcycles for many years and are commonly found in Harley-Davidson models. These batteries provide a reliable and consistent power supply for starting the bike and operating electrical systems. They offer great cold-cranking amps (CCA), making them suitable for all weather conditions.
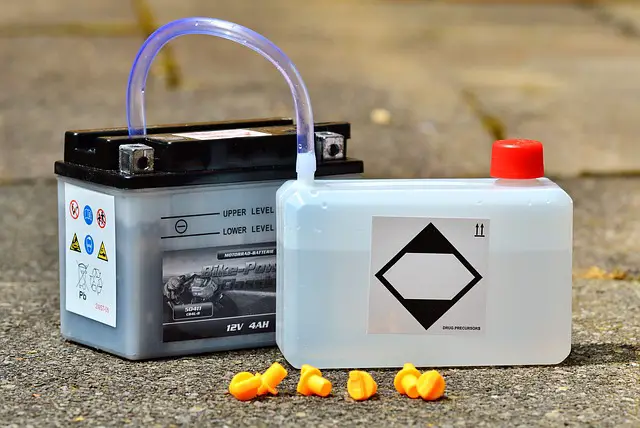
These batteries require regular maintenance. They might need occasional topping up of distilled water to replenish the electrolyte levels and prevent sulfation, a common issue in these batteries. Proper care and periodic charging will be important to extend their lifespan. The lifespan of a lead-acid battery depends on different factors like usage, maintenance, and environmental conditions.
Lithium-ion batteries
Lithium-ion batteries have gained popularity in recent years thanks to their high energy density and lightweight nature. These batteries offer an excellent power-to-weight ratio, offering strong starting power and reliable performance. They maintain stable voltage levels throughout their discharge cycle and offer quick recharge times.
One of the major advantages of lithium-ion batteries is their low maintenance requirements. They do not require topping up with electrolytes or periodic charging to the same extent as lead-acid batteries. However, proper handling and charging using a compatible charger are important to prevent overcharging or discharging, which can damage the battery. These batteries come with a longer lifespan compared to lead-acid batteries.
Gel cell batteries
Gel cell batteries or also known as valve-regulated lead-acid (VRLA) batteries are a type of sealed lead-acid battery. These batteries provide a reliable starting power and steady voltage output. They’re known for their deep cycle capabilities, which makes them suitable for applications that need consistent power over extended periods, such as accessories or audio systems.
Gel cell batteries are maintenance-free and they do not require adding water or electrolyte. Their sealed construction eliminates the risk of acid spills or leaks. These batteries have a similar lifespan to traditional lead-acid batteries.
How to replace your Harley-Davidson battery?
Replacing the battery in your Harley-Davidson motorcycle is a routine maintenance task that ensures reliable performance and avoids any unexpected breakdowns. With proper preparation and a systematic approach, you’ll be able to safely and efficiently replace the battery in your Harley-Davidson motorcycle. Here are the steps you will need to follow for replacing your Harley-Davidson battery.
Step 1: Prepare the battery area
Before you start the battery replacement process, it is important to take certain precautions and prepare the battery area. First, you should make sure that your bike is parked on a level surface and turned off. Wear any appropriate protective gear, including gloves and safety glasses to prevent any potential injury.
Turn off the bike’s ignition switch and remove the key. Disconnect any auxiliary power sources like accessories or battery tenders, connected to the battery. Refer to your bike’s owner’s manual to find the battery’s location. It will typically be located under the seat or in a battery compartment on the side of the motorcycle.
Step 2: Remove the old battery
Once you have prepared the battery area, you will need to remove the old battery. Start by loosening the nut or screw on the negative terminal of the battery. Make use of the appropriate size wrench or socket for loosening the connection. Once loose, you will need to carefully remove the cable from the terminal and secure it away from the battery.
Now, repeat the same process for the positive terminal. Loosen the nut or screw, remove the cable, and then secure it away from the battery. Some Harley-Davidson bikes might have retention straps or brackets holding the battery in place. Remove any straps or brackets by following the specific instructions outlined in your owner’s manual.
With all connections and retention devices removed, you should gently lift the old battery out of its compartment. Take care that you support its weight properly and avoid dropping or tipping the battery as it contains hazardous materials.
Step 3: Install the new battery
Now that you have removed the old battery, you’ll be able to proceed with installing the new one. Before installing the new battery, you should inspect the battery compartment for any dirt, debris, or corrosion. Moreover, clean the area using a soft brush or cloth, making sure you get a clean and secure battery fit.
Carefully place the new battery into the compartment, making sure that it sits securely and correctly. Refer to the owner’s manual for the proper battery orientation and placement. Start by connecting the positive (+) cable to the positive terminal of the new battery. After that, tighten the nut or screw securely, making sure you get a proper electrical connection. Then, you should connect the negative (-) cable to the negative terminal of the new battery. Tighten the nut or screw securely, making sure you get a tight and reliable connection.
If your bike has retention straps or brackets, you should reattach them securely as per the manufacturer’s instructions. Make sure that the battery is firmly in place.
Step 4: Testing and final checks
After you have installed the new battery, you should perform a number of tests and checks to ensure everything is in order. Make use of a multimeter to check the battery voltage and ensure that it meets the manufacturer’s specifications. A properly charged battery needs to read around 12.6 to 12.8 volts.
Turn on your bike’s ignition switch and verify that all electrical systems and accessories are functioning correctly. Check the lights, horn, turn signals, and other electrical components. Double-check that all battery connections are secure and properly tightened. Confirm that there is no movement or play in the battery or cables.

Maintenance tips to take care of your Harley-Davidson battery
Proper battery maintenance is important for ensuring the optimal performance and longevity of your Harley-Davidson motorcycle. By implementing routine maintenance practices, you’ll be able to extend the life of your battery, avoid unexpected breakdowns, and maximize your riding experience. Here are a few essential maintenance tips for your Harley-Davidson battery to keep it working properly and have a long life span.
#1. Clean and tighten the connections
Maintaining clean and secure connections will be important for reliable battery performance. Before beginning any maintenance, you need to make sure that your motorcycle is turned off and that you’re wearing appropriate safety gear, including gloves and safety glasses.
Make use of a wire brush or battery terminal cleaner for removing any corrosion or debris from the battery terminals. Corrosion could impede electrical flow and cause poor performance. Make sure that the terminals are clean and free from any buildup.
Use the appropriate size wrench or socket for ensuring that the battery terminals are securely tightened. Loose connections could result in voltage drops and unreliable performance. Make sure that the connections are snug but avoid overtightening as it might damage the terminals.
Regularly cleaning and tightening the connections will help maintain a solid electrical connection and prevent voltage drops or intermittent power supply issues.
#2. Regularly check the battery level
Monitoring the battery terminals will be important for identifying potential issues and ensuring that your battery remains adequately charged. You should periodically inspect the battery for any signs of damage, leaks, or swelling. A visual examination can help identify any physical issues that might impact battery performance.
Make use of a multimeter for measuring the battery’s voltage regularly. A fully charged battery will read somewhere between 12.6 volts and 12.8 volts. If the voltage drops significantly below this range, it might indicate that a battery that needs recharging or potential issues with the charging system.
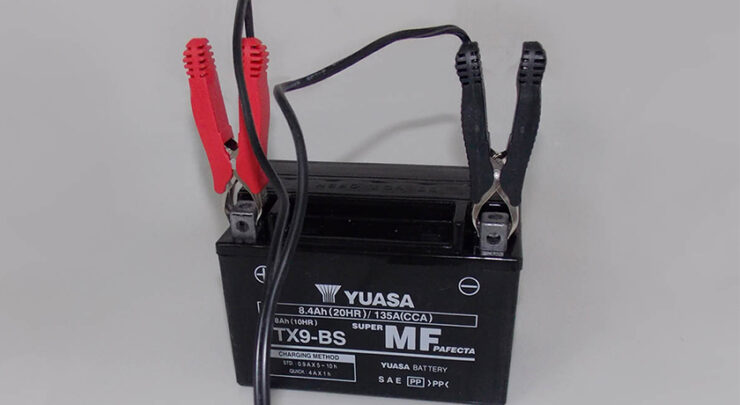
If the battery voltage is low, recharge the battery using a compatible battery charger. You’ll need to follow the manufacturer’s instructions for proper charging procedures, making sure that you don’t overcharge the battery. Regularly checking the battery level will allow you to identify any potential charging issues or battery deterioration early on, allowing for timely action to be taken.
#3. Have your battery professionally tested
Professional battery testing is a valuable service that will provide a comprehensive assessment of your Harley-Davidson battery’s health and performance. It’ll be all about comprehensive evaluation, early detection of evaluation, and fixing the problem.
Professional battery testing will involve using specialized equipment to assess the battery’s voltage, load capacity, and internal resistance. This testing will provide a more accurate evaluation of the battery’s overall condition.
Getting the battery tested by a professional will help you identify potential battery problems, such as weakened cells or reduced capacity before they lead to complete battery failure. This will allow for proactive measurements to be taken, such as recharging, maintenance, or replacement depending on the test results.
A professional technician will offer expert advice on battery maintenance, charging practices, and other measures for optimizing battery performance and prolonging its lifespan.
Having your Harley-Davidson battery professionally tested at regular intervals, especially as a part of routine motorcycle maintenance will provide valuable insights into its health and performance, enabling you to take appropriate actions and ensure long-lasting reliability.
FAQ
What signs indicate that my Harley Davidson battery needs to be replaced?
There are several signs that may indicate your Harley Davidson battery needs to be replaced, including slow engine cranking, dim headlights, slow starting, corrosion on the battery terminals, and swollen or bulging battery case.
How often should I replace the battery in my Harley Davidson?
The frequency of replacing the battery in your Harley Davidson can vary depending on factors such as type of battery, climate, and usage. Generally, a battery should be replaced every two to three years to ensure optimal performance and safety.
What type of battery should I use for my Harley Davidson?
The type of battery you should use for your Harley Davidson depends on the model and year of your bike. It is important to check your owner’s manual for the recommended battery type for your bike. You should also consider the climate and conditions in which you typically ride when choosing a battery.
>>> Read more about Battery for Harley-Davidson <<<

