Are you looking for the best way to protect your Harley-Davidson motorcycle? Installing a motorcycle cover is a great way to keep your bike safe from the elements, but what’s the proper way to do it?
To install a cover, ensure the bike is cool, start by covering the handlebars and mirrors, then drape it over the rest of the bike, securing the bottom straps to prevent movement in wind.
In this article, we’ll discuss the process of properly installing a motorcycle cover on a Harley-Davidson. Whether you’re a novice or an experienced rider, you’ll learn how to keep your bike in top condition with a few simple steps. So, let’s get started and find out how to properly install a motorcycle cover on a Harley-Davidson!
What is a motorcycle cover?
Harley-Davidson motorcycles are a symbol of style, freedom, and unparalleled craftsmanship. To preserve and protect your iconic machine, motorcycle covers play an important role. Motorcycle covers are not just ordinary accessories. In fact, they are guardians that shield your motorcycle from external elements, ensuring it remains in pristine condition.
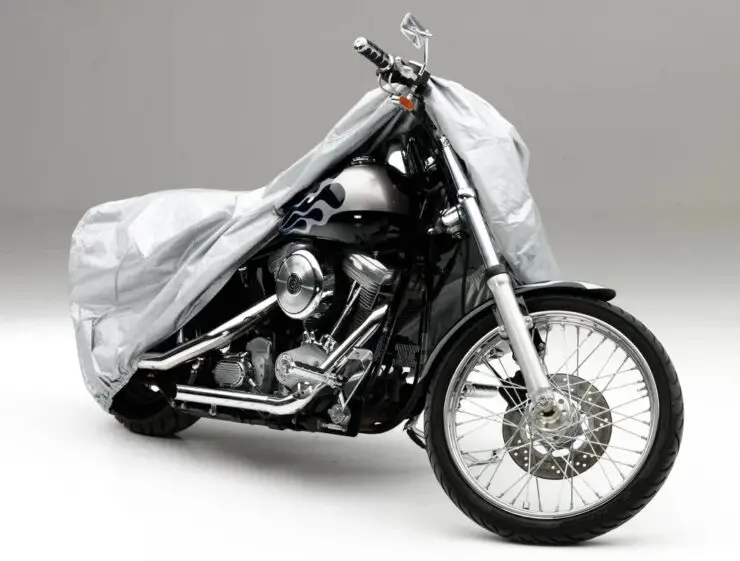
A motorcycle cover is a protective layer of fabric designed for shielding your bike from external factors that can cause damage, such as dust, dirt, rain, UV rays, and even prying eyes. Motorcycle covers come tailored to fit the contours of your motorcycle, offering a snug fit that provides maximum protection while preserving the aesthetic appeal of your bike.
Harley-Davidson bikes deserve nothing but the best. Motorcycle covers sold by Harley-Davidson are designed for these motorcycles using high-quality materials that offer durability and resistance to the elements. Premium fabrics are chosen as they’re capable of withstanding wind, dust, UV rays, rain, and more, providing reliable protection for your investment.
Since moisture can wreak havoc on your bike’s components, covers are also designed with breathability in mind. This feature prevents condensation from building up underneath the cover, which reduces the risk of corrosion and ensures that your bike stays dry and pristine. Meanwhile, exposure to UV rays can result in fading and deterioration of your Harley’s paint and components. Motorcycle covers shield your bike from the sun’s harmful effects and preserve its vibrant colors and finishes.
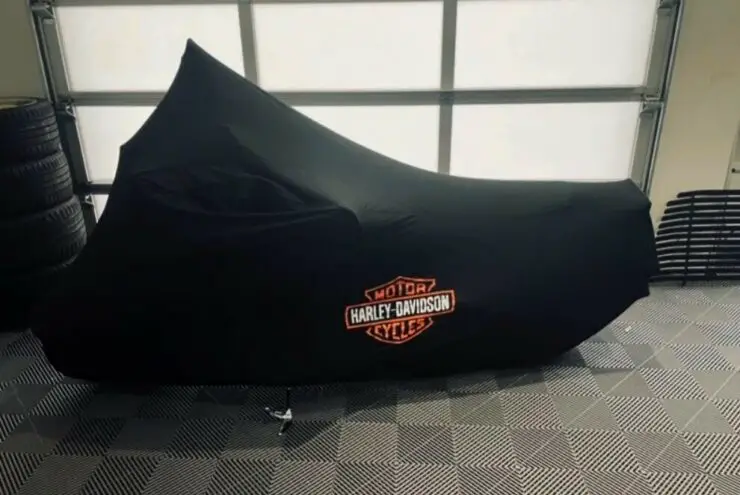
To ensure that there is a secure fit, motorcycle covers feature elasticized hems that grip the motorcycle’s contours snugly. Adjustable straps or buckles add an extra layer of security, preventing the motorcycle cover from shifting in windy conditions. Harley-Davidson is also known for selling high-quality motorcycle covers. These covers feature the brand’s iconic logo, styling, and colors. These covers will allow you to showcase your love for the Harley-Davidson brand while keeping your motorcycle safe.
There are also custom options available for motorcycle covers for Harley-Davidson bikes. These motorcycle covers come in different sizes and shapes as they’re tailored to fit the unique contours of Harley-Davidson models. These ensure a snug and secure fit, preventing the motorcycle cover from flapping in the wind or causing scratches to the bike’s finish.
Benefits of installing a motorcycle cover on a Harley-Davidson Motorcycle
Preserving the condition and striking appearance of your Harley-Davidson motorcycle is a priority for every Harley-Davidson biker. This is where the value of a motorcycle cover comes into the picture. Motorcycle covers offer a wide range of benefits that extend beyond mere protection, ensuring that your cherished motorcycle remains a timeless masterpiece. Here are some of the primary advantages of installing a motorcycle cover on a Harley-Davidson Bike.
#1. Shield against the elements
Mother Nature can be both beautiful and unforgiving. Installing a motorcycle cover offers a shield against various environmental elements like dust, dirt, sun, rain, bird droppings, and more. These natural factors can end up taking a toll on your motorcycle’s finish, paint, and components over time. A motorcycle cover acts as a protective barrier, preventing these elements from causing damage and ensuring your Harley-Davidson bike remains in impeccable condition.
#2. UV protection
Exposure to the sun’s harsh UV rays can result in fading, peeling, and deterioration of your motorcycle’s paint and finishes. A motorcycle cover with UV protection will prevent the sun’s rays from causing irreversible damage, keeping your bike’s paint vibrant and ensuring that its visual appeal remains as stunning as the day you first laid eyes on it.

#3. Prevent corrosion
Moisture can be a silent enemy, resulting in corrosion and rust on exposed metal parts of your motorcycle. A high-quality motorcycle cover acts as a barrier against rain, dew, and humidity, preventing moisture from accumulating and safeguarding your motorcycle’s components from the corrosive effects of water.
#4. Reducing cleaning frequency
The road is full of dust, debris, and pollutants that can accumulate on your motorcycle’s surfaces. Regular cleaning and maintenance are vital to keep your Harley-Davidson looking its best. However, by using a motorcycle cover, you will be able to significantly reduce the frequency of cleaning. A motorcycle cover minimizes the amount of dirt and grime that settles on your motorcycle, allowing you to spend more time riding and less time cleaning.
#5. Preserve resale value
A well-maintained Harley-Davidson bike commands attention and respect, even years down the line. By investing in a motorcycle cover, you will be actively preserving your Harley-Davidson motorcycle’s resale value. When the time comes to pass on the legacy of your bike to a new owner, your bike’s pristine condition will definitely make a positive impression and contribute to a higher resale price.
#6. A convenient storage solution
Motorcycle covers are designed for easy storage when not in use. Most covers come with compact storage bags that allow you to fold and stow the covers conveniently. Whether you are at home or on the road, having a motorcycle cover and storage bag on hand will provide a hassle-free solution for protecting your motorcycle wherever you go.
Preparation before installing a motorcycle cover on your Harley-Davidson Bike
Installing a motorcycle cover on your Harley-Davidson bike is more than just about protection. It is a declaration of commitment to your prized possession’s beauty and longevity. To ensure a seamless installation process and optimal preservation, carrying out the preparatory steps is essential. Here are some of the key steps that will guide you towards an easier installation process of installing a motorcycle cover.
Step 1: Choose the right motorcycle cover
Selecting the perfect motorcycle cover is the first step towards preserving your Harley-Davidson bike’s allure. You need to consider different factors like size, fit, material, weather resistance, and more.
You must opt for a motorcycle cover that fits your specific Harley-Davidson bike’s model snugly. Covers with elasticized hems and adjustable straps ensure a secure fit that does not flap in the wind. Choose a motorcycle cover that is crafted from high-quality durable materials that offer protection against the elements and UV rays. Breathable fabrics must be used as they prevent condensation buildup and potential corrosion.
Depending on your riding habits and location, you should choose a cover that provides adequate protection against rain, sun, dust, and other environmental factors. Prioritize covers with UV protection for preventing paint fading and deterioration caused by the sun’s rays.
Step 2: Inspect your bike
Before installing the motorcycle cover, you must inspect your Harley-Davidson bike for any issues that might require attention. Check for any signs of fluid leaks like oil or coolant that may compromise the condition of your cover.
Make sure that all loose parts, such as mirrors, saddlebags, or accessories are securely fastened to prevent any movement that could damage the cover. Verify that the tires are inflated to the recommended pressure to avoid any distortion of the motorcycle cover’s fit.
Step 3: Clean your bike
A clean canvas will ensure that your motorcycle cover does not trap dirt or grime against your motorcycle’s surface. Give your Harley-Davidson bike a thorough wash to remove dust, dirt, and road debris from all surfaces.
Allow your motorcycle to dry completely to prevent moisture from getting trapped under the motorcycle cover. If needed, you should consider applying a wax or protective coating to your motorcycle’s surfaces for an added layer of protection.
Step 4: Gather tools and materials
Before you can start, you need to gather a set of tools and equipment to ensure a smooth installation process. Here are the tools you must gather –
- Microfiber towels – Towels will come in handy for a final wipe-down and ensuring that there is no moisture left on the bike before you can cover it
- Cleaning products – Use appropriate cleaning solutions for your motorcycle’s surfaces, including paint, chrome, and leather
- Tire chocks – To prevent your Harley from rolling while installing the motorcycle cover
- Bungee cords or straps – These will help secure the cover against strong winds
- Storage bag – Keep your motorcycle cover’s storage bag nearby to stow it neatly when not in use
How do you properly install a motorcycle cover on a Harley-Davidson Bike?
Installing a motorcycle cover on your bike isn’t just an act of protection, it is a ritual that ensures your prized possession remains shielded from external elements while maintaining its allure. Once you have carried out the preparatory steps, you’ll want to know how do you properly install a motorcycle cover on a Harley-Davidson bike. Whether you are safeguarding it overnight, during storage, or between rides, the process will require a systematic approach. Here are the steps you’ll need to follow for installing a motorcycle cover on your Harley-Davidson Bike to get a snug and effective fit.
Step 1: Unfold the motorcycle cover
Start by unzipping or opening the storage bag that holds your motorcycle cover. Gently unfold the cover on a clean, debris-free surface. Take a moment to smooth out any wrinkles, ensuring that the cover lies flat and ready for installation. Handling the cover with care will prevent any unnecessary wear and tear and guarantee a seamless installation process.
Step 2: Place the cover on your motorcycle
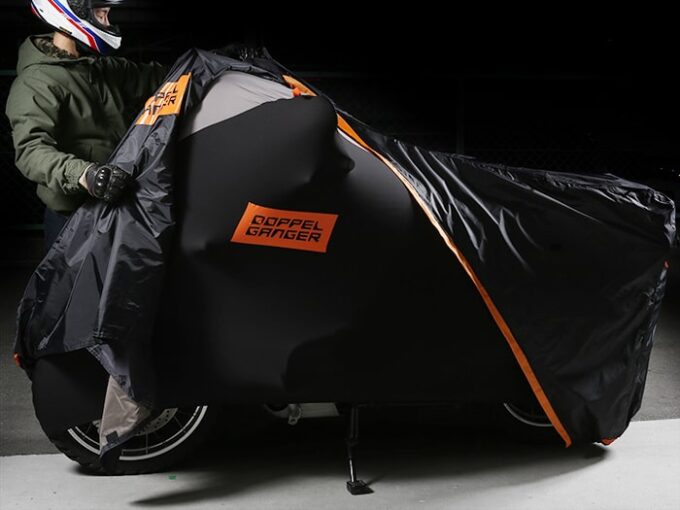
Position the motorcycle cover near your Harley-Davidson motorcycle, ensuring that the cover’s front and rear ends are easily identifiable. With the cover in hand, you should stand next to your motorcycle’s front end and drape the cover gently over the handlebars. Allow the cover to drape evenly over the entire motorcycle, making sure that no part of the motorcycle remains exposed.

Step 3: Secure the cover to the motorcycle
Securing the cover will prevent it from flapping in the wind, maintaining its protective integrity. For the front end, you need to walk to the front of the motorcycle and make sure that the cover’s front end is aligned with your motorcycle’s front wheel.
Stretch the elasticized hems of the motorcycle cover under the front and rear wheels. This snug fit will ensure that the cover stays in place, even during windy conditions. If your motorcycle cover has mirror pockets, slip them over your motorcycle’s mirrors for added security. If the cover features buckles or straps, fasten them securely around your bike’s belly or undercarriage, ensuring a snug fit.
Lastly, walk to the rear of the bike and ensure that the motorcycle cover’s rear end is aligned with your motorcycle’s rear wheel.
Step 4: Adjust the cover
A well-fitted cover will not only protect your Harley-Davidson bike but also enhance its aesthetic appeal. You need to carry out a set of steps to adjust the cover to get a snug and effective fit. If your motorcycle is on a surface where it could roll, you must place tire chocks behind the wheels for preventing any movement during the adjustment process.
Gently smoothen out wrinkles or folds on the cover’s surface. This will ensure that the cover lays flat and offers even protection across your bike’s contours. If your motorcycle cover has straps or buckles, make sure that they are securely fastened but not overly tight. Straps that are too tight could potentially damage your bike’s surfaces.
Post-installation maintenance after installing a motorcycle cover
Once you have installed a motorcycle cover on your cherished Harley-Davidson bike, your commitment to protecting its allure will not end there. Just as you’ve to invest time and effort into maintaining your bike, the same care will also extend to the cover. Regular maintenance will ensure that your cover remains effective in guarding against the elements while maintaining its longevity and quality. Here are a few important post-installation maintenance steps for motorcycle covers on Harley-Davidson bikes.
#1. Regularly check for signs of wear
After your motorcycle cover has been protecting your Harley-Davidson bike, it is important that you regularly inspect it for signs of wear and tear. Check the seams and edges of the motorcycle cover for any fraying, unraveling, or weakening. These areas are quite prone to damage and should be addressed promptly.
Examine the elasticized hems and fastening straps for signs of stretching, tearing, or loss of elasticity. These components will ensure a secure fit and any issues could compromise the cover’s effectiveness.
#2. Clean the cover
Cleaning the motorcycle cover will ensure that it remains free from dirt, debris, and contaminants that may affect its protective abilities.
Depending on the level of dirt and grime, you could either shake the cover to remove loose debris or gently spot-clean it with the help of a soft cloth and mild soap. If the cover is heavily soiled, you could rinse it with water and allow it to dry completely before re-installing it on your bike.
#3. Store the cover properly
When the cover is not in use, proper storage will be important to maintain its quality. Fold the cover neatly to avoid any unnecessary creasing or wrinkling. Store it in its original storage bag or in a clean, dry space. Make sure that the cover is stored away from sharp objects or edges that may cause tears or punctures.
#4. Replace the cover as needed
Over time, even the most durable motorcycle covers will experience wear that affects their protective abilities. Knowing when to replace the motorcycle cover will be important.
You must regularly inspect your motorcycle cover for signs of wear, such as fading, thinning material, or compromised seams. If the cover does not fit your bike snugly, it might have lost its elasticity or shape. If you’re noticing significant tears, holes, or areas of damage that cannot be repaired, it’ll be time to consider a replacement.

Troubleshooting common issues with motorcycle covers
Motorcycle covers play a major role in preserving the beauty and integrity of your Harley-Davidson bikes. However, like any accessory, they can encounter issues that hinder their effectiveness. Understanding how to troubleshoot these common issues will ensure that your Harley-Davidson bike remains shielded from the elements while maintaining its allure. Here are some of the common issues with motorcycle covers on Harley-Davidson Bikes and how you can troubleshoot them.
Poor fitment
A motorcycle cover that does not fit snugly might flap in the wind, potentially causing scratches to your motorcycle’s finish and reducing its protective effectiveness. To resolve this issue, you should opt for a cover with custom fitments designed specifically for your Harley-Davidson bike. Elasticized hems and adjustable straps offer a secure fit, preventing flapping. Make sure that the motorcycle cover’s front and rear ends align with your motorcycle’s wheels for optimal protection.
Condensation buildup
Condensation could accumulate underneath the cover, potentially resulting in corrosion and damage to your motorcycle’s components. To troubleshoot this issue, you must choose a motorcycle cover made from breathable materials that allow moisture to escape. To prevent condensation, you should avoid covering your bike immediately after riding, especially if the motorcycle is still warm. Let the motorcycle cool down and dry before installing the cover.
Ventilation concerns
Without proper ventilation, your motorcycle might become stuffy under the cover, resulting in moisture buildup and potential mold growth.
For troubleshooting this issue, you must look for motorcycle covers with built-in ventilation features, such as strategically placed vents or mesh panels. If the cover lacks these features, you should consider using moisture-absorbing products like desiccant bags placed around the motorcycle before covering it.
Scratches and abrasions
Ill-fitting or low-quality motorcycle covers can cause scratches or abrasions to your motorcycle’s paint and finishes due to the movement of the cover in the wind. To fix this issue, you must prioritize covers made using soft and scratch-resistant materials. Make sure that the mirror pockets, straps, and buckles are fastened securely and not causing friction against your motorcycle’s surfaces.
Cover displacement
Strong winds can displace a loosely fitted cover, exposing your bike to external elements. In windy conditions, you must consider using additional securing methods like bungee cords or extra straps for fastening the cover more securely. Alternatively, you can also park your motorcycle in a location that provides wind protection, such as a garage or against a building.
Fading fabric
Continuous exposure to the sun’s UV rays can result in the motorcycle cover’s fabric fading over time. To resolve this issue, you must choose a motorcycle cover with UV protection features that prevent UV rays from penetrating the material. If your motorcycle cover lacks this feature, you must apply a UV-resistant fabric spray to prolong its lifespan.
Mold and mildew growth
If your Harley-Davidson motorcycle is stored in a humid environment or if the cover isn’t breathable, mold and mildew could develop. Regularly inspect the motorcycle and motorcycle cover for signs of mild or mildew. If you’re noticing any, you should clean and dry your bike before installing the cover. If your area is prone to humidity, you should prefer using a humidifier in your storage space to reduce moisture levels.
FAQs
What type of motorcycle cover should I use for my Harley Davidson?
When choosing a motorcycle cover for your Harley Davidson, you should consider the size and shape of the bike, the weather conditions you will be riding in, and the level of protection you need. Generally, a waterproof and breathable cover is best for protecting your bike from dust, dirt, and other elements.
How do I install a motorcycle cover on my Harley Davidson?
Installing a motorcycle cover on your Harley Davidson is a fairly straightforward process. Begin by placing the cover on the motorcycle and ensuring that it is centered, then adjust the straps or fasteners to secure the cover in place. Be sure to check the cover regularly to make sure that it is still secure and that the straps or fasteners have not become loose.
What are some tips for taking care of a motorcycle cover?
It’s important to take good care of your motorcycle cover in order to ensure its longevity. You should store the cover in a cool, dry place away from direct sunlight and extreme temperatures when not in use. You should also avoid folding the cover as this can cause creases and tears. Additionally, it’s important to clean the cover regularly to remove any dirt or debris that may have accumulated.
>>> Read more about Motorcycle Cover for Harley-Davidson <<<

