Are you ready to learn how to recharge a Harley-Davidson battery? Recharging a battery is a simple and efficient way to extend the lifespan of your motorcycle and help ensure a safe and reliable ride. In this article, we will cover the steps and tools needed to recharge your Harley-Davidson battery. So, what are you waiting for? Read on to learn the steps and tips for recharging your Harley-Davidson battery.
Recharge a Harley-Davidson battery by connecting it to a compatible battery charger, ideally a trickle or smart charger. Ensure the charger matches the battery type (typically 12V) and connect it to the terminals as directed until fully charged.
Recharge your Harley-Davidson battery
Riding a Harley-Davidson motorcycle is a highly exhilarating experience that captures the spirit of freedom and adventure. Behind every successful ride lies a crucial component – a Harley-Davidson battery. The significance of having a fully charged Harley-Davidson battery cannot be overstated. It won’t just ensure the smooth operation of your motorcycle but it’ll also contribute to your safety, convenience, and overall riding experience.
>>> Click here to read our review of the Best Battery For Harley-Davidson <<<
A recharged Harley-Davidson battery will provide the necessary power for starting your bike reliably and ensuring consistent performance throughout the ride. A weak or discharged battery might lead to difficulties in starting the engine or cause intermittent electrical issues, potentially leaving you stranded. By having a fully charged battery, you’ll be able to count on your bike to start effortlessly and deliver the consistent performance you expect from a Harley-Davidson bike.
Harley-Davidson bikes also feature various electrical components that rely on a fully charged battery for functioning optimally. These components include headlights, brake lights, turn signals, instrument clusters, and audio systems, among others. A rechargeable battery will supply the necessary electrical power to these components, ensuring they operate effectively and provide the needed visibility, communication, and safety features during the ride.
A fully recharged battery will also enhance the convenience and comfort of your ride. Many modern Harley-Davidson motorcycles come equipped with additional features such as anti-lock braking systems, electronic fuel injection, and advanced rider-assist technologies. These features rely on electrical power and a fully charged battery will ensure their seamless operation. By maintaining a recharged battery, you’ll be able to enjoy advanced features without any disruptions, enhancing your overall riding experience.
Having a recharged battery will be important for your safety, especially in emergency situations. A properly charged battery will ensure that your bike’s electrical systems, including the horn and hazard lights, are fully functional. These features play a key role in alerting others on the road, signaling potential dangers, and attracting attention during critical moments. A recharged battery will provide the power needed for these safety features to function effectively, contributing to your overall riding safety.

Preparation before recharging the battery
Harley-Davidson bikes are known for their powerful engines and iconic design. To keep these machines running smoothly, maintaining the battery’s health will be important. Recharging the battery will require careful preparation to ensure safety and maximize the battery’s lifespan. Here are the preparatory steps you’ll need to take before you can recharge your Harley-Davidson battery, ensuring a successful and efficient charging process.
#1. Prioritize your safety
Before you start any battery-related maintenance, you need to prioritize your safety by gathering the necessary protective gear. This will include safety goggles, safety gloves, and appropriate clothing to shield yourself from any potential accidents or exposure to battery acid. It is important to protect your eyes, skin, and clothing from corrosive materials that might be present in or around the battery.
#2. Choose the charging equipment
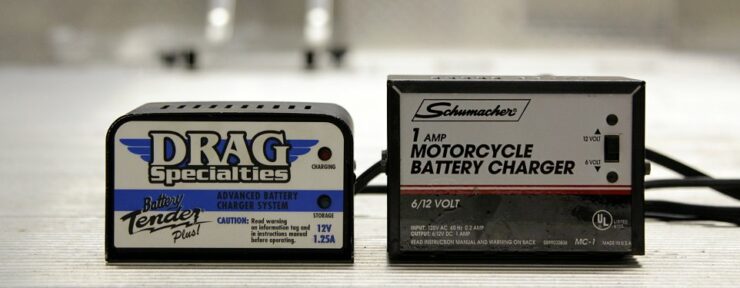
Selecting the appropriate charging equipment will be important for a successful battery recharge. Harley-Davidson bikes typically use 12-volt batteries and choosing a charger designed for this voltage will be important. Go for a charger specifically designed for motorcycle batteries to ensure the proper charging current and voltage levels.
#3. Ensure proper ventilation
When recharging a Harley-Davidson battery, it’ll be important to provide proper ventilation to dissipate any potentially harmful gases that might be released during the charging process. Make sure that you are in a well-ventilated area, preferably outdoors or in a well-ventilated garage. Adequate ventilation will reduce the risk of gas buildup and the potential hazards associated with it.
#4. Read the owner’s manual
Familiarize yourself with the specific instructions provided in the owner’s manual. Different models and battery types might have varying charging requirements so it’ll be important to understand the manufacturer’s guidelines. The owner’s manual will give you the necessary information on charging procedures, safety precautions, and any specific recommendations for your particular model.
Assess the condition of the battery before recharging
Before you recharge your Harley-Davidson battery, it’ll be important to assess its condition and ensure proper preparation for its charging process. By carefully assessing the condition of your battery and evaluating its health, you’ll be able to take appropriate measures and carry out a successful recharge. Here are the steps you will need to follow for assessing the condition of your Harley-Davidson battery.
#1. Locate the battery
To start the assessment, you will have to locate the battery on your Harley-Davidson bike. While the battery’s position might vary depending on the model, it will typically be located beneath the seat or side cover. You should refer to your bike’s owner’s manual for specific instructions on locating the battery. Take your time to find the battery as it will ensure you can proceed with the assessment accurately.
#2. Identify the battery type
Once you have located the battery, it will be important to identify the type of battery your Harley-Davidson motorcycle is running on. Harley-Davidson motorcycles commonly use lead-acid batteries. These batteries can be further classified as either conventional lead-acid batteries or maintenance-free (also known as AGM or absorbed glass mat) batteries. Identifying the battery type will be important as it’ll help determine the appropriate charging method while also helping you choose the correct battery charger.
Conventional lead-acid batteries typically come with removable caps that allow you to check and add distilled water periodically. On the other hand, maintenance-free Absorbed Glass Mat batteries are sealed and require no maintenance. You will need to review your bike’s owner’s manual or consult a Harley-Davidson technician for confirming the type of battery installed on your motorcycle.
#3. Inspect the battery and connections
Before you proceed with recharging, you will need to thoroughly inspect the battery and its connections. Look for any signs of physical damage, such as cracks, leaks, or corrosion. If you notice any damage, then it is advised that you should replace the battery rather than attempting to recharge it. Moreover, you should also check the battery cables for secure connections, ensuring that they are tight and free from corrosion. Proper connections will be essential for a successful and safe charging process.
#4. Clean and remove corrosion
If you notice any corrosion on the battery terminals or cable connections, it is important to clean them before recharging. Corrosion can help interfere with the charging process and hinder proper electrical contact. Make use of a battery terminal cleaner or a mixture of baking soda and water for gently removing corrosion, ensuring that the terminals and cable connections are clean and free from any buildup.
#5. Prepare the battery for removal
If your motorcycle battery requires removal for recharging, proper preparation will be important for ensuring a smooth and safe process. Start by turning off the ignition switch and then remove the key from the motorcycle. Disconnect any accessories or devices connected to the battery.
If needed, you should remove the seat or side cover to assess the battery compartment. Refer to your bike’s owner’s manual for specific instructions on removing these parts. Before handling the battery, you must wear appropriate protective gear to prevent any potential contact with battery acid or electrical shock.
Carefully loosen and disconnect the battery cables, starting with the negative cable, followed by the positive cable. You should remember that the sequence of removal is important as it will help you ensure proper connection later on. Once the cables have been disconnected, you should carefully lift the battery out of the battery compartment, making sure that there is a firm grip to prevent any accidental drops or damage.
If you’re uncertain about removing the battery, it would be smart to seek assistance from a professional mechanic or a qualified Harley-Davidson technician. This will help you avoid any potential risks or damage.

How do you recharge a Harley-Davidson battery?
Recharging a Harley-Davidson battery is an important step in maintaining the performance and longevity of your bike. To ensure a safe and effective charging process, it’ll be important to know how do you recharge a Harley-Davidson battery. Here are the steps that you will need to follow for recharging a Harley-Davidson battery. By adhering to these steps, you will be able to recharge your Harley-Davidson battery efficiently and within no time.
Step 1: Connect the charger to the battery
To get started with the charging process, you will first need to connect the battery charger to your Harley-Davidson battery. Make sure that the charger is unplugged and turned off before you can make any connections.
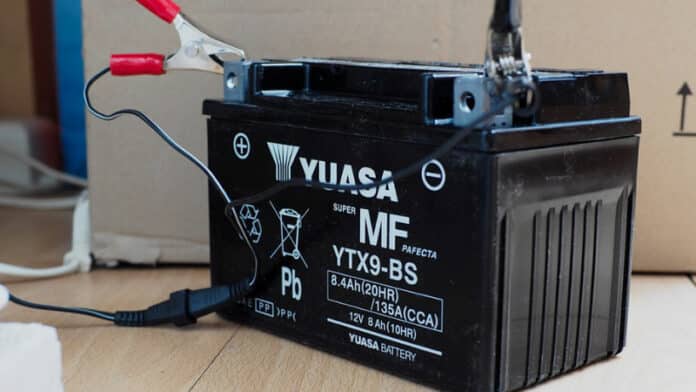
Then, identify the positive (which will be marked with “+”) and negative (which will be marked with “-“) terminals on the battery. The positive terminal will be typically marked with a “+” symbol or red color whereas the negative terminal will be marked with a “-“ symbol or black color. After that, connect the positive (red) clamp of the battery charger to the positive (+) terminal of the motorcycle battery. Make sure that you have a secure and tight connection.
After that, connect the negative (black) clamp of the charger to the negative (-) terminal of the battery. Again, you should make sure there is a secure and tight connection. You must double-check the connections to make sure that they are properly attached and secure.
Step 2: Select the charging mode
Once the charger has been connected, it will be important to select the appropriate charging mode based on the type of battery installed on your Harley-Davidson bike. Different motorcycle chargers might have varying charging modes, such as “Standard”, “Maintenance”, or “AGM”. You should refer to the charger’s manual to get specific instructions on selecting the correct mode.
If you are using an automatic battery charger, it may detect the battery type and set the appropriate charging mode automatically. Nevertheless, it is advised that you should double-check and confirm that the battery charger is set to the correct mode.
Step 3: Monitor the charging process
During the charging process, it is important that you should monitor the progress to make sure that it proceeds smoothly and without any hassle. Set a timer or use the charger’s built-in timer for monitoring the charging time. Overcharging can end up damaging the battery, so it is important to adhere to the recommended charging time specific by the charger manufacturer.
Observe the charger’s indicator lights or display panel. Most battery chargers provide visual cues indicating the progress of the charging process. These indicators might show battery voltage, charging status, or any potential errors or issues that might arise during the charging process.
Keep an eye on the battery and charger for signs of overheating or unusual smells. If you notice any abnormalities, such as excessive heat or a burning odor, you should immediately disconnect the charger and consult a professional technician.
Step 4: Disconnect the charger
Once the battery is fully charged, it’ll be time to disconnect the charger. Turn off the charger and then unplug it from the power source. Start by removing the negative clamp from the battery terminal.
Next up, you’ll need to remove the positive (red) clamp from the battery terminal. Make sure that the clamps don’t touch each other or any metal surfaces to prevent potential short-circuiting. Store the charger in a safe place for future use.
How to reinstall a Harley-Davidson battery?
After you know how do you recharge a Harley-Davidson battery, knowing how to properly reinstall the battery will be crucial for ensuring optimal performance and longevity. By knowing and following the right steps, you’ll be able to confidently complete the process and be ready to take your Harley out on the road ahead. Here are the steps that you will need to follow for reinstalling a Harley-Davidson battery.
Step 1: Wipe the battery terminals
Before you reinstall the Harley-Davidson battery, it will be important to clean the battery terminals. This will help you make sure that there is a solid electrical connection. Prepare a mixture of baking soda and water or make use of a battery terminal cleaner.
Dip a clean cloth or a small brush into the solution and gently scrub the battery terminals for removing any corrosion or residue. Make sure that you reach all areas of the terminals for thorough cleaning. Once the terminals are clean, you should rinse them with clean water and wipe them dry with a separate clean cloth. Then, inspect the terminals and make sure that they are free from any debris or moisture before proceeding.
Step 2: Reinstall the battery
After cleaning the battery terminals, it will be time to reinstall the battery on your Harley-Davidson motorcycle. Position the battery back into the battery compartment, making sure that it aligns correctly with the terminal connections.
Carefully reconnect the battery cables, starting with the positive (red) cable and then the negative (black) cable. Make sure that the cables are securely attached to their respective terminals. After that, tighten the battery cable connections with the help of the appropriate tools, ensuring that they are snug but not overly tightened. Be cautious that they aren’t overtightened as this might damage the battery terminals or cables.
Step 3: Secure the battery
To ensure that the battery remains secure during motorcycle operation, it will be important to properly secure it in place. Replace any battery hold-down brackets or straps that were previously removed during the battery removal process. Refer to the owner’s manual for specific instructions on securing the battery for your particular Harley-Davidson model.
Fasten the hold-down brackets or straps securely, making sure that the battery is snugly in place and will not move or shift during rides. Gently shake the battery for confirming that it is firmly secured. If you notice any movement, you should readjust the hold-down brackets or straps until the battery is stable.

Test the Harley-Davidson battery’s condition after recharging
After you have recharged your Harley-Davidson battery, it will be important to perform the final checks to make sure that the battery is properly charged and that the motorcycle is ready to hit the road. To do that, you will need to check the battery voltage and ride your bike to confirm its proper functionality. By following the final checks and tests, you will be able to ensure a successful recharge and enjoy a smooth and trouble-free ride. Here are the steps for carrying out the final tests and checks on your Harley-Davidson motorcycle after recharging the battery.
Check the battery voltage
Checking the battery voltage will be an important step for confirming that the battery has been charged adequately. Make use of a multimeter or voltmeter for measuring the battery voltage. Set the meter to the appropriate voltage range. Then, connect the positive (red) probe of the multimeter to the positive terminal of the battery and the negative (black) probe to the negative terminal.
Read the voltage displayed on the meter. For a fully charged 12V battery, the reading needs to be somewhere between 12.6V and 12.8V. If the voltage is significantly lower, it might indicate that the battery needs further charging or that there could be an underlying issue. If the voltage falls below the expected range, you should consider recharging the battery for a longer duration or consult a professional technician for further assessment.
Run your motorcycle
After you have confirmed the battery voltage, it will be time to run the motorcycle to verify its functionality. Make sure that your bike is in a well-ventilated area and that it is on a stable and level surface. After that, turn the ignition key to the “ON” position without starting the engine.
Check if your Harley-Davidson motorcycle’s lights, indicators, and other electrical components are functioning correctly. If your bike has an electric starter, engage it for starting the engine. Observe the starting process for ensuring smooth and consistent cranking. Once your bike is running, listen for any unusual noises or vibrations that might indicate potential issues. Pay close attention to the engine’s performance, responsiveness, and overall smoothness of operation.
If you’re noticing any abnormalities during the running process, such as difficulty starting, unusual sounds, or poor performance, it is advised that you should consult a professional technician for further evaluation and potential troubleshooting.
FAQ
What type of battery does a Harley Davidson use?
Harley Davidson motorcycles use a sealed, maintenance-free battery that typically lasts 3-5 years before needing to be replaced. The battery is usually a 12-volt, lead-acid battery that is designed to last longer and requires less maintenance than other types of batteries.
How do you recharge a Harley Davidson battery?
Recharging a Harley Davidson battery is relatively simple and can be done by connecting a battery charger to the battery terminals. It’s important to use a charger specifically designed for sealed, maintenance-free batteries to ensure it is charging properly and safely.
What precautions should I take when recharging a Harley Davidson battery?
When recharging a Harley Davidson battery, it’s important to make sure that the charger is rated for sealed, maintenance-free batteries. It’s also important to follow the manufacturer’s instructions for charging the battery and to disconnect the charger when the battery is fully charged. Additionally, it’s important to keep the battery and charger away from open flames and sparks and to make sure the area is well ventilated.
>>> Read more about Battery for Harley-Davidson <<<

