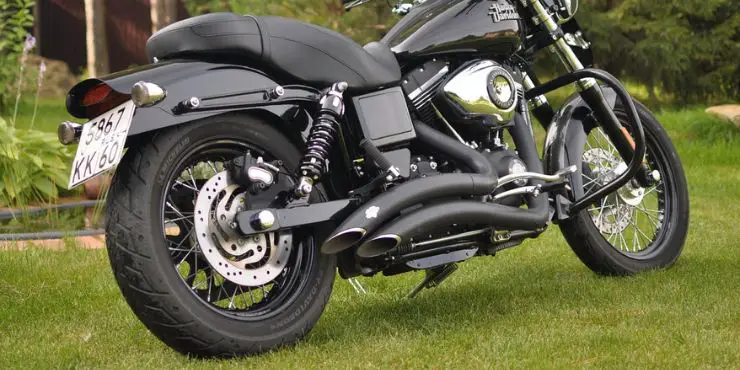
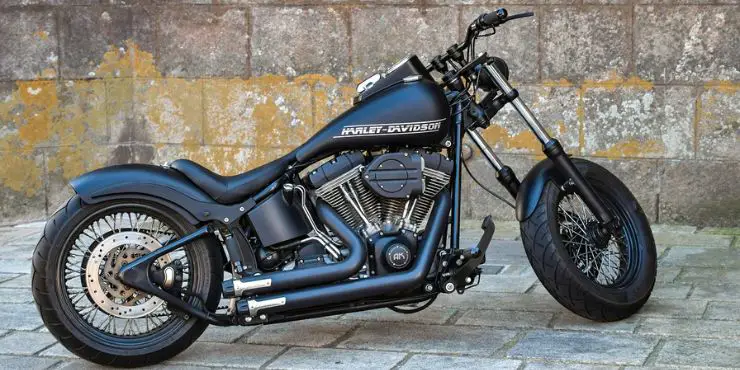
Are you a Harley-Davidson biker looking to put exhaust heat wrap around the exhaust, but you don’t know how much of it you need? If so, then you are definitely in the right place.
To wrap motorcycle exhaust pipes, you typically need about 50 feet of exhaust wrap for a standard set of pipes. However, the exact amount depends on the pipe size and how tightly you wrap.
In this article, you will get to know all about exhaust wraps, the benefits of exhaust wrap, how much exhaust wrap do I need, and other important facts you need to keep in mind. Continue reading to get all the answers that you are looking for.
Exhaust wrap for Harley-Davidson bikes
In the past, exhaust heat wrap was largely seen only on performance cars. Over time, more and more people started seeing the benefits that heat wrapping provided. Now, exhaust wrap has become one of the most convenient, useful, and cheap DIY modifications for Harley-Davidson bikes.
Whether you have got shiny new engine bay bling or you are just looking to keep the temperature down on your existing bike, heat wrapping will give your tuned motorcycle a great look. Moreover, it also offers performance gains from increased engine efficiency.
Either way, you will want to protect your valuable custom upgrades or stock parts for ensuring that they last the test of time while also enjoying numerous other benefits.
What are the benefits of using exhaust wrap
How can wrapping your exhaust headers just provide you with additional horsepower? Exhaust wrapping helps in making sure that the heat remains within the headers instead of dissipating to other areas of the engine. Some of the exhaust wraps are rated highly enough to drop the engine bay temperatures by up to 50%.
When heat is contained in the exhaust headers, for instance, it will improve the flow of gases throughout the system. It makes the exhaust gases move faster, providing the engine with more power. With the engine bay temperatures down, less warm air will enter the intake, which in turn provides additional cooling.
At the same time, the heat wrap will make sure that your specific exhaust components are maintained at a higher temperature. This provides maximum efficiency for reducing drastic temperature changes. You should constantly look for maximum airflow when tuning, whether it be for fitting superior headers, providing cold air for the intake, or making sure that the free-flowing exhaust has got as few restrictions as possible.
Exhaust wrap is basic to fit, and it can be done by you with a few simple steps and a couple of tools, which you will more than likely have laying around.
How much exhaust wrap do I need
If you aren’t certain how much heat wrap you are going to need, you can find a reliable exhaust wrap calculator to help you. After that, you need to enter the measurements into the useful calculator, and it will tell you the exact amount you need. It is always convenient to get slightly more than you need to help you during “just in case” moments.
It is recommended that you should do so with the parts, you want to wrap, either taken off your bike or before the initial fitting. Sure, some Harley-Davidson bike owners have fitted exhaust wrap with a header still fitted. However, to make sure that you’re doing the best job possible, it will be worth taking it off and doing that properly.
Now that you have more than enough information about exhaust wraps, it is time to learn how to install it.
How to install exhaust wrap on your Harley-Davidson bike
Even though applying exhaust wrap isn’t the most challenging job, you will want to ensure that you get it right. In this article, you will find the right steps to install the exhaust wrap properly and get the most benefits out of it.
As a bare minimum, you will need to purchase a set of stainless-steel locking ties that are designed to keep the wrap securely in place. Moreover, it will also give the exhaust a fresh new look. These usually come as a part of the kit, so you should keep your eye out for them. Now comes the time to get your exhaust wrapping.
Gather the necessary supplies
Aside from exhaust wrap, you will also need something to hold them in place. Some bikers prefer using safety wires. Meanwhile, others use stainless clamps, while radiator hose clamps can also be a decent alternative. You can make life easier and get a pipe wrap kit, which generally includes both wrap and fasteners.
The other items that you’ll want to have handy are latex gloves and a bucket. The gloves will keep you from getting itchy, as most exhaust wraps are made using fiberglass, which can result in a deeply irritating itch for many people if it comes in contact with the skin. Moreover, you will want to keep a set of fresh exhaust gaskets with you too.
Remove the exhaust
Unbolt the exhaust and then take it down. This is a great time if you want to examine it for broken welds, cracked brackets, or pinholes. If you have got heavy rust, you may want to remove it using a wire brush or wire cup brush. Once you are done, you should clean everything thoroughly.
Soak your exhaust wrap
Remember the bucket that you had gathered above? Now, you should drop the rolls of exhaust wraps in there and then soak them up. Some people recommend not following this step with colored wraps, as it can easily pull color from the wrap. However, you should keep in mind that after a few months of driving, the exhaust wrap is going to lose a significant amount of color anyway.
Secondly, it’ll be easier to install and keep the airborne fiberglass at bay, which will likely be better for your health compared to the alternative. Lastly, and most importantly, wet exhaust wrap stretches slightly, so you’ll be able to wrap tighter and have a better-looking finished product.
Start wrapping the exhaust wrap
Now, you need to wire down one end of the exhaust wrap at the exhaust outlet and then start wrapping. You must pull the wrap tightly while overlapping the preceding layer roughly halfway with each exhaust wrap.
You do not need to affix the end of the warp if you can get an overlap working enough to get it cinched down. In fact, it is recommended that you should do it this way and secure the start and end points once you’re done. Wrap the outlet to the inlet such that the openings in the overlaps are facing the rear of the bike. This helps keep the road scuzz from working its way in between the exhaust wrap and pipe or helping the exhaust wrap to separate or tear.
If you need to wrap around a bung or bracket, you should wrap it in an “X” and overlap it, continuing the pattern. You need to be sure as the exhaust wrap can sometimes build up the unsightly thickness in a few layers. Remember to make the exhaust wrap look nice on the “show” side of the pipe. No one will notice a gap or exhaust section in the exhaust that is facing the inside of the bike.
Finish off the wrapping
Now, you should affix the exhaust wrap to the manifold end. If you’ve got removable exhaust flanges, ensure that they are installed before you proceed. If you are using safety wire, you must bury the twisted section of the wire in the exhaust wrap such that you do not stick yourself if you are near it.

Reinstall your exhaust pipes
Now, you need to reinstall the exhaust pipes. You need not forget the fresh gaskets.
Fire up your motorcycle
Fire up your bike and take it for a spin. Your bike is going to off-gas a load of smoke and bad smells, which eventually subsides with time. Get your bike good and hot before driving off as much as possible right off the bat. You need to be careful as the exhaust wrap will discolor a bit. Black exhaust wrap turns charcoal, while white exhaust wrap gets dingy. Even your first attempt will look great if you take proper care.
FAQs
Should you heat wrap your whole exhaust?
Installing exhaust wrap is essential as it will offer improved reliability because of reduced heat exposure, increased engine performance, and a safer working environment near the hot exhaust.
Do you need to soak the exhaust wrap?
Wetting the exhaust wrap is recommended as it will help the material be more flexible, which allows for a tighter fit during installation.
What temperature will the exhaust wrap be good for?
Generally, exhaust wraps are rated to be used at a continuous 1200 degrees Fahrenheit and an intermittent temperature of 2000 degrees Fahrenheit.

