Are you an avid Harley Davidson lover? Are you looking to do some maintenance work on your own? Then you’ve come to the right place!
On a Twin Cam, valve adjustments aren’t typically needed because it uses hydraulic lifters. However, if lifters are noisy, inspect and replace if necessary.
In this article, we’ll show you how to adjust the valves on your Harley Davidson Twin Cam Motorcycle. With our step-by-step guide, you’ll be confident in your ability to get the job done quickly and correctly. Plus, you’ll get tips on how to troubleshoot any potential problems along the way. So read on and get ready to take your bike maintenance skills to the next level!
Overview of Harley-Davidson Twin Cam valves
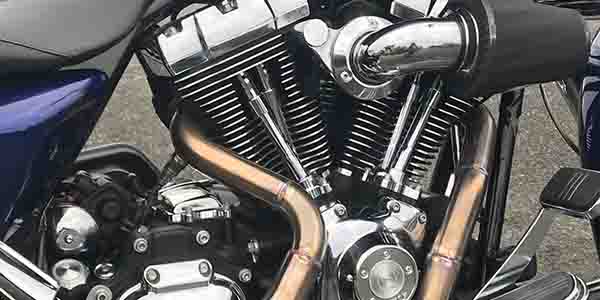
When it comes to American motorcycles, Harley-Davidson is a brand that has certainly earned legendary status. One of the key components in a Harley-Davidson bike’s Twin Cam engine is the valve. This important component plays a key role in the engine’s overall efficiency and power output. Valves are significant parts of the internal combustion engine and they’re responsible for the intake of air-fuel mixture and the expulsion of exhaust gases. In the Twin Cam engine, two valves per cylinder (one intake and one exhaust) work in harmony to ensure there is efficient fuel combustion and optimal engine performance. The proper functioning of valves will be important for achieving maximum power, torque, and overall engine efficiency.
Harley-Davidson Twin Cam valves are typically made using high-quality materials like stainless steel or titanium. Such materials are able to withstand the intense heat and stress of the engine environment. These valves are precision-engineered and undergo strict quality control measures for ensuring durability and performance. They’re designed to fit precisely within the valve guides and maintain a tight seal for preventing any loss of compression or leakage. Stainless steel valves offer tremendous durability, corrosion resistance, and affordability, which makes them a popular choice for most bikers. Meanwhile, titanium valves are significantly lighter, which allows for faster valve actuation and reduced stress on the valve train. Titanium valves also have amazing heat dissipation properties, making them perfect for high-performance applications. However, titanium valves are more expensive than stainless steel valves.
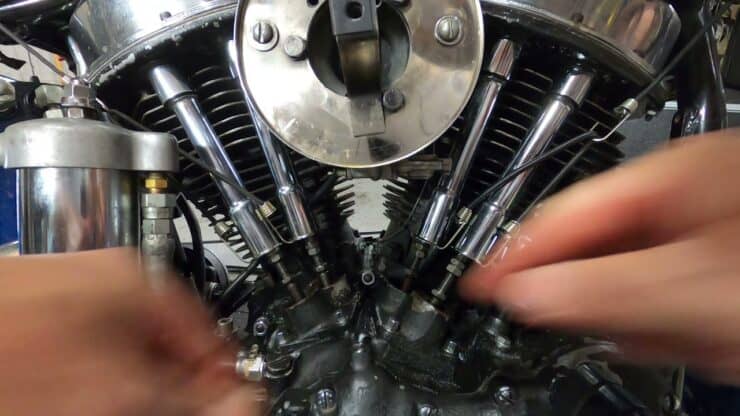
The Twin Cam engine makes use of a camshaft-driven valve train system where the camshaft operates the valves through a series of components like lifters, pushrods, and rocker arms. The camshaft is engineered carefully to open and close the valves at precise intervals, coordinating with the rotation of the engine’s crankshaft. Proper valve timing will be important for optimal engine performance and smooth operation.
Regular valve maintenance is important to keep the Twin Cam engine running smoothly and efficiently. It is important to follow the manufacturer’s recommended maintenance schedule, which includes inspections and adjustments of valve clearances. Over time, valve clearances could change due to wear and tear while improper clearances can also negatively impact engine performance and lead to potential damage. Regular inspection and adjustment of valve clearances will help maintain proper valve operation and extend the lifespan of the engine.
For bikers looking to enhance the performance of their Twin Cam engine, aftermarket valve options are available. The performance valves made using advanced materials like lightweight titanium can offer increased durability, improved flow characteristics, and reduced weight. Upgraded valves can help optimize the engine’s breathing capability, resulting in enhanced power and torque output.

Different types of Harley-Davidson Twin Cam valves
Harley-Davidson bikes are known best for their power, performance, and unmistakable sound. At the heart of the iconic Twin Cam engines are the valves, which are components that help in controlling the intake and exhaust flow. These valves come in different types, each designed for catering to specific performance needs and engine configurations. Here, you will get to know different types of Harley-Davidson Twin Cam valves, shedding light on their characteristics, applications, and benefits, providing riders and enthusiasts with a deeper understanding of these critical engine components.
#1. Stock replacement valves
Stock replacement valves are the standard valves that come installed in Harley-Davidson Twin Cam engines from the factory. These valves have been engineered to meet the engine’s original specifications, ensuring proper fitment and performance. They’re typically made from durable materials like stainless steel or hardened steel for withstanding the demands of everyday riding. They’re an ideal choice for bikers looking for a direct replacement to maintain the original engine performance.
#2. Performance valves
For bikers who crave enhanced power and performance, performance valves offer a major upgrade over stock replacement options. These valves are typically made from advanced materials like stainless or titanium, which offer improved strength, lighter weight, and increased resistance to heat and stress. Performance valves are designed in a way to improve the engine’s breathing capability, allowing for better airflow and combustion efficiency. Upgrading to performance valves can help you get increased horsepower, torque, and overall engine responsiveness.
#3. Oversized valves
In certain performance applications, oversized valves can be used for maximizing airflow and increase power output. Oversized valves have larger dimensions in comparison to stock valves, which allow for increased flow rates and improved engine breathing. This type of valve is commonly used for high-performance Harley-Davidson Twin Cam engines or when modifying the engine for increased displacement or forced induction. It is important that you note that installing oversized valves might require modifications to other engine components like cylinder heads and pistons to ensure proper fitment and compatibility.
#4. High-flow valves
High-flow valves are useful in optimizing airflow and increasing the engine’s breathing capacity. These valves feature specific design enhancements like increased valve head diameter, reshaped valve stems, or modified valve seat angles. High-flow valves facilitate improved airflow during the intake and exhaust strokes, resulting in enhanced power and torque output. This type of valve is used in performance-oriented Harley-Davidson Twin Cam engines, especially in conjunction with other modifications like high-performance air intake systems and exhausts.
Tools and parts needed for adjusting Harley-Davidson Twin Cam valves
Proper valve adjustment is important for maintaining the optimal performance and longevity of a Harley-Davidson Twin Cam engine. To ensure precision and more accurate valve clearance, having the right tools at your disposal will be essential. The more prepared you are, the easier it will be to carry out the whole process of adjusting valves. Here is the list of tools and parts necessary for adjusting Harley-Davidson Twin Cam valves, helping the bikers perform this critical maintenance task effectively.
#1. Feeler gauge
A feeler gauge is an indispensable tool for measuring the gap between the valve stem and the rocker arm. It’ll allow you to accurately determine the valve clearance, ensuring proper valve operation. You must choose a feeler gauge set that includes a variety of thicknesses for covering the specific valve clearance requirements of your Twin Cam engine.
#2. Torque wrench
A torque wrench will be important for tightening the locknuts on the rocker arms to the manufacturer’s specified torque values. Proper torque will ensure that the locknuts are secure without overtightening, which can result in damage to the valve train components.
#3. Valve adjusting wrench
A valve adjusting wrench or also known as a tapped wrench is a specialized tool designed for reaching the locknuts on the rocker arms. This wrench will allow you to hold the adjusting screw in place while tightening the locknut to ensure precise valve adjustment.
#4. Screwdriver or hex key
Depending on the design of the Twin Cam engine, you might need a screwdriver or hex key for adjusting the valve clearance. Some Twin Cam models make use of a screw-type adjuster while others might use a hex nut or locknut system. Make sure that you’ve got the appropriate screwdriver or hex key size to access and adjust the valves accurately.
#5. Valve cover gasket
When performing valve adjustments, it is recommended that you replace the valve cover gaskets to ensure a proper seal and prevent oil leaks. Having a fresh valve cover gasket on hand would help in maintaining the integrity of the engine’s oil system.
#6. Owner’s manual or service guide
While not a physical tool, the owner’s manual or service guide will be an invaluable resource when it comes to valve adjustments and other maintenance tasks. These manuals will provide step-by-step instructions, torque specifications, and other important information specific to your Twin Cam engine model. You must refer to the owner’s manual or service guide to ensure that you follow the correct procedures for valve adjustment.

How to adjust valves on Harley-Davidson Twin Cam
Proper valve adjustment will be important for maintaining optimal performance and reliability in a Harley-Davidson Twin Cam engine. This critical maintenance task will ensure precise valve clearance and promote efficient engine performance. As long as you know the right steps to adjust valves, you will be able to carry out the process easily. To help with the steps, here are the steps that will help you navigate the process of adjusting valves on the Harley-Davidson Twin Cam.
Step 1: Preparation before adjusting the valves
Before you start adjusting the valves on your Twin Cam engine, it is important that you gather the necessary tools and materials. Further, you need to familiarize yourself with the instructions and torque specifications outlined in the manual. Then, you should stand your bike on a flat surface, preferably in an elevated area. Moreover, you must also keep the safety precautions in mind and wear gloves and carry paper towels to clean things.
Step 2: Remove the cam chest cover
For removing the camshaft cover, you will first need to disconnect the negative battery cables to prevent any electrical mishaps. Then, you should remove any components obstructing access to the camchest cover like air cleaner assemblies or fuel tanks.
Loosen and remove the bolts that are securing the cam shaft cover using the appropriate tools. Make sure that you are keeping track of the bolt locations for reinstallation. You must carefully lift the cam chest cover off the engine, taking care that you don’t damage any surrounding components.
Step 3: Adjust the intake valves
After that, you need to loosen the intake valves and their corresponding rocker arms on the cylinder heads. With the help of a feeler gauge, measure the gap between the valve stem and the rocker arm. You must refer to the service manual for the specified valve clearance.
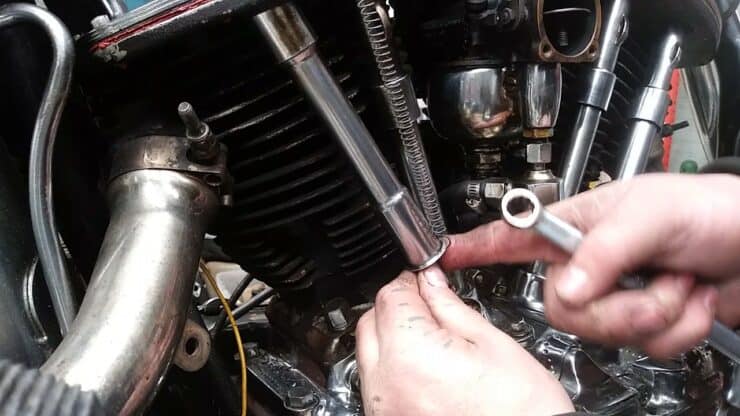
If the clearance requires adjustment, make use of a valve adjusting wrench for turning the adjuster screw clockwise or counterclockwise to achieve the recommended clearance. Moreover, hold the adjuster screw in place when tightening the locknut. You should recheck the valve clearance with the feeler gauge, making sure that it falls within the recommended range.
Step 4: Adjust the exhaust valves
Locate the exhaust valves and their respective rocker arms on the cylinder head. Then, you should follow the same process as adjusting the valves, using the appropriate feeler gauge and valve adjusting wrench to achieve the recommended clearance. Lastly, you should double-check the clearance to ensure proper adjustment.
Step 5: Reinstall the cam chest cover
First, you need to clean the mating surface of the engine and the cam chest cover for ensuring a proper seal. Then, install a new valve cover gasket onto the cam chest cover while ensuring you align it correctly.
You must carefully place the cam chest cover back onto the engine, making sure that it aligns with the dowel pins. Start tightening the cover bolts using the specified torque values outlined in the service manual, following a crisscross pattern to evenly distribute the torque.
Reinstall any components that were previously removed, such as air cleaner assemblies or fuel tanks. Lastly, reconnect the negative battery cable.
Troubleshoot common issues while adjusting valves
The valves play a key role in the performance and smooth operation of a Harley-Davidson Twin Cam engine. Maintaining proper valve clearance will be important for the optimal performance and longevity of your bike’s Twin Cam engine. However, occasional issues could arise and greatly affect the valve function and overall engine performance. To be able to troubleshoot the issues, you will first need to find out where the problem actually lies. Here, you will get to know the common issues with valves and how to troubleshoot them easily and effectively.
#1. Intake valve adjustment issues
If the intake valve clearance is too loose or too high, it can greatly result in poor engine performance, excessive noise, or engine damage. You should double-check the valve clearance using the recommended feeler gauge, referring to the owner’s manual for the correct specifications. Make the necessary adjustments to achieve the proper clearance within the specified range.
Sticking valves can cause erratic performance and affect engine efficiency. Make sure that the valves move freely by cleaning and lubricating the valve stems and guides. If the problems persist, you must consult a professional to inspect the valve train components for any wear or damage that might be causing the issue.
#2. Exhaust valve adjustment issues
Similar to intake valves, correct clearance on exhaust valves can result in excessive noise and poor performance. Make use of the recommended feeler gauge and service manual specifications for verifying the correct clearance. Adjust the exhaust valves as needed for achieving the appropriate clearance.
Excessive valve noise, commonly referred to as “ticking” might indicate insufficient valve clearance. You need to recheck the valve clearance and make adjustments accordingly. If the noise persists, you must inspect the valve train components for wear or damage that might be contributing to the problem.
#3. Cam chest cover installation issues
Improper installation of the cam chest cover can result in oil leaks. Make sure that the mating surfaces of the engine and cam chest cover are clean and free of any debris. Make use of a new gasket and ensure that it is correctly aligned before tightening the cover bolts to the specified torque values outlined in the service manual. Double-check the torque on each bolt to ensure proper sealing.
When you’re reinstalling the cam chest cover, ensure that the dowel pins align correctly with the corresponding holes on the engine. Misalignment can result in improper sealing, potential leaks, and difficulty in tightening the cover bolts. You must be taking care to position the cover accurately before you secure it in place.

#4. Excessive valve noise
One of the common issues bikers encounter with valves on a Twin Cam is excessive valve noise, often described as “clattering” or “ticking”. This noise can be caused by different factors such as incorrect valve clearance, adequate lubrication, or worn valve components. There are numerous troubleshooting steps you can take to address the valve noise.
Incorrect valve clearance can result in excessive noise. You must consult your service manual for determining the proper clearance specifications and use a feeler gauge for measuring and adjusting the valves accordingly.
Worn or damaged valve components like valve guides or valve stems can greatly contribute to noise. You must inspect these components for signs of wear, damage, or pitting. If needed, you must consult a professional technician for replacing or repairing these parts.
Inadequate lubrication can result in increased friction and valve noise. Make sure that the engine has sufficient oil levels and uses the recommended oil viscosity specified by the manufacturer. Regular oil changes and maintenance will help prevent valve-related issues.
#5. Valve leakage
Valve leakage can also result in poor engine performance, increased consumption, and reduced power. Some of the common causes of valve leakage include damaged valve seats, worn valve seats, or improper valve adjustment. You can carry out different troubleshooting steps for addressing valve leakage.
Worn or damaged valve seals can allow oil to leak past the valves. You need to check for signs of oil around the valve stems and replace the seals if needed. Moreover, a damaged or worn valve seat can also cause leakage. A professional inspection and valve seat reconditioning or replacement might be needed for addressing this issue.
Incorrect valve clearance can result in poor sealing and valve leakage. You must refer to the service manual for the recommended clearance specifications and adjust the valves accordingly.
#6. Poor valve performance
If you experience decreased engine power, reduced throttle response, or rough idle, it can be attributed to poor valve performance. There are multiple troubleshooting steps that will help improve valve performance.
A clogged or dirty air filter could restrict airflow to the engine, affecting valve performance. You must regularly inspect and clean or replace the air filter as needed. Make sure that you have proper fuel delivery to the engine. Check the fuel filter, fuel lines, and carburetor or fuel injection system for any clogs or issues that might affect valve performance. Vacuum leaks in the intake system could impact valve performance. You need to inspect the intake manifold and associated gaskets for potential leaks and address them accordingly.
Also read: Harley-Davidson Superlow vs Iron 883
FAQs
Q: What are valves and why do I need to adjust them on a Harley Davidson Twin Cam?
Valves are components that regulate the air and fuel mixture entering the engine cylinder. On a Harley Davidson Twin Cam, it is important to adjust the valves periodically to ensure proper engine performance. Adjusting the valves will help maintain the engine’s power, efficiency, and longevity.
How do I adjust the valves on a Harley Davidson Twin Cam?
Adjusting the valves on a Harley Davidson Twin Cam involves checking and adjusting the valve clearance, which is the gap between the valve and the rocker arm. This should be done when the engine is cold, and a feeler gauge should be used to measure the gap. If the gap is not within the specified range, the rocker nut and valve adjustment screw should be adjusted to correct the gap.
What should I do if I am not comfortable adjusting the valves on my Harley Davidson Twin Cam?
If you are not comfortable adjusting the valves on your Harley Davidson Twin Cam, it is best to take it to a qualified mechanic or service center to have the valves adjusted. They will be able to properly adjust the valves to ensure your engine is running at peak performance.

