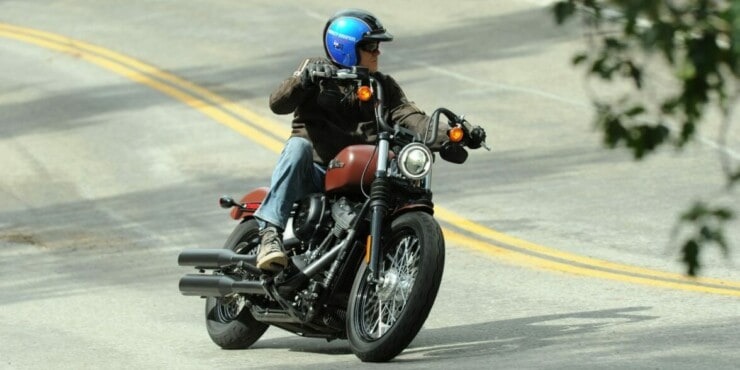
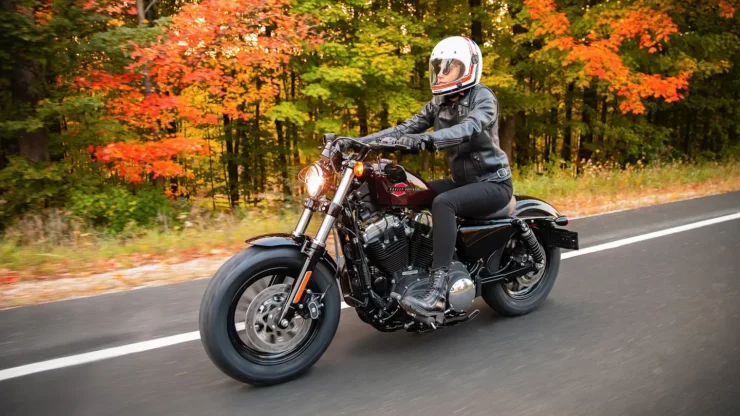
Are you ready to give your Harley a makeover? Upgrading the handlebars is an easy way to transform the look of your bike and customize it to your riding style.
To change handlebars on a Harley, remove the handlebar cover to access the bolts, disconnect any wiring and cables, and remove the old handlebars. Mount the new handlebars, reconnect the wiring and cables, and ensure proper alignment and secure tightening.
In this article, we’ll provide a step-by-step guide for how to change handlebars on a Harley. With the right tools and a few easy steps, you’ll have your bike looking like new in no time. So, let’s get started!
How do handlebars work on a Harley-Davidson bike?
Harley-Davidson bikes have become quite synonymous with classy designs, power, and the feeling of freedom when driving on open roads. One of the important components that contribute tremendously to the iconic look and feel of these motorcycles is the handlebars. Handlebars aren’t just functional but they’re also a distinctive part of the bike’s design.
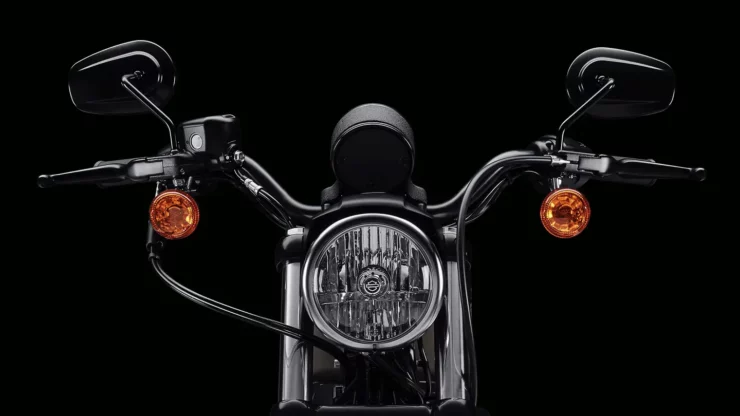
Handlebars, as the name suggests, are the bars or rods attached to the front end of a bike’s frame that the rider uses for steering the bike. In the case of Harley-Davidson bikes, the handlebars are designed with a unique style that reflects the brand’s heritage and provides a comfortable riding experience.

The handlebars play a key role in the overall control and maneuverability of a Harley. They serve as a primary connection point between the rider and the bike, allowing the rider to direct the bike’s movement and navigate through various road conditions. In a Harley-Davidson bike, the handlebars go well beyond their functional role. They contribute to the distinctive aesthetics and character of the bike. Harley-Davidson offers a wide range of handlebar styles, each one designed to cater to different riding preferences, ergonomics, and overall aesthetics.
The working mechanism of the handlebars involves transmitting the rider’s input into the motorcycle’s steering system, which results in changes in direction. Harley-Davidson handlebars are typically attached to the triple tree or also known as the yoke or fork crown, which connects the forks to the frame.
When the rider turns the handlebars, the motion will be transferred to the front forks through the triple tree. The forks, in turn, rotate the front wheel, causing the motorcycle to change direction. This mechanism will allow the rider to control the bike’s steering, ensuring a responsive and reliable riding experience.
Handlebars also play a key role in determining the rider’s riding position and comfort. Harley-Davidson offers various styles of handlebars, such as ape hangers, drag bars, mini-apes, and beach bars, each one with different shapes, heights, and widths. These variations enable riders to find the handlebar style that perfectly suits their preferences, riding style, and body ergonomics.
Tools needed for changing handlebars in a Harley-Davidson bike
If you are a Harley-Davidson biker looking to customize your bike or replace worn-out handlebars, knowing the right tools for the job will be important. Changing the handlebars on your Harley will require a specific set of tools to ensure a smooth and successful installation. Here are some of the tools needed for changing the handlebars in a Harley-Davidson motorcycle.
#1. A wrench set
A set of wrenches is a must-have for any motorcycle owner. For handlebar replacement, you will typically require a combination of open-end wrenches and socket wrenches in various sizes. These wrenches can be used for removing bolts, nuts, and other fasteners securing the existing handlebars to the bike.
#2. Hex (Allen) key
Many Harley-Davidson bikes use hex bolts for securing components, including handlebars. Therefore, having a set of hex keys in different sizes will allow you to easily remove and install these bolts efficiently. Make sure that you have both metric and standard sizes as Harley-Davidson bikes might have a mix of both.
#3. Torque wrench
When installing new handlebars, it will be important to tighten the bolts to the manufacturer’s recommended torque specifications. A torque wrench helps in achieving the correct level of tightness without over-tightening or risking damage to the components. You must refer to your motorcycle’s service manual or manufacturer guidelines for the appropriate torque values.
#4. Screwdrivers
Having a set of screwdrivers, including both Phillips and flat-heat will come in handy for different tasks during the handlebar replacement process. You might require them for removing screws or connectors on your bike’s control switches, housing, or handgrips.
#5. Electrical tape
Electrical tape is useful for securing and installing wires when making connections. It will help in preventing short circuits and keep the wiring tidy and organized during the handlebar replacement process.
#6. Threadlocker
To make sure that the bolts and screws stay securely in place, especially in high-vibration areas like handlebar attachments, you must apply a small amount of threadlocker to the threads is advised. This will help prevent the fasteners from loosening over time.
#7. Rubber mallet
A rubber mallet can be useful for gently tapping or adjusting handlebar components into position. It will allow you to make fine adjustments while minimizing the risk of damage or scratching the finish.

Preparation before changing the handlebars
Changing the handlebars on a Harley-Davidson bike can be an exciting project, especially for those who want to customize their bike or replace worn-out components. However, before diving into the handlebar change process, it’ll be important to carry out the preparation to ensure a safe and successful endeavor. Here are the important preparation steps you need to follow –
#1. Park your bike in a safe space
Before starting, it will be important to park your Harley in a safe and appropriate location. Choose a flat and level surface that offers enough space around the bike for you to work comfortably. Avoid parking on sloped or uneven surfaces as this could make the motorcycle unstable and increase the risk of accidents.
If possible, you should consider using a motorcycle lift or stand to elevate your bike, providing better access to the handlebars. This will make the handlebar replacement process easier and safer as you will not have to crouch or strain to reach the necessary components.
#2. Familiarize yourself with the bike
Take time to familiarize yourself with your Harley-Davidson motorcycle before attempting to change the handlebars. Study the owner’s manual specific to your bike’s model and understand the layout and functions of the controls, cables, and wiring harnesses connected to the handlebars.
You must identify the locations of important components like the throttle, brake levers, clutch, handgrips, and switches. This knowledge will help you navigate the handlebar replacement process more quickly and avoid any inadvertent mistakes or damage.
#4. Wear appropriate safety gear
When you are working on a Harley, it’ll be important to prioritize safety by wearing the appropriate gear. For handlebar replacement, you must consider safety equipment like gloves, safety gloves, protective clothing, and more.
You must choose durable and well-fitting gloves that offer proper protection and grip. This will shield your hands from potential injuries and sharp edges, and offer a better grip on tools and components.
Protect your eyes from dust, debris, or any small particles that might be dislodged during the handlebar replacement process. Safety glasses or goggles will be important for preventing eye injuries.
You need to wear appropriate clothing to minimize the risk of cuts, scratches, or burns. Study pants, long sleeves, and closed-toe shoes are recommended.

How to change handlebars on a Harley: Removing old handlebars
Whether you want to know how to change handlebars on a Harley Ultra Classic or a Softail or any other Harley-Davidson bike, removing the old handlebars will be the first step in the process. While it might seem like a slightly daunting task, breaking it down into different phases will make it more manageable. Here are the steps for removing the old handlebars on a Harley-Davidson bike.
Step1: Loosen the handlebar clamps
Start by locating the handlebar clamps on the top triple tree, which secure the handlebars to the bike’s front end. Using the appropriate wrench or socket, you must loosen the bolts or nuts on the handlebar clamps. It is important to loosen them enough to allow movement but not fully remove them at this stage.
Step 2: Disconnect brake and clutch cables
Next up, you will have to disconnect the brake and clutch cables from the handlebars. Start off by locating the cable adjusters near the levers. Loosen the adjusters for creating slack in the cables. This will make it easier to remove them from the handlebars.
Once the cables have enough slack, you must remove the retaining pins or clips that secure them to the handlebars. Gently pull the cables out of their respective levers, being careful not to damage or kink them.
#3. Disconnect the wiring harness connections
If your bike has wiring harness conditions, running through the handlebars, you will have to disconnect them before removing the handlebars. Start off by identifying the wiring connections near the handlebar controls.
Make use of a screwdriver or appropriate tool to disconnect the wiring harness connections. It will be a smart practice to label or take note of the wire connections to ensure easy reassembly later.
#4. Remove old handlebars
Once the brake, clutch cables, and wiring harness connections have disconnected, you’ll now be able to fully remove the handlebars. With the handlebar clamps loose, you should gently wiggly and slide the handlebars out of the clamps.
If the handlebars are stubborn or seem stuck, you can use a rubber mallet or soft-faced hammer to tap them lightly and loosen any remaining grip. Be careful that you do not damage any surrounding components during this process.
#5. Drain the remaining fluid and clean the area
There will be fluid (such as brake fluid) running through the handlebars. Before installing new handlebars, it will be important to drain any remaining fluid and clean the area thoroughly. Refer to your bike’s owner’s manual for specific instructions on draining fluid and disposing of it properly.
After draining the fluid, you must clean the handlebar area, removing any debris or residue. This will ensure a clean surface for installing the new handlebars and maintain the integrity of your motorcycle’s components.
How to change handlebars on a Harley: Installing new handlebars
Installing new handlebars on your Harley-Davidson motorcycle will be the next phase. As long as you know the right steps to carry out, you will be able to install new handlebars on your bike. Here are the steps you will need to follow for installing new handlebars in your Harley-Davidson bike.
#1. Install new handlebar clamps
Begin by placing the new handlebar clamps onto the top triple tree, aligning them with the mounting holes. Make sure that the clamps are oriented correctly and facing the correct direction as per your desired handlebar position.
Once aligned, you must insert the bolts or screws through the clamp holes and into the triple tree. Tighten them securely using the appropriate wrench or socket. Make sure that the clamps are positioned evenly on both sides and securely fastened to the triple tree.
#2. Connect the brake and clutch cables
Before you connect the brake and clutch cables, make sure that they are routed correctly and not kinked or twisted. Start off by inserting the brake and clutch cables into their respective lever housings.
With the cables inserted, you must reattach the retaining pins or clips to secure them in place. Make sure that the pins or clips are seated properly and provide a secure connection.
Next up, you will need to adjust the cable tension by using the cable adjusters near the levers. Gradually tighten the adjusters to remove any slack but make sure that the cables aren’t overly tight, as this can affect their functionality.
#3. Connect the wiring harness connectors
If your bike has wiring harness connections running through the handlebars, it’ll be time to reconnect them. Carefully align the wiring harness connectors and then insert them together until they click into place. Be mindful of any alignment guides or notches that ensure proper connection.
Double-check that all the connections are secure and snug. Make sure that no wires are pinched or trapped between components.
#4. Install new handlebars
With the handlebar clamps in place and the cables and wiring reconnected, it’ll be time to install the new handlebars. Carefully slide the new handlebars into clamps, making sure that they are positioned evenly and aligned with your preferred riding position.
Once the handlebars are in place, you must tighten the clamps bolts or screws. Begin by hand-tightening them and use the appropriate wrench or socket for securing them further. Make sure that the handlebars are secure and don’t move or rotate within the clamps.
#5. Fill the reservoir with fluid
If your new handlebars require fluid, such as brake fluid, you will have to fill the reservoir accordingly. Refer to your bike’s owner’s manual for specific instructions on filling the reservoirs and bleeding the system. Use the recommended type and grade of fluid and make sure that the reservoir is properly filled to the indicated levels.
How to change handlebars on a Harley: Applying the finishing touches
You have almost installed new handlebars on your bike. As you’re nearing the completion of the process, it’ll be important to carry out a few final steps to ensure everything is secure and functioning properly. Here are the final steps to finish changing the handlebars on your Harley-Davidson bike.
#1. Tighten the bolts and nuts
With the new handlebars in place, it’ll be important to double-check and tighten all the bolts and nuts involved in the installation. Starting with the handlebar clamps, use the appropriate wrench or socket for tightening the bolts securely. Make sure that they are tightened evenly on both sides to prevent any imbalance.
Next up, you’ll need to check the tightness of all other bolts and fasteners that are loosened during the installation process, such as those securing control switches, housings, and other related components. Tighten them according to the manufacturer’s recommended torque specifications, ensuring they are secure but not overtightened.
#2. Check all the connections
After tightening the bolts and nuts, carefully inspect all the connections that you made during the handlebar installation. This includes the brake and clutch cable connections, wiring harness connectors, and any other connections specific to your Harley-Davidson motorcycle.
Make sure that all connections are properly seated and engaged. You should double-check that there are no loose or disconnected cables, wires, or plugs. Verify that all the connectors are secure and snug.
Inspect the routing of the cables and wiring, ensuring that they are properly positioned and not twisted or pinched. Take your time to ensure that everything is in its correct place as any loose or improper connections can compromise the functionality and safety of your bike.
#3. Test all the functions
Once you have confirmed that all the connections are secure, it’ll be time to test the various functions of your Harley-Davidson bike. Start the engine and test the functionality of the handlebar controls, including the throttle, clutch, brake levers, and switches.
Make sure that the brake lever activates the brakes smoothly and effectively. Test the clutch lever to make sure it disengages and engages smoothly. Check that all switches, such as turn signals, lights, and horns are working correctly.
Moreover, check the handlebar’s range of motion. Turn the handlebars fully in both directions to ensure that they don’t interfere with any other components and have a smooth range of motion.
Take your Harley out for a short ride in a safe area to further test the handlebar functionality, steering, and overall comfort. Pay close attention to any abnormal vibrations, noises, or handling issues. If you’re noticing any concerns, you should stop riding and address them before further use.
ALSO READ: What Is The Leather Strap On Motorcycle Handlebar
Symptoms that the handlebars in your Harley-Davidson bike need changing
Handlebars are an integral part of any motorcycle, including Harley-Davidson motorcycles as they provide control, stability, and comfort to the rider. Over time, handlebars do wear out or become unsuitable for your riding style and preferences. Recognizing the signs that indicate it is time to change your handlebars will be important for maintaining optimal control and ensuring a comfortable riding experience. Here are some of the common symptoms that suggest it is time to change the handlebars on your Harley-Davidson bike.
#1. Discomfort or fatigue
One of the primary reasons for changing the handlebars is discomfort or fatigue while riding. If you’re experiencing discomfort or numbness in your hands, wrists, or arms, it will be an indication that the current handlebars do not provide the right ergonomics for your riding position.
Uncomfortable handlebars can result in strain and fatigue, making long rides a challenging and tiring experience. Changing the handlebars with a different shape, height, or pullback can alleviate such issues and provide a more comfortable riding position.
#2. Limited range of motion
If you find that your current handlebars restrict your range of motion or hinder your ability to maneuver the bike comfortably, it is a sign that a change is needed. Your handlebars must allow you to turn smoothly, navigate tight corners, and perform maneuvers without any hindrance. If you feel cramped or struggle to make precise movements, it’ll be time to consider handlebars that offer better clearance and allow for a wider range of motion.
#3. Handling issues
If you’re noticing changes in your bike’s handling, such as instability, difficulty in maintaining a straight line, or excessive vibration, it might be because of the handlebars. Worn or damaged handlebars can affect your Harley’s stability and compromise your control. Loose or bent handlebars can cause handling problems. If you have ruled out other potential causes and handling issues persist, replacing the handlebars might resolve the problem.
#4. Upgrading for riding style
Another reason it might be time to change the handlebars will be to match your riding style and preferences. Harley-Davidson offers a wide range of handlebars with different shapes and styles to accommodate various riding positions, including touring, cruiser, and sportier riding styles.
If you have transitioned from one style to the other or find that your current handlebars do not provide the desired riding experience, upgrading to handlebars specifically designed for your preferred style could enhance your comfort and control.
#5. Damage or wear
You must inspect your handlebars regularly for signs of damage or wear. Look out for cracks, dents, corrosions, or any other visible signs of deterioration. Over time, handlebars can weaken because of stress, vibration, or external factors like accidents or harsh weather conditions. If you’re noticing any structural issues or damage, it’ll be important to replace the handlebars promptly to ensure your safety while riding.
FAQs
What tools do I need to change the handlebars on a Harley?
o change the handlebars on a Harley, you will need a few tools including a Phillips head screwdriver, a flathead screwdriver, a set of Allen wrenches, and a torque wrench. You may also need a set of handlebar risers, depending on the type of handlebars you are installing.
How do I remove the existing handlebars from my Harley?
To remove the existing handlebars from your Harley, you will need to loosen and remove the clamps from the handlebars. Once the clamps are removed, you can then loosen and remove the mounting bolts from the handlebars and risers. Once the bolts are removed, you can then carefully remove the handlebars.
What steps do I need to take to install new handlebars on my Harley?
To install new handlebars on your Harley, you will need to start by ensuring that the handlebar risers are properly secured to the top tree. Once the risers are in place, you can then install the new handlebars onto the risers and secure them with the mounting bolts. Finally, you can tighten the clamps to secure the handlebars in place and use a torque wrench.

