If you’re ready to give your Harley Street Glide a brand-new look, then it’s time to learn how to change the handlebars.
To change handlebars on a Street Glide, remove the fairing to access handlebar bolts, disconnect wiring, and unbolt the old handlebars. Install new bars, reconnect wiring, and adjust all connections before reattaching the fairing.
Whether you’re a first-time DIYer or a seasoned pro, this easy-to-follow guide will show you the simple steps to take to change your Harley’s handlebars. Plus, you’ll be able to customize your bike to your own unique style and preferences. So, if you’re ready to hit the open road with a brand-new look, let’s get started!
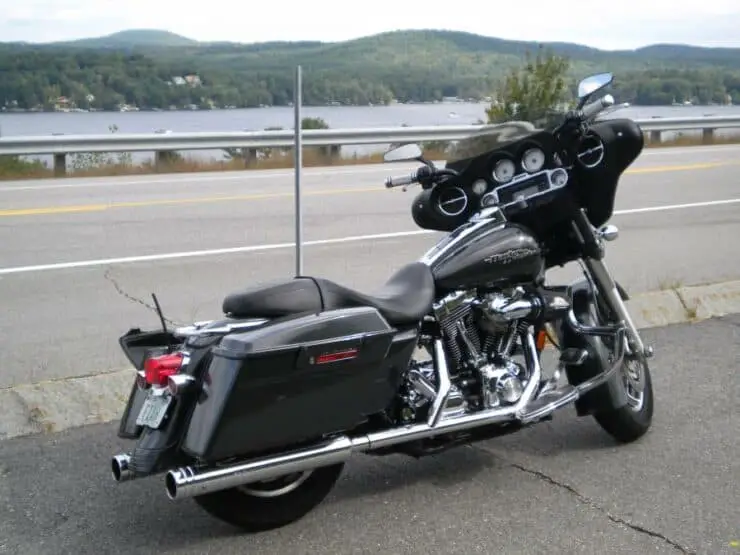
Handlebars on a Harley-Davidson Street Glide
The handlebars on a Harley-Davidson Street Glide aren’t just an essential control component, but they’re also a prominent visual feature that greatly contributes to the overall style and riding experience of the bike.
Handlebars that have a slight pullback bring the grips closer to the rider, promoting a more relaxed riding position. Wider handlebars can easily enhance stability and control, especially during low-speed maneuvers. The handlebars typically accommodate various grip styles, like the traditional round grips or more ergonomic designs that offer enhance comfort and vibration dampening.
Harley-Davidson offers an impressive range of accessories and aftermarket options for customizing the handlebars. These include different types, finishes, and additional features like hand controls and built-in instrumentation. It is important that you consider factors like riding style, rider height, and personal preferences when selecting handlebars.
If you’re in the market for a new handlebar for your Street Glide, then you should be aware of the different types of handlebars and materials used. If you’re aware of the different characteristics of Street Glide, you’ll know whether a specific handlebar is ideal for you.

Types of handlebars
Here are the different types of handlebars that you can use for your Street Glide –
#1. Stock handlebars
The Harley-Davidson Street Glide typically comes equipped with a set of high-quality stock wallpapers that offer an extremely comfortable riding position for most bikers. These handlebars are designed to offer ergonomics and rider comfort.
#2. Ape hangers
Ape hanger is a popular aftermarket choice that is characterized by the tall, curved design that extends above the rider’s shoulders. These handlebars provide a classic and custom look, but they might require cable and wiring modifications for proper fitment.
#3. Beach bars
Similar to ape hangers, Beach Bars also come with a relaxed, swept-back shape that offers a laid-back riding position. These handlebars come with a cruiser-style appearance, and they are often favored for their comfort during long rides.
#4. Drag bars
Drag bars are low and straight handlebars that offer an aggressive and sporty riding position. They provide a much more leaned-forward posture, enhancing control and maneuverability. These handlebars are quite popular among bikers who are looking for a performance-oriented look.
Material and finish
The handlebars in a Harley-Davidson Street Glide come in various materials and finishes. Some of the popular ones are –
#1. Steel
Harley-Davidson handlebars are commonly made using steel, which provides strength and durability. Steel handlebars are best known for their ability to absorb vibrations and offer a solid feel while riding.
#2. Chrome
Many stock and aftermarket handlebars come with a chrome finish. Chrome offers a shiny and reflective surface, adding a touch of classic Harley-Davidson style to the Street Glide’s overall appearance.
#3. Powder Coating
Some handlebars come with a powder-coated finish. Powder coating will offer a durable and resistant coating that can withstand weather elements and provides an impressive range of color options.
How to change handlebars on a Harley Street Glide: Preparation
Changing the handlebar on your Harley-Davidson Street Glide can be an exciting and helpful addition. Like any other modification, changing handlebars on your Street Glide will require the right tools and safety gear. If you have the necessary tools and materials, you’ll be able to ensure a smooth and safe process.
Here are the necessary tools and materials that you will need when changing the handlebars –
- A socket set – A comprehensive socket set with both metric and standard sizes will be required when you’re removing and installing various bolts and fasteners
- Allen wrench set – Many components on your Street Glide such as the handlebar controls require Allen head bolts, so having a set of Allen wrenches in different sizes is important
- Torque wrench – For ensuring proper tightening of bolts and preventing over-tightening, a torque wrench will be required
- Pliers and wire cutters – These tools could come in handy when removing and installing wires and cables
- Electrical tape – Electrical tape is used for securing and insulating electrical connections
- Screwdrivers – A set of screwdrivers, both Philips head and flathead, will be required for various tasks
Here are the necessary tools and materials that you will need when changing the handlebars –
- Safety glasses – A pair of safety glasses will help protect your eyes from dust, debris, and any potential hazards during the installation process
- Gloves – Wearing gloves can provide a better grip and protect your hands from cuts, abrasions, and potential chemical exposure
- Ear protection – Changing the handlebar might involve using power tools, which can help generate loud noises, so wearing ear protection will help safeguard your hearing
- Mask or respirator – If you’re going to be working with paints or chemical solvents, wearing a mask or a respirator will help protect you from fumes and inhalation hazards
You should remember that safety must always be your top priority when working on your Street Glide. It is important that you consult your bike’s service manual or seek guidance from a qualified mechanic to ensure proper installation and avoid any issues.

How to change handlebars on a Harley Street Glide: Remove the handlebars
When you’re installing new handlebars on a Street Glide, you will first want to know the right steps to remove the old handlebars. There are a number of steps involved to ensure you can remove the handlebars safely and efficiently. So without further ado, let’s see how to remove handlebars on your Street Glide –
#1. Prepare the workspace
Before you can start work, you should first look for a suitable workspace that has enough room to maneuver around your Street Glide. Moreover, make sure that you have the necessary tools and materials available, including a socket set, pliers, Allen wrenches, electrical tape, and more.
#2. Detach the throttle and clutch cables
Start off by loosening the throttle cable adjustment to provide slack. You should then locate the throttle grip assembly, which will be held in place by two screws or Allen bolts. Remove the fasteners and slide the throttle grip off the handlebars carefully. Make sure that you don’t end up damaging the cables.
Coming to the clutch cable, you must first locate the clutch lever assembly on the handlebars. Using an Allen wrench, you must loosen the bolt that holds the clutch lever in place. Once it is loose, you can carefully slide the clutch lever assembly off the handlebars, ensuring that you don’t damage any component.
#3. Unscrew the old handlebars
Locate the handlebar riser bolts under the top triple tree. With the help of a socket set or suitable wrench, you should loosen and remove the bolts on both sides of the risers. These bolts are responsible for securing the handlebars to the risers and triple trees. Once the bolts have been removed, you should lift the handlebars slightly to make sure that they are free from any attachments or wiring.
Next up, you should check for any wires or cables that might be routed through the handlebars. Carefully, you should disconnect any electrical connectors or loosen cable ties to create slack. With the help of an Allen wrench, you should unscrew any control switch housings or any other accessories attached to the handlebars. Then, set the components aside for reinstallation of the new handlebars if needed.
#4. Remove the old handlebars
With all attachments and wiring disconnected, you should carefully lift the old handlebars upward and guide them out of the risers and steering head. Once you remove the old handlebars, you should make sure that no wires or cables snag or get damaged during this process. Take time and exercise caution so that you can prevent any mishaps.
During the removal process, you must pay close attention to the routing and positioning of wires and cables. Take pictures or make notes if necessary for ensuring correct reinstallation later on. Consulting an expert will always be helpful as they will help you carry out the removal process with ease.
How to change handlebars on a Harley Street Glide: Install new handlebars
Installing new handlebars on your Harley-Davidson Street Glide will help enhance the style and riding experience of your bike. Once you have successfully removed the old handlebars, the next step would involve aligning and installing new handlebars. As long as you know the right steps, you can easily pull off the installation. Here is how to install new handlebars on your Street Glide –
#1. Align the handlebars
Before you insert the new handlebars, it is important that you ensure they are aligned properly. Begin by placing the new handlebars in the risers and aligning them with the front wheel. Make note of the handlebar’s position and ensure that it feels comfortable and visually centered.
#2. Insert the new handlebars
Start by routing any wires or cables that run through the handlebars. Take special care that you thread them through the openings in the new handlebars, following the same path as before. You should gently lower the new handlebars into the riders, ensuring that they are aligned with the front wheel. Take time and be cautious that you do not pinch or damage any wires or cables during this step.
#3. Secure the new handlebars
Once the handlebars are inserted properly, it’ll be time to secure them in place. Start off by loosely tightening the handlebar riser bolts or screws for holding the handlebars in position. This will help you make final adjustments before you tighten everything securely. Moreover, you should check the handlebar’s alignment and make necessary adjustments to ensure that they are straight and centered with the front wheel. This step will be important for comfortable and precise handling.
Gradually, tighten the handlebar riser bolts or screws on each side using a socket set or a suitable wrench. Start with a snug fit and gradually torque them to the manufacturer’s specifications. This will prevent overtightening or damaging the bolts. Double-check the handlebar’s alignment one last time after tightening so that you can ensure they are still properly centered and aligned with the front wheel.
If you are facing any difficulties or feel unsure during the installation process, it is recommended that you seek the help of a professional mechanic or experienced motorcycle technician. They will help provide expert guidance and ensure that the handlebars are installed correctly, promoting safety and optimal performance.
How to change handlebars on a Harley Street Glide: Re-connect the cables
Once you have successfully installed the new handlebars on your Harley-Davidson Street Glide, the next step will involve connecting the throttle and clutch cables. By properly connecting the throttle cables and clutch cables, you will be able to ensure better operation and control over your bike. Here is how you can connect both the throttle cables and clutch cables –
#1. Connect the throttle cables
Start off by locating the throttle grip assembly on your new Harley-Davidson Street Glide handlebars. You should check that the throttle cable is properly seated in the grip. Slide the throttle grip assembly onto the handlebars such that it aligns with the throttle housing. You need to insert and tighten the screws or Allen bolts that secure the throttle grip assembly to the handlebars. Make sure that they are snug but not overtightened, allowing your smooth rotation of the throttle grip.
Once the throttle grip assembly is securely in place, you need to adjust the tension of the throttle cables. You should consult your Street Glide’s service manual for the proper adjustment procedure. Generally, adjusting the throttle cables involves loosening the cable adjustment locknut and turning the cable adjuster to provide the correct amount of slack or tension. You will have to follow the manufacturer’s specifications for the appropriate cable tension.
#2. Connect the clutch cables
First, you should locate the clutch lever assembly on the new handlebars. Make sure that the clutch cable is properly seated in the lever assembly. Slide the clutch lever assembly onto the handlebars, aligning it with the clutch perch and ensuring that it is oriented correctly.
Insert and tighten the bolts or screws that are securing the clutch lever assembly to the handlebars. Moreover, tighten them snugly, but they should not be excessively tight. Once you have secured the clutch lever assembly, you need to adjust the tension of the clutch cable. For the specific adjustment procedure for your bike, you need to refer to the service manual.
Typically, adjusting the clutch cable will involve loosening the cable adjustment locknut and turning the cable adjuster for achieving the desired amount of free play in the clutch lever. Make sure that the clutch engages and disengages smoothly and that there is appropriate free play in the lever.

#3. Inspect that the cable connections are proper
Once you have connected and adjusted the throttle cables and clutch cables, you have to perform a final inspection of all the cable connections. Moreover, make sure that they are secure and properly seated. Verify that the throttle is operating smoothly and that it returns to the idle position without any binding or sticking.
Test the clutch lever’s functionality by engaging and disengaging the clutch. Make sure that there is proper engagement and disengagement without excessive play or stiffness. Lastly, you should take care and verify that both the cables are functioning correctly and that you have full control of your bike.
How to change handlebars on a Harley Street Glide: Carry out final inspections
After installing new handlebars on your Harley-Davidson Street Glide, it will be important that you carry out the final inspections. This includes ensuring that the bolts are properly tightened, all connections are securely in place, and more. Here are the steps that you will need to follow –
#1. Handlebar riser bolts
Start off by double-checking the handlebar riser bolts that secure the handlebars to the triple tree. Make use of a suitable wrench or socket set for ensuring they are properly tightened. You need to tighten to bolts in a crisscross pattern, gradually increasing the torque until they are securely tightened.
You shouldn’t be afraid to refer to your Street Glide’s service manual for the recommended torque specifications for the handlebar riser bolts. Over-tightening the bolts can end up damaging the bolts or components, while under-tightening can lead to lose handlebars.
#2. Control switch housings and accessories
If you have removed control switch housings or other accessories from the old handlebars, you should ensure that you reattach them to the new handlebars securely. Make use of the appropriate tools, such as Allen wrenches or screwdrivers, for tightening the fasteners and ensure a snug fit.
You need to check each control switch housing, lever assembly, or accessory for potential signs of looseness or play. If needed, you have to tighten any fasteners that might have become loose during the installation process.
#3. Cable connections and wire routing
You need to inspect all cable connections and wiring for verifying that they are seated and connected properly. Make sure that any wires or cables that run through the handlebars have been routed correctly and that they are pinched or twisted.
You must check that the electrical connectors are securely plugged in, and use cable ties or clips to tidy up any loose wiring or cables, ensuring they are safely secured.
#4. Final inspections
Carry out a visual inspection of the entire handlebar assembly, paying close attention to all connections, bolts, or accessories. Ensure that all fasteners are tightened appropriately but avoid overtightening as it could result in damage.
Test the functionality of all controls, including the throttle, switches, clutch, and any other accessories. Rotate the handlebars from lock to make sure that there are no obstructions or interference with other components. Take your Harley-Davidson Street Glide out for a short test ride in a controlled environment to verify that the handlebars feel secure and responsive.
If you are having any concerns or difficulty tightening bolts or checking connections, you should either consult the service manual or take help from a professional mechanic.
FAQ
What tools do I need to change handlebars on a Harley Street Glide?
To change the handlebars on a Harley Street Glide, you will need a few basic tools, including a metric socket set, a metric wrench set, a screwdriver, a torque wrench, and an adjustable wrench. You may also need a pair of pliers and a few other specialized tools, depending on the type of handlebar and mounting hardware being used.
How do I remove the handlebars on a Harley Street Glide?
To remove the handlebars on a Harley Street Glide, first use the metric socket set to remove the upper and lower bolts securing the handlebar clamps. Once the clamps are loose, you can use the screwdriver to remove the clamps and the handlebars. Make sure to keep track of all the mounting hardware, and be sure to save the top clamp to use when mounting the new handlebars.
What should I consider when choosing a new handlebar for my Harley Street Glide?
When choosing a new handlebar for your Harley Street Glide, you should consider the shape and size of the handlebar, the placement of the controls, and the style. It’s important to find a handlebar that fits your riding style

