Welcome, Harley Davidson Ultra Classic owners! If you’re looking for a comprehensive guide to changing the oil in your ride, you’ve come to the right place.
To change the oil, warm up the engine, remove the oil drain plug and let it drain. Replace the oil filter, reinstall the drain plug, and fill with fresh oil to the specified level using the dipstick to check.
In this article, we’ll be providing a step-by-step guide to changing your oil in a way that will help ensure a smooth, trouble-free journey for many miles to come! So if you’re ready to get started, let’s jump right in!
Importance of oil in a Harley-Davidson Ultra Classic
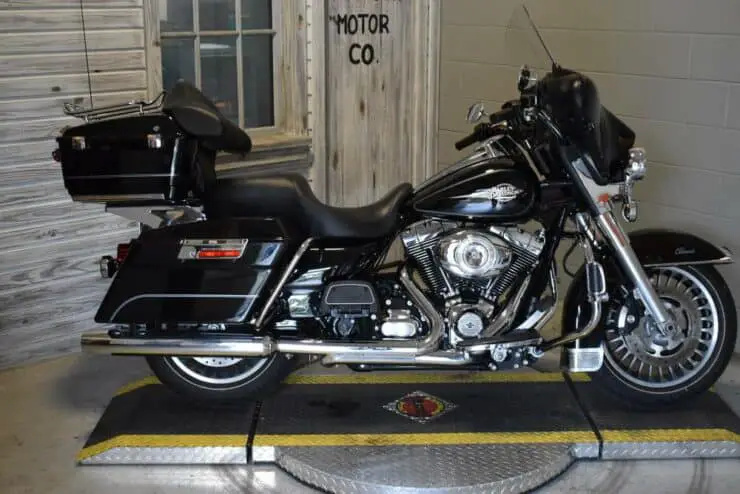
The Harley-Davidson Ultra Classic is a legendary touring bike from Harley’s Grant American Touring lineup. This masterpiece is known for optimizing power, style, and comfort. Behind its impressive performance will lie a crucial element that is often overlooked – oil. Oil serves as the lifeblood of the Harley-Davidson Ultra Classic, ensuring optimal engine function, lubrication, and longevity.
One of the most important functions of oil in Ultra Classic is engine lubrication. The engine consists of numerous moving parts like pistons, crankshafts, and camshafts that operate at high speeds and under extreme heat and pressure. Oil essentially forms a protective film between these components, reducing friction and wear. This lubrication will prevent metal-to-metal contact and minimize heat generation, hence preserving the longevity and performance of the engine.
Moreover, oil also helps with heat dissipation. The Ultra Classic’s air-cooled engine design generates substantial heat during operation. Oil will play a crucial role in dissipating this heat. As the oil circulates through the engine, it’ll absorb heat from the hot engine components. It will then carry the heat away from the oil cooler, where it’ll be dissipated into the surrounding air. Efficient heat dissipation will help prevent overheating, ensuring that the engine operates within the optimal temperature range for peak performance.
Regular oil changes are important for maintaining the health of your Harley-Davidson Ultra Classic’s engine. Over time, oil breaks down, loses its viscosity, and becomes contaminated with particles and sludge. By adhering to the manufacturer’s recommended oil change intervals, you’ll ensure that fresh, clean oil circulating through the engine, providing optimal lubrication and protection.

Tools and materials needed for changing the oil
Changing oil regularly on your Harley-Davidson Ultra Classic will be vital as it’ll help maintain optimal performance and longevity of the bike. To perform an oil change successfully, you will first need to have the right tools and materials. Here are some of the important tools and materials needed for changing the oil in your Ultra Classic.
#1. Motorcycle jack
A motorcycle jack is an important tool for elevating your Harley-Davidson Ultra Classic and providing a stable platform to work on. Go for a high-quality, sturdy motorcycle jack that is capable of safely supporting the weight of the bike. Make sure it has a wide base and secure attachment points to prevent any accidents or damage to your motorcycle during the oil change process.
#2. Oil filter
The oil filter is responsible for removing contaminants and debris from the engine oil, ensuring clean oil circulates through the engine. It is important to select the correct oil filter designed specifically for your Ultra Classic model. You must refer to your bike’s owner’s manual or consult with a trusted mechanic or dealer to ensure you choose the right filter.
#3. Oil drain pan
An oil drain pan will be important for collecting and safely disposing of the used oil. Choose a pan capable of holding an adequate amount of oil, has a secure lid or cap, and is resistant to leaks. Go for pans specifically designed for oil changes to ensure ease of use and prevent spills or accidents.
#4. Socket wrench
A socket wrench, preferably with a wide variety of socket sizes, is indispensable for removing and reinstalling the oil drain plug and oil filter. Ensure that the socket wrench fits the specific sizes needed for your Ultra Classic’s drain plug and oil filter housing. This highly versatile tool allows for easy and efficient removal and installation of these components.
#5. Oil of choice
Choosing the right oil option for your Harley-Davidson Ultra Classic is important for optimal engine performance. You need to refer to your bike’s owner’s manual or consult with a trusted mechanic or dealer to determine the recommended oil viscosity and type for your specific model. It is important to choose a high-quality motorcycle-specific oil that meets or exceeds the specifications for optimal lubrication and protection.
Getting started with changing the oil on your Ultra Classic
To start the oil change process on your Harley-Davidson Ultra Classic, you will need to follow certain steps. Knowing how to get started will help you ensure a safe and successful oil change. Here are the steps to follow to get started with changing the oil on your bike.
Step 1: Place your Ultra Classic on a jack
Before you start the oil change process, it’ll be important to elevate your Harley-Davidson Ultra Classic on a sturdy motorcycle jack. To do that, first, you should find a flat and stable surface for parking your bike. Make sure that your bike is in neutral and turn off the engine.
Position your motorcycle jack under the frame or designated lifting points as per the manufacturer’s instructions. Slowly raise the jack until your bike is securely lifted off the ground. You should take care that you distribute the weight evenly to maintain stability. Verify that your bike is stable and securely positioned on the jack before proceeding with the oil change.
Step 2: Remove the oil filter cap
The next step will involve removing the oil filter cap for gaining access to the oil filter. First, you should locate the oil filter cap on the engine, typically positioned on the side or bottom of the engine casing. Placing an oil drain pan directly under the oil filter cap for catching any oil that might spill during the removal process.
Using a socket wrench, you should carefully loosen and remove the oil filter cap. Once the cap has been removed, you should set it aside in a safe place. Be cautious as some residue oil might drain from the cap. Inspect the oil filter for any signs of damage like cracks or tears. If the oil filter appears damaged, it is recommended that you should replace it with a new one.
Step 3: Remove the oil drain plug
Once you have accessed the oil filter, it’ll be time to remove the oil drain plug. To do that, you should first locate the oil drain plug on the bottom of the engine casing. Typically, it is a hexagonal or square-shaped bolt. Position the oil drain pan directly underneath the oil drain plug.
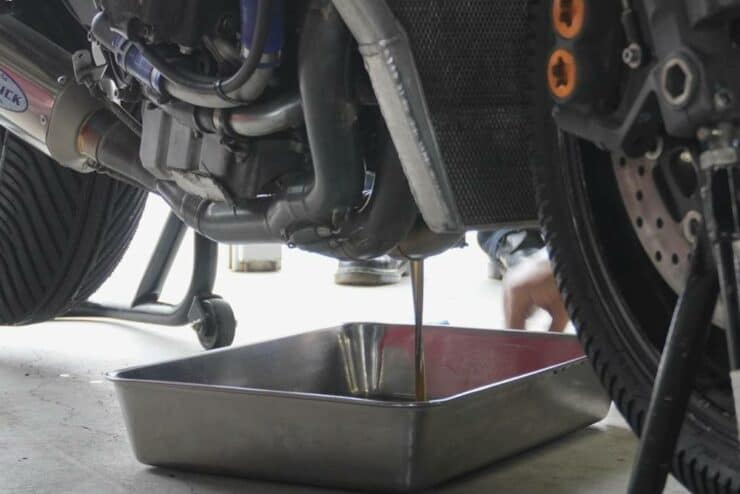
With the help of a socket wrench, carefully loosen and remove the oil drain plug. Make sure that the oil drain pan is in place to catch the draining oil. Allow the oil to drain completely into the oil drain pan. This might take a few minutes depending on the amount of oil in the engine. Once the oil has drained completely, inspect the drain plug for any signs of damage or wear. Clean the drain plug and set it aside for re-installation later.

How to change oil in Harley-Davidson Ultra Classic: Drain the old oil
Performing an oil change on your Harley-Davidson Ultra Classic will be quite easy as long as you know the right steps. Once you have the necessary tools and you have gotten started with the oil change process, it’ll be important to follow these specific steps to safely and effectively drain the old oil from the engine. Here are the steps that you should follow to drain the old oil out of your Harley-Davidson Ultra Classic.
Step 1: Place the old drain pan underneath the bike
Before starting out the process of draining the oil, it’ll be important to position an oil drain pan beneath the motorcycle to catch the oil. First, you should gather a suitable oil drain pan that can accommodate the volume of oil in your Ultra Classic’s engine.
Then, you should position the oil drain pan directly underneath the oil drain plug, which is usually located on the bottom of the engine casing. Make sure that the oil drain pan is stable and properly aligned to catch the oil without any spillage.
Step 2: Loosen the oil drain plug with a socket wrench
Once the oil drain pan is positioned correctly, the next step would be to loosen the oil drain plug using a socket wrench. Choose a socket wrench with the appropriate size socket that matches the oil drain plug on your Ultra Classic.
Then, you should insert the socket wrench onto the drain plug and turn it counterclockwise for loosening the plug. Apply steady and controlled pressure, taking care that you don’t strip or damage the plug. You must loosen the drain plug just enough such that you can remove it by hand once the oil is ready to drain. Make sure that the oil drain pan is still securely positioned to catch the oil flow.
Step 3: Remove the oil plug and allow the oil to drain
With the oil drain plug loosened, you’ll be able to remove the plug and allow the old oil to drain out of the engine. To do that, you should first carefully remove the old drain plug by hand once it is loose enough. Make sure that you’re cautious as the plug might be hot so you should be using gloves or a towel if needed.
Allow the old oil to drain fully into the oil drain pan. Depending on the temperature, viscosity, and condition of the oil, this process could take several minutes. Once the oil has drained completely, inspect the drain plug for signs of damage or wear. Clean the plug and keep it aside for reinstallation during the oil change process.
You need to verify that the oil drain pan has captured the drained oil and isn’t leaking. Make sure that the drain plug hole is clear of any debris and ready to add fresh oil.
How to change oil in Harley-Davidson Ultra Classic: Replace the oil filter
When you’re changing the oil in your Ultra Classic, it’ll be a good time to replace the oil filter as well. A clean and properly functioning oil filter will help maintain engine performance and prolong the life of your bike. Here are the steps involved with replacing the old oil filter to keep you on the route to changing the oil in your Harley-Davidson Ultra Classic.
Step 1: Unscrew the oil filter
Start by locating the oil filter on your Harley-Davidson Ultra Classic. It is usually positioned on the side or bottom of the engine casing. With the help of an appropriate tool, like an oil filter wrench or a suitable grip, carefully loosen the oil filter by turning it counterclockwise. Take care that you shouldn’t overtighten the filter during installation as this could make removal difficult. Slowly unscrew the oil filter until it is completely detached from the engine. Be prepared for the residual oil to drain from the filter housing.
Step 2: Remove the old oil filter
Once the oil filter has been unscrewed completely, you should gently pull it away from the filter housing. You must keep the filter upright for preventing the oil from spilling. Inspect the old oil filter for any signs of damage, such as excessive debris buildup, cracks, or tears. If the oil filter is damaged or appears clogged, it’ll be crucial to replace it with a new one. You must properly dispose of the old oil filter in accordance with local regulations. You must avoid dumping it in regular trash as used oil could harm the environment.
Step 3: Clean the filter mounting area
Before you install the new oil filter, make sure that the filter mounting area is clean and free from any debris or residual oil. Make use of a clean cloth or shop rag for wiping away any dirt or oil buildup. Inspect the filter mounting surface for any signs of damage or wear. If you notice any problems, you should address them accordingly before proceeding.
Step 4: Apply a small amount of oil to the new filter
Before you install the new oil filter, apply a small amount of fresh oil to the rubber gasket or O-ring on the filter. This will help create a good seal and prevent dry start-ups. Take a small amount of oil on your finger or a clean cloth and evenly coat the rubber gasket or O-ring.
Step 5: Screw the new filter into place
You should carefully align the new filter with the filter mounting area on the engine. Before you screw the new filter into place by hand, you should turn it clockwise. Make sure that it is properly aligned and threads smoothly onto the filter housing.
Use an oil filter wrench on your hand for tightening the new filter. Follow the manufacturer’s instructions or consult your bike’s owner’s manual to determine the recommended torque specifications. Avoid overtightening the new filter as it could damage the filter or housing. A snug fit is normally sufficient to create a proper seal.
How to change oil in Harley-Davidson Ultra Classic: Replace the oil and finish up
Once you have gathered the necessary tools and equipment, removed the old oil, and replaced the oil filter, you will be in an ideal position to replace the oil and finish up. Here are the steps you will need to carry out to change the oil in your Harley-Davidson Ultra Classic.
Step 1: Pouring oil into the oil filter hole
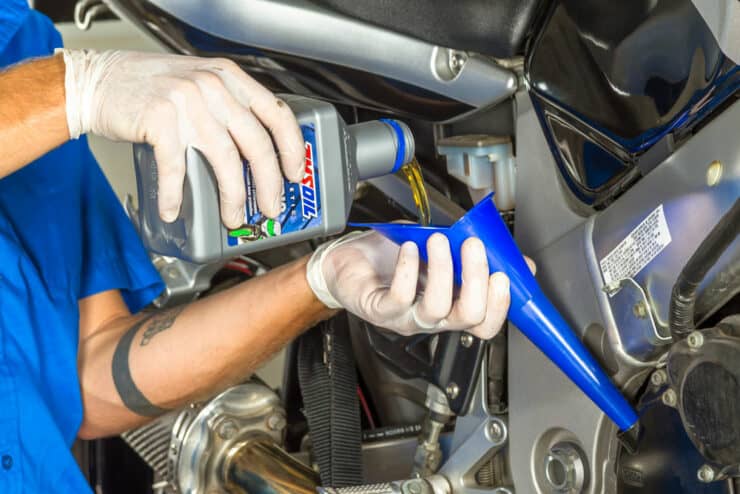
First, you will need to locate the oil filter hole on your Harley-Davidson Ultra Classic engine. It is typically located near the oil filter cap or housing. Then, you should slowly pour the recommended amount of fresh, high-quality motorcycle-specific oil into the oil filter hole.
You must refer to your bike’s owner’s manual or consult with a trusted mechanic or dealer for the correct oil type and quantity. Take care that you don’t overfill the oil filter hole. It is advised that you should pour the oil in small increments and periodically check the oil level to ensure it stays within the recommended range.
Step 2: Replace the oil filter cap
Retrieve the oil filter cap that you had removed earlier. Ensure that it is clean and free from any debris or old gasket material. Position the oil filter cap over the oil filter housing and carefully thread it clockwise until it is snug. Take care that you don’t cross-thread the cap. Make use of a socket wrench or the appropriate tool for tightening the oil filter cap to the recommended torque specifications. be cautious that you don’t overtighten as it might cause damage or leaks.

Step 3: Re-attach the oil drain plug
You need to retrieve the oil drain plug that was previously removed and ensure it is clean and free from any debris. Now, position the oil drain plug back into its original location on the engine casing. With the help of a socket wrench or the appropriate tool, you must carefully tighten the oil drain plug clockwise. Make sure that it is securely fastened but avoid overtightening it as it could damage the threads.
Step 4: Lower the motorcycle from the jack
Slowly and carefully lower your Harley-Davidson Ultra Classic from the jack, ensuring a stable and controlled descent. Keep a close eye on the motorcycle’s balance and stability as it is lowed. Make sure that all four tires are firmly in contact with the ground before proceeding.
Step 5: Check the oil level
With your Ultra Classic on level ground, you should start the engine and let it idle for a couple of minutes. This will allow the oil to circulate throughout the engine. After idling, you should turn off the engine and wait for a few minutes so that the oil settles down.
Locate the oil dipstick, which is typically located on the engine cases. Remove the dipstick, wipe it clean using a cloth or rag, and reinsert it fully into the oil filler hole. Remove the dipstick once again and check the oil level. Make sure that it falls within the recommended range indicated on the dipstick or in the bike’s owner’s manual. If the oil level is low, you should add more oil in small increments until it reaches the correct level. Be cautious that you do not overfill it.
Also read: What does FLH Mean?
FAQs
What type of oil should I use for my Harley Davidson Ultra Classic?
It is recommended to use Harley-Davidson certified oils for your Harley Davidson Ultra Classic. These oils are specifically designed for Harley-Davidson engines and provide maximum engine protection and performance. You should also use the correct viscosity grade of oil for your engine, as specified in your owner’s manual.
What are the steps for changing the oil in my Harley Davidson Ultra Classic?
Changing the oil in your Harley Davidson Ultra Classic is a relatively simple process. First, you should warm up the engine to ensure the oil is warm and easy to drain. Then, locate the oil drain plug and remove it to allow the oil to drain into a suitable container. Once the oil has drained, replace the drain plug and refill the engine with the correct amount of new oil. Finally, start your engine and check for any leaks.
What are the benefits of changing the oil in my Harley Davidson Ultra Classic?
Changing the oil regularly in your Harley Davidson Ultra Classic is essential for keeping your engine running optimally. Regular oil changes help to reduce engine wear and increase its efficiency, as well as improve performance and fuel economy. In addition, clean oil helps to reduce emissions and keep your engine running

