Welcome all Harley Davidson Fatboy owners! Changing your oil is a great way to maintain your bike, and it’s easier than you think.
Warm up the engine, place the Fat Boy on a level surface, remove the drain plug to let oil drain, replace the oil filter, reinstall the plug, and fill the oil tank to the recommended level, checking with the dipstick.
This article will provide you with an easy step-by-step guide to changing your oil. So if you have a Fatboy and are ready to get your hands a little dirty, read on for the full guide!
Overview of Harley-Davidson Fatboy
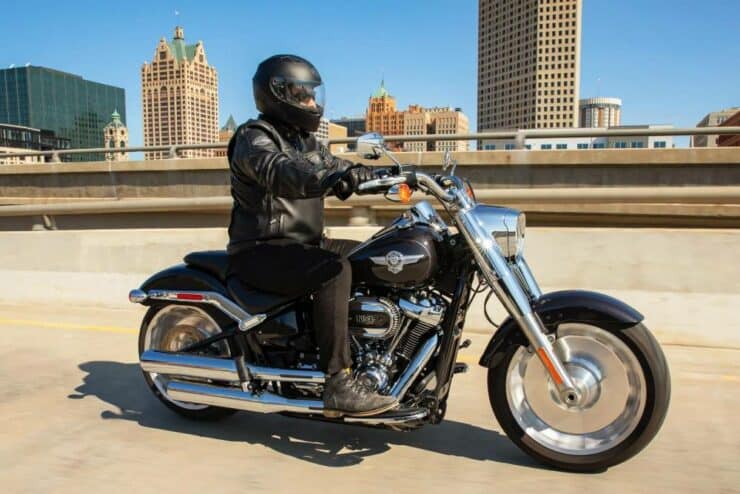
The Harley-Davidson Fatboy is a legendary motorcycle from the iconic American motorcycle brand that has captured the hearts of bikers and Harley enthusiasts around the world. Since it was introduced in the early 90s, the Fatboy has become an iconic symbol of American motorcycle culture and a staple in Harley-Davidson’s lineup. With its rich heritage, distinctive style, and powerful performance, the Harley-Davidson Fatboy continues to be a highly sought-after model for bikers looking for a unique and exhilarating riding experience.
One of the most striking features of this bike is its bold and muscular design. It showcases a classic cruiser profile with a wide and low-slung stance, which emphasizes its powerful presence on the road. The bike’s signature feature is its large, solid disc wheels that contribute to its distinctive look and enhance its overall aesthetic appeal. The bike is often characterized by its chrome accents, including the iconic shotgun-style exhaust pipes, adding a touch of elegance and nostalgia to its design.
Under its eye-catching exterior, the Fatboy boasts impressive performance capabilities. It comes powered by a Milwaukee-Eight engine, which delivers substantial torque and power, allowing bikers to feel the thrill of acceleration and experience the open road with confidence. The engine’s displacement might vary depending on the specific model and year but it consistently offers a robust and exhilarating riding experience.
In terms of handling, the bike features a low center of gravity and a well-balanced chassis, offering stability and control, especially during long rides or when navigating winding roads. Its comfortable seating position and ergonomics make it a great choice for extended journeys, ensuring bikers can enjoy their adventures without feeling fatigued. Further, the bike also comes equipped with advanced technology and features to enhance the overall riding experience. Modern iterations of the bike come with features like electronic throttle control, LED lighting, and anti-lock braking systems. These features improve safety and performance while also maintaining the classic charm and allure that this bike is known for.
Over the years, the Harley-Davidson Fatboy has undergone numerous updates and iterations, adapting to changing trends and technological advancements while staying true to its iconic heritage. Further, the bike has also made appearances in popular culture, which further cemented its status as an American icon. The Harley-Davidson Fatboy has become synonymous with the spirit of freedom, rebellion, and adventure.

Tools and materials needed for changing oil
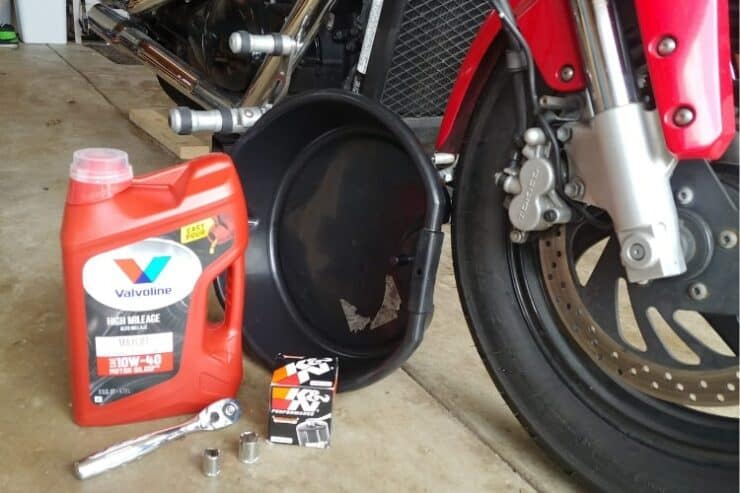
Changing the oil on your Harley-Davidson Fatboy is an important part of motorcycle maintenance. It helps in ensuring the longevity and optimal performance of the engine. While this task might seem daunting initially, having the right tools and materials on hand will make the process easier and more efficient. Here are the necessary tools and materials you will need for changing the oil in your Harley-Davidson Fatboy.
#1. Oil filter wrench
An oil filter wrench is a specialized tool designed for removing the oil filter from the engine. It will provide a firm grip and allow you to easily twist off the old oil filter without damaging it or your hands. You should ensure that you’re choosing a wrench that is compatible with the size and type of oil filter used on your bike.
#2. Oil filter
It is important that you replace the oil filter with a new one during the oil change process. The oil filter will help remove contaminants and impurities from the engine oil, ensuring clean and efficient lubrication. You need to consult your bike’s manual or talk to a Harley-Davidson dealer for determining the correct filter model for your bike.
#3. Oil pan
An oil pan or also known as a catch basin or a drain pan is used for collecting the old oil as it drains from the engine. You must look for a pan that has the capacity to hold the amount of oil specified for your Fatboy model. It should also come with a secure lid for preventing spills during transportation for proper disposal.
#4. Ratchet and socket set
A ratchet and socket set is important for loosening and tightening the drain plug on the oil pan. The drain plug is generally located on the underside of the bike’s engine. The size of the socket required might vary, so you should ensure that you have a set that includes the appropriate sizes for your Fatboy.
#5. Funnel
A funnel is important for pouring the new oil into the engine without spilling. Look for a funnel having a wide opening and a long spout to easily access the oil fill port of the bike. It would be a smart idea to have a clean rag or cloth nearby to wipe out any spills or drips.
#6. Oil filter O-rings and gaskets
Some oil filters might need additional O-rings or gaskets to ensure a proper seal. You must check the oil filter package or consult the manufacturer’s instructions and see if any additional seals are required. it would be a good idea if you have a spare set of O-rings or gaskets present in case of leaks or damage during the oil change.
#7. Oil filter removal tool
Depending on the specific oil filter installed on your Harley-Davidson Fatboy, you might require an additional tool for removing it. Some filters come with a unique design or can be tightly secured. This means you will require a specialized tool for removal.
#8. Oil
Choosing the right type of oil will be important for the optimal performance and protection of your Harley-Davidson Fatboy’s engine. If you aren’t sure, you shouldn’t hesitate in referring to your bike’s owner’s manual or consult with a Harley-Davidson dealer to determine the recommended oil type and viscosity for your specific model and riding conditions. You should ensure that you have the appropriate quality of oil on hand.
Preparation for changing oil the oil in your Harley-Davidson Fatboy
Carrying out the proper preparation for an oil change in your Harley-Davidson Fatboy will be important for ensuring a smooth and successful process. By following the necessary preparation steps, you will set yourself up for a smooth, hassle-free oil change experience. Here are the steps you need to follow for preparation –
#1. Choose a suitable location
You need to find a suitable location for performing the oil change on your Harley-Davidson Fatboy. Ideally, you should select a flat and well-ventilated area that allows you to maneuver around the bike comfortably. Make sure you have enough space for placing the oil pan beneath the motorcycle to catch the drained oil.
#2. Warm up the engine
Start your bike and let the engine run for a few minutes to warm up the engine oil. Warm oil will flow more easily, making it easier to drain from the engine.
#3. Turn off the engine and secure the bike
Once the engine has been warmed up, you must turn off your Fatboy and engage the kickstand. You can also make use of a suitable stand or lift for securing the bike in an upright position. You should make sure that your bike is stable and won’t tip over as it’ll be important for safety during the oil change process.

How to change oil on a Harley-Davidson Fatboy
Regularly changing the oil on your Fatboy will be an essential part of your motorcycle maintenance. Regular oil changes will help keep the engine running smoothly and prolong its lifespan. By following a series of steps, you will be able to confidently perform the oil change on your Harley-Davidson Fatboy. Here are the steps on how to change oil on a Harley-Davidson Fatboy.
Step 1: Warm up the bike
Begin by warming up your Fatboy’s engine and allow it to run for a few minutes. This will help in warming up the oil and making it flow more easily during the draining process.
Step 2: Drain the oil
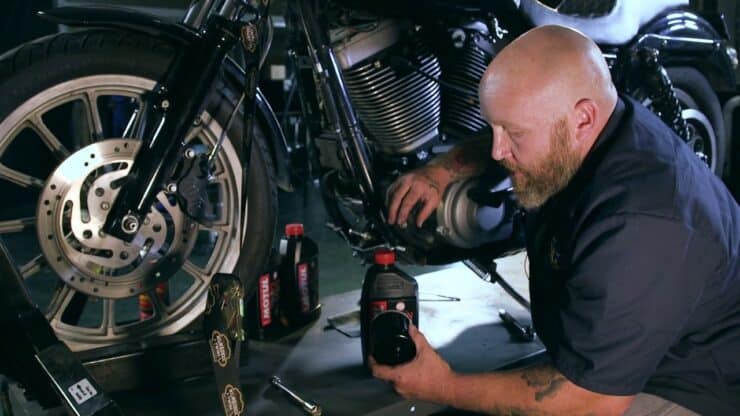
Then, you should locate the oil drain plug on the bottom of the engine. You need to position the oil pan or catch basin directly under the drain plug for catching the old oil. Make use of a socket and ratchet for loosening the drain plug, turning it counterclockwise. Be prepared for a sudden release of hot oil. Then, allow the oil to drain completely into the pan. This could take a few minutes.
Step 3: Replace the oil filter
After draining the oil, it will be time to replace the oil filter. Using an oil filter wrench, you should carefully remove the old oil filter. Be cautious as more oil might spill out. Clean the filter mounting area using a clean rag or cloth. Apply a small amount of clean oil to the rubber gasket on the new oil filter.
This will help you with installation and create a better seal. Screw on the new oil filter by hand until it is snug. Then, you should give it an additional three-quarters to one whole turn to ensure a proper seal.
Step 4: Refill with new oil
After that, you need to locate the oil fill port on your Harley-Davidson Fatboy’s engine. With the help of a funnel, you should pour the recommended type and quality of new oil into the engine.
You should refer to your bike’s owner’s manual for the correct specifications. Pour the oil slowly and allow it to settle before you check the oil level using the dipstick. Add more oil as required until you reach the recommended level.
Step 5: Replace the oil plug
Once you have added the new oil, you will need to clean the drain plug and inspect the washer or O-ring for damage. If needed, you should replace the washer or O-ring. Carefully, you need to thread the drain plug back into the engine and tighten it securely. Be careful that you do not overtighten as it might damage the threads.
Step 6: Clean up and dispose of old oil
Lastly, you need to wipe off any excess oil spills or drips using a clean rag or cloth. Once you have done that, you need to properly dispose of the old oil and the oil filter. Make sure that you are following local regulations and guidelines. You can also take used oil to a local recycling center or an auto parts store for disposal.
Tips to follow for an easier oil change
It can be tricky to change the oil in your Harley-Davidson Fatboy, especially if you are a beginner new to motorcycle maintenance. However, if you follow certain handy tips and tricks, it will make things easier and more efficient. Here are a few valuable tips to remember for an easier oil change on your Harley-Davidson Fatboy.
#1. Read the owner’s manual
Before you do this maintenance task or any maintenance task for that matter, it’ll be essential to read your bike’s owner’s manual thoroughly. The owner’s manual will help provide specific instructions and recommendations for the oil change process, including the type and quantity of oil needed, the torque specifications for the drain plug, and other essential details. You must familiarize yourself with the steps and guidelines mentioned in the manual for ensuring a smooth oil change.
#2. Position the oil pan correctly
Position the oil pan or catch basin directly beneath the drain plug for catching the old oil. Ensure that it is properly aligned and stable to avoid spills. You should consider using a larger capacity oil pan if you anticipate needing extra space or if your bike has a larger oil capacity.
#3. Loosen the oil filter properly
When removing the oil filter, you should be cautious of the oil that might spill out. Loosen the filter carefully to prevent damage to the filter housing or other components. It’ll be helpful to place a clean rag or cloth around the filter housing for catching any oil that might escape during removal.
#4. Clean the filter mounting area
Once the old filter is removed, clean the filter mounting area thoroughly. Make use of a clean rag or cloth for wiping away any residue or debris. This will help ensure a clean surface for the new filter and help prevent leaks.
#5. Hand-tighten the new filter
When you are installing the new oil filter, you must avoid overtightening it. Hand-tighten the filter until it is snug and give it additional three-quarters or one full snug for a proper seal. Be careful that you are not overtightening as it can make future removal difficult.
#6. Double-check the drain plug
Before you add the new oil, you must double-check that the drain plug is tightened securely. Use the recommended torque specifications from the owner’s manual to avoid overtightening or undertightening the drain plug. A properly secured drain plug will help prevent oil leaks.
#7. Never dump oil down the drain
Once you have completed the oil change, you must dispose of the old oil and filter responsibly. Take them to a recycling center or an auto parts store that accepts used oil. You should never dump oil down the drain or dispose of it with regular household waste.
Troubleshoot the issues when changing the oil on your Fatboy
Changing the oil in your Fatboy is a necessary maintenance process. While this process is rather straightforward, there might be a few issues that arise during the oil change. Understanding these issues and knowing how to troubleshoot them will help you overcome any obstacles and ensure a successful oil change. Here, you will get to know about some of the common issues when changing the oil in your Fatboy and how to troubleshoot them.
Stripped drain plug
One of the common issues when changing the oil in your Harley is a stripped drain plug. This issue can occur if the drain plug is overtightened or the threads become damaged over time. If you face the stripped drain plug issue, you will have a few options for troubleshooting.
For starters, you should try to use an oversized drain plug or an oversized self-tapping oil drain repair kit for creating new threads. Alternatively, you can also consult a professional mechanic for assessing the situation and providing a suitable solution, such as replacing the oil pan.

Stuck oil filter
Removing the old oil filter can sometimes be challenging, especially if you installed it too tightly or if the gasket has adhered to the engine. For troubleshooting a stuck oil filter, you must use an oil filter wrench for additional grip and leverage. If this doesn’t work, you should try gently tapping the filter with a rubber mallet to loosen it.
Applying heat with a heat gun or torch could also expand the metal and help release the filter. In extreme cases, you might have to use a specialized oil filter removal tool. Remember to be patient and avoid using excessive force for preventing any damage.
Leaking oil filter
After installing a new oil filter, it will be important to check for any leaks. A common issue is an oil filter that continues to leak even after it has been tightened properly.
For troubleshooting this issue, you should make sure that the old filter’s gasket or O-ring has been removed, as a double gasket could cause leaks. Moreover, you should inspect the filter for any damage or defects. If the filter is intact and installed properly but still leaks, you should consider replacing it with a different brand or model compatible with your bike.
Overfilling or underfilling
Accurately measuring and adding the correct amount of oil will be important for the optimal performance of your bike. Overfilling or underfilling the oil could result in engine damage and poor performance.
For troubleshooting the issue, you should refer to your bike’s owner’s manual for the recommended oil capacity. Double-check the oil level using the dipstick after adding oil. Make sure that it falls within the specified range. If you have overfilled the oil, you must drain the excess oil using the drain plug until the level is correct. If you have underfilled, add the necessary amount of oil.
Oil spills and cleanup
Oil spills and messes are quite common during an oil change but they can be addressed easily with proper cleanup. Have an absorbent material like cat litter or shop towels on hand to absorb any spills or drips. If oil spills on your bike’s components, you must wipe it off immediately using a clean rag or cloth to prevent damage. Properly dispose of used materials and oil in accordance with local regulations.
Also read: Removing Harley Wheel Bearings
FAQs
What type of oil should I use in my Harley Davidson Fatboy?
The recommended oil for a Harley Davidson Fatboy is 20W-50 synthetic oil. This type of oil is designed to provide superior lubrication, protection, and performance for the engine. It is important to use the correct type of oil to ensure your motorcycle runs smoothly.
What supplies do I need to change the oil on a Harley Davidson Fatboy?
In addition to the oil, you will need a new oil filter, a socket wrench, an oil filter wrench, an oil drain pan, and a funnel. It is also a good idea to have a few rags on hand for cleaning up any spillage.
What is the process for changing the oil on a Harley Davidson Fatboy?
The process for changing the oil on a Harley Davidson Fatboy is fairly straightforward. You will need to remove the seat and side cover, take out the old oil filter and drain the oil, replace the filter and add new oil, and then put the seat and side cover back on. Make sure to refer to the owner’s manual for detailed instructions on the process.

