Are you a proud owner of a Harley-Davidson Sportster, but stressed out about charging the battery? Don’t worry – you don’t need to be a professional mechanic to know how to charge your Sportster’s battery!
To charge a Harley-Davidson Sportster battery, connect a trickle charger or battery tender to the battery terminals. Attach the positive cable first, then the negative, and plug in the charger. Charge until fully topped off, avoiding overcharging.
In this article, we will give you an easy-to-follow guide on charging your Sportster battery. From choosing the right charger to connecting the cables, you will have a fully charged battery in no time. So, let’s get started – read on to discover how to easily charge your Harley-Davidson Sportster battery!
Overview of batteries in Harley-Davidson Sportster
When it comes to American motorcycles, very few names resonate as strongly as Harley-Davidson. Known for their distinctive designs, powerful engines, and rich heritage, Harley-Davidson bikes have become a symbol of freedom and adventure on the open road. One particular model that encapsulates the spirit of Harley-Davidson is the Sportster. This is a versatile and beloved motorcycle that has managed to capture the hearts of bikers all over the world. One of the vital components of a Harley-Davidson Sportster is the battery.
The battery is a fundamental component of any motorcycle’s electrical system, and the Sportster is no exception. It’ll serve as the power source for different electrical components, offering energy for starting the engine, powering the lights, and operating various electronic systems. Without a reliable and efficient battery, the Sportster’s performance and functionality will be compromised severely.
One of the main functions of the battery is to offer the electrical energy needed for starting the engine. The Sportster’s engine is a high-performance V-twin powerhouse that requires a huge amount of electrical power for igniting the spark plugs and initiate combustion. The battery delivers a strong current to the starter motor, which rotates the engine’s crankshaft and starts the combustion process. A reliable motorcycle battery will ensure that the engine starts promptly, allowing the riders to hit the road with confidence.
Moreover, the battery is also responsible for powering the bike’s lighting system. Whether it is the headlights, turn signals, taillights, or indicators, these components will rely on electrical energy for functioning properly. The battery will ensure that the riders have proper visibility, especially during low-light conditions, enhancing safety on the road. Additionally, the battery will power the instrument cluster and provide key information such as speed, fuel level, and engine performance. This data will allow riders to monitor their Sportster’s performance and make well-informed decisions while riding.
The battery on the Sportster will also support the different electronic systems that enhance the riding experience. Modern Sportster models come with advanced features including electronic fuel injection, traction control, and anti-lock braking systems. These systems rely heavily on a stable power supply for functioning optimally. The battery acts as the buffer, ensuring that these electronic components receive a consistent flow of power and allows riders to enjoy improved fuel efficiency, enhanced performance, and enhanced safety features.
Reliability is important when it comes to motorcycles. The battery is a key factor in ensuring that your Sportster performs reliably and consistently. Harley-Davidson understands the importance of having a reliable battery and has engineered its bikes accordingly. From selecting high-quality battery components to implementing robust charging systems, Harley aims to provide riders with batteries capable of withstanding the rigors of the road and delivering consistent performance throughout the bike’s lifespan.
It is also worth noting that the batteries need proper maintenance and periodic replacement for ensuring optimal performance. Regularly checking that the motorcycle’s charge level, cleaning the terminals, and monitoring its overall health will be key steps that Sportster bikers must undertake. Moreover, Harley-Davidson also recommends that you should follow the manufacturer’s guidelines for battery replacement to maintain your Sportster’s electrical system’s integrity and longevity.

Identify the type of battery to use in your Sportster
Harley-Davidson Sportsters have a rich history and the lineup has a wide range of models, each one with its own unique characteristics. Before you can boost your Sportster by installing a battery, you will first want to know the type of battery you should be using in your Harley-Davidson Sportster. Here are the steps that you will need to carry out to determine the ideal battery for your Sportster.
#1. Determine the year and model
Identifying the year and model of your Harley-Davidson Sportster will be the first step to finding the ideal battery. The year of manufacture can be found easily on your Sportster’s title, registration documents, or VIN (Vehicle Identification Number) plate. Typically, the VIN is located on the frame’s neck, on the left side. Once you have successfully obtained the VIN, you’ll be able to refer to online resources or contact a Harley-Davidson dealer to decode it. The VIN will offer detailed info about the year, engine size, model, and other specifications specific to your Sportster.
#2. Understand different types of batteries
Harley-Davidson Sportsters are compatible with different types of batteries. Each one offers different features and performance characteristics. Here are some of the common types of batteries used in Sportsters –
Lead-acid batteries
Conventional lead-acid batteries have been used widely in motorcycles for many years. These batteries are quite reliable and cost-effective. These batteries will require regular maintenance, including checking electrolyte levels and topping up with distilled water. They are available in different capacities and measured in ampere-hours (Ah) and come in different sizes that fit specific Sportster models.
Sealed batteries
Maintenance-free or sealed batteries are an alternative to conventional lead-acid batteries. They’re designed with sealed cells that don’t require periodic maintenance. These batteries are typically more expensive but offer the convenience of no maintenance and a longer service life. They’re available in different sizes and capacities.
Lithium-ion batteries
Lithium-ion or Li-ion batteries have gained popularity lately thanks to their lightweight design, high-energy density, and long life. They are significantly lighter than conventional lead-acid batteries and offer reliable starting power. Li-ion batteries have a longer shelf life and need no maintenance. However, they tend to be somewhat more expensive than other types of batteries.
#3. Determine the battery type for your Sportster model
Once you have managed to identify the year and model of your Sportster and familiarized yourself with the different battery types, it will be time to determine the appropriate battery for your motorcycle.
Battery size and fitment
Harley-Davidson Sportster models might have different battery box sizes and configurations. It is important that you choose a battery that fits properly in the designated battery compartment. You must consult the owner’s manual and determine the correct battery size and fitment for your Sportster model.
Cold Cranking Amps (CAA) rating
The Cold Cranking Amps rating indicates the battery’s ability to provide a strong current in cold temperatures, ensuring reliable starting power. You must refer to the owner’s manual or consult a Harley-Davidson dealer to determine the ideal CCA rating for your Sportster model.
Brand and quality
It is important to choose a reputed battery brand known for its quality and reliability. You should opt for a battery from a trusted manufacturer, as it’ll help ensure optimal performance and durability.
Warranty
Moreover, you should also consider the warranty offered by the battery manufacturer. A longer warranty period will indicate the manufacturer’s confidence in its product’s quality and performance.

Preparing to change the battery in your Sportster
Installing a new battery in your Harley-Davidson Sportster is a rather straightforward process, but it’ll be important that you gather the necessary tools and supplies and carry out proper preparation. Moreover, you should also set up the work area to make sure you can carry out the installation smoothly and efficiently. By being prepared and organized, you’ll be able to make the battery installation process easier, while also minimizing the risk of any complications. Here are some of the steps that you should carry out when preparing to charge your Harley-Davidson Sportster’s battery.
#1. Gather the necessary tools and supplies
Before you start, you should ensure that you’ve got the correct tools and supplies readily available –
- A new battery – Make sure that you have the correct battery size and type for your Harley-Davidson Sportster model
- Safety goggles and gloves – You must protect your eyes and hands during the installation process
- Socket set – A socket set with the appropriate socket sizes is required for removing and installing the battery terminals
- Battery terminal cleaner – Make use of a wire brush or specialized terminal cleaner for removing any corrosion or buildup on the battery terminals
- Battery terminal protectant – Applying a battery terminal protectant or grease will help prevent any future corrosion
- Battery strap or tie-down – Certain Sportster models might require a battery strap or tie-down to secure the bike’s battery in place
- Battery tender or charger – It is recommended that you have a battery tender or charger available to maintain and charge your battery when needed
- Shop rags or towels – Arrange a few clean shop rags or towels nearby to wipe off any dirt or residue
#2. Set up the work area
Creating a safe and organized work area will greatly contribute to a hassle-free battery installation. With a ventilated, clean area having good lighting, it’ll become much easier to carry out the entire task safely and efficiently.
Make sure that your work area is well-ventilated. This way, you can prevent the buildup of potentially hazardous gases that can be emitted from the battery during installation. Then, you should park your Harley-Davidson Sportster on a flat and stable surface. This will provide a secure foundation for the entire battery installation process.
Before you start work, make sure to turn off the ignition switch and disconnect the negative (-) terminal of the old battery. This will be important as it’ll allow you to prevent any accidental electrical surges or damage during the installation. Moreover, you should clear away any dirt, debris, or clutter from the work area to prevent any accidents and ensure a clean workspace.
For preparing the work surface, lay down a clean, non-conductive work surface like a rubber mat or a piece of wood. Then, you should place the battery on during the installation process. This will help prevent damage to the battery while providing stability while working. Keep in mind that adequate lighting will be crucial to see what you are doing clearly. Make sure that you have enough light in the work area to perform the installation safely and effectively.

#3. Remove the battery
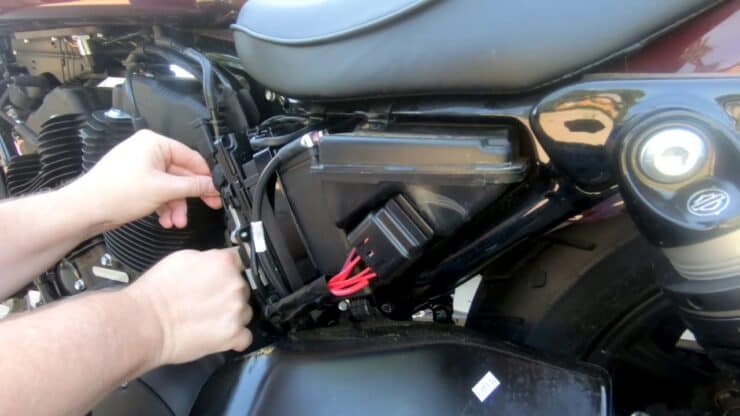
For removing the old battery from your Harley-Davidson Sportster, you will first need to arm yourself with safety gear. Put on your safety goggles and gloves for protecting your eyes and hands during this process. Depending on your Harley-Davidson Sportster model, the battery will be typically located underneath the seat or in a battery on the side of the bike.
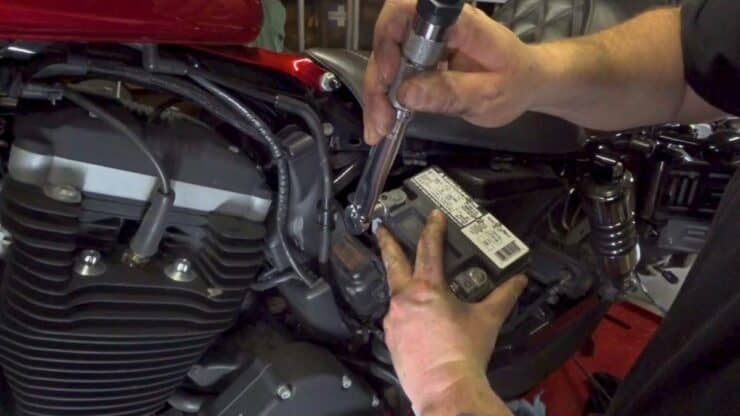
Then, you will need to disconnect the negative (-) terminal first, followed by the positive (+) terminal. Make use of a socket wrench for loosening the terminal nuts and carefully remove the battery cables.
Once the terminals have been disconnected, you must carefully lift the battery out of its compartment. Make sure that you’re considering the battery’s weight and make sure that you have a secure grip to prevent any accidents or damage.
#4. Clean the battery terminals
Once you have removed the old battery, it is important that you clean the battery terminals to make sure that you have a good connection with the new battery. Check the battery terminals and look for any signs of corrosion, such as greenish or whitish deposits. Corrosion could hinder electrical conductivity and might affect the performance of the new battery.
Make use of a battery terminal cleaner or a wire brush for removing any corrosion or buildup from the battery terminals. Scrub the terminals gently until they are clean and shiny. If there is heavy corrosion, you can create a solution of baking soda and water to neutralize it. Apply the solution to the terminals using a small brush. Then, rinse thoroughly with clean water and dry the terminals.
Once you have cleaned the terminals, you must apply a thin layer of battery terminal protectant or grease for preventing future corrosion. This protective coating will help maintain a good electrical connection.
#5. Examine the new battery for any leaks and damage
Before you install the new battery, you should first carefully inspect it for any leaks or damage. Examine the battery casing and look for signs of leakage, such as fluid strains or a strong smell. If you notice any leaks, you shouldn’t install the battery and contact the manufacturer or a Harley-Davidson dealer for help.
Look for any cracks, bulges, or other physical damage on the battery casing. Damaged batteries should not be used and must be replaced immediately.
Moreover, you should check the battery’s date, which will be found on the battery casing. Make sure that the battery is fresh and within its recommended shelf life for optimal performance. Double-check that the new battery matches the required size, capacity, and voltage for your specific Harley-Davidson Sportster model.
How to charge a Harley-Davidson Sportster battery
Properly charging the battery in your Sportster will be important when it comes to maintaining its performance and longevity. When talking about charging, it’ll be important that you understand the different charging levels and install the new battery that matches perfectly to your specific Sportster model. Once it is done, you must test to see if the battery is functioning properly. Here are the steps to follow to ensure a safe and effective battery charging process for your Sportster –
#1. Connect the charger to the battery
Before you connect the charger to your Harley-Davidson Sportster’s battery, you must wear the necessary safety equipment. Wear safety goggles and gloves when working with a battery. Moreover, you should select a charger that is compatible with your bike’s battery and suitable for the size and voltage of your Sportster’s battery.
Depending on your specific Sportster model, the battery is typically located beneath the seat or in a battery box on the side of the motorcycle. Identify the positive (+) and negative (-) terminals on the battery. Connect the charger’s positive lead to the positive terminal and the negative lead to the negative terminal. Then, you should ensure there is a secure connection.
#2. Understand different charging levels
Battery chargers offer different charging levels depending on the requirements of the battery. Typically, there are three common charging levels –
Trickle charge
Trickle charging will provide a low and constant charge to the battery. It is ideal for maintaining the battery’s charge during storage or for smaller batteries.
Standard charge
A standard charging level will provide a moderate charge rate for regular battery maintenance and recharging.
Fast charge
Fast charging will deliver a high charge rate for replenishing a significantly discharged battery. This mode should only be used if recommended by the battery manufacturer and charger.
#3. Select the appropriate charging level
Selecting the appropriate charging level will be important for the well-being of the battery. You must consider the battery’s current charge level and the manufacturer’s recommendations. If you’re in doubt, it’ll be safer to go for a lower charging level to avoid overcharging.
#4. Monitor the charging process
While the battery is still charging, it’ll be important that you monitor the process for safety and efficiency. You should make sure that the charger is functioning correctly. Look out for any abnormal behavior, such as excessive heat, sparks, or unusual noises. If you notice anything unusual, you must immediately disconnect the charger and consult a professional.
You need to read and follow the instructions mentioned by the charger manufacturer regarding the specific charging process and any safety precautions. During charging, you need to monitor the battery’s temperature periodically. If the battery becomes excessively hot, you must discontinue the charging process and let it cool down before discontinuing.
#5. Test the battery once the charging is complete
Once the battery is fully charged, it’ll be important that you test its performance. Safely disconnect the charger from the battery by removing the leads in the reverse order of connection (the negative lead first and then the positive lead).
Let your battery rest for a couple of hours to stabilize before testing. Make use of a multimeter for measuring the battery’s voltage. You can compare the reading to the manufacturer’s specifications to make sure it is within an acceptable range.
#6. Disconnect the charger from the battery
Disconnecting the charger properly will be important for safety. Before you disconnect, ensure that the charger is turned off. Remove the charger’s leads from the battery, first the negative lead and then the positive lead. You must ensure that no part of the charger is connected to the battery.
FAQs
What type of battery does a Harley-Davidson Sportster use?
A Harley-Davidson Sportster typically uses a 12-volt sealed lead acid (SLA) battery. These batteries are designed to provide a reliable and long-lasting power source for the motorcycle.
How do I charge the battery on my Harley-Davidson Sportster?
To charge the battery on a Harley-Davidson Sportster, you should first disconnect the battery from the motorcycle and connect it to a battery charger. It’s important to use a charger specifically designed for SLA batteries, such as a smart charger or a trickle charger. The charger should be set to the proper voltage for your battery and should be monitored closely to ensure it does not become overcharged.
What should I do if my Harley-Davidson Sportster battery won’t charge?
If your battery won’t charge, you may need to have it checked by a professional. The battery may have a dead cell or need to be replaced. It’s also important to make sure that the battery charger is working properly and is set to the correct voltage for your battery.

