Are you a Harley-Davidson biker having issues with the compensator, but aren’t quite sure how to check your Harley compensator? If yes, then you’ve managed to land yourself in the right place.
To check a Harley compensator, remove the primary cover and inspect the compensator’s sprocket and spring. Signs of wear include unusual noises like clunking or rough starts, which may require further inspection or replacement.
In this article, you’ll get to know all about Harley-Davidson compensators, what is a compensator, why is a compensator important, how to check Harley compensator, and how to diagnose a Harley compensator. Continue reading, and you’ll get all the answers you’re looking for.
What is a compensator in a Harley-Davidson bike?
When you’re riding your Harley-Davidson bike, you’ll want to make sure that you’re having a smooth, enjoyable ride. In case the compensator is damaged, bad, or not working, you’re definitely in for a bumpy ride.
During such situations, you’ll be having questions like what is a compensator? Why is a compensator important? How does a compensator work? How to check Harley compensator? How to diagnose a Harley-Davidson compensator? These are reasonable questions to have as the compensator is a small yet relatively unknown element for most bikers. Even many serious Harley-Davidson enthusiasts don’t have a strong understanding of the compensator.
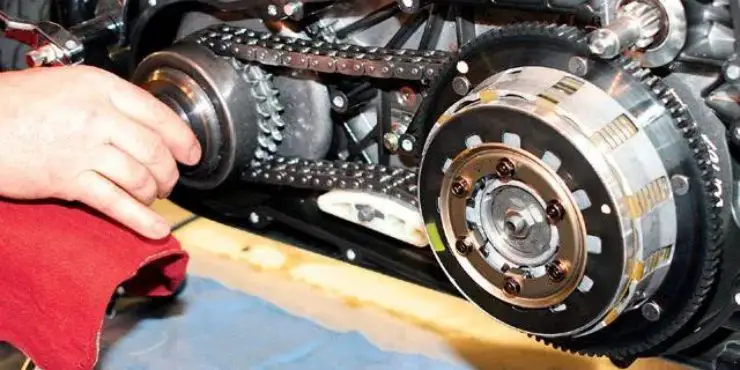
A Harley-Davidson Compensator is essentially a shock absorber in the starting mechanism, and it is located in the primary chain. When a bike is in certain load situations, the compensator smoothens out the rough pulses from the engine and stops the pulses from getting channeled to the drivetrain. Moreover, a compensator protects the gears from getting damaged if the engine rotates backward. It also is helpful during severe race launches. Harley-Davidson states that compensators are engineered with springs for supporting high torque, particularly for large displacement and high compression engines.
How does a Harley-Davidson compensator work?
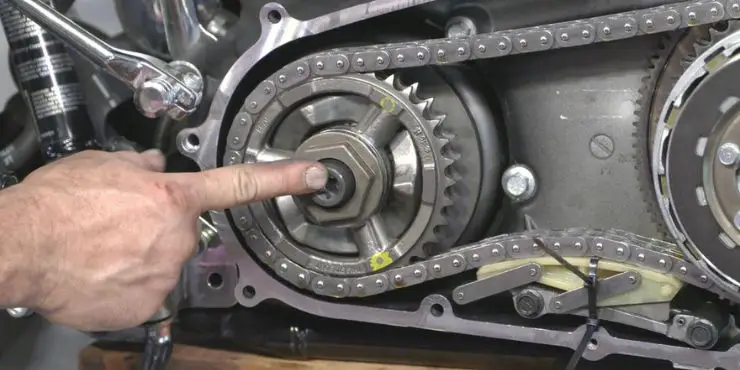
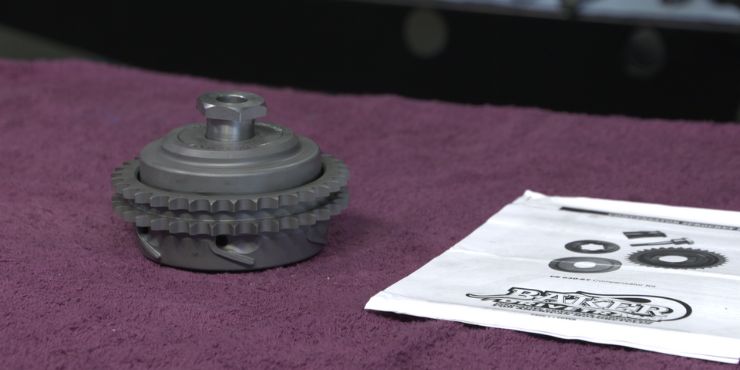
As a shock absorber, the compensator is basically made up of a few different parts. It includes a spring pack, a nut on the front side, sprockets, and ramps that extend the compensator out. The spring pack has four sets of springs clamped in place, which allows it to absorb movement and energy.
Additionally, scoops on the outside ramp of the compensator collect lubricant from the lowest point of the primary chain case as it is moving in rotation. The revenge ramp inside is lubricated all the time. This will, in turn, reduce any wear or destruction of the springs. With all these different parts in sync, the compensator works effectively and will last for a longer period of time.
How to check Harley compensator?
If you’re suspecting that your compensator isn’t working as well as expected, it isn’t a difficult task to check it. However, you should practice patience and proceed with caution when checking to ensure nothing is damaged in the primary mechanism.
To begin, you’ll first need to drain the primary drive oil before removing the cover to the primary mechanism. It’s a smart option to put down a tray or piece of cardboard for catching any oil dripping. You should then heat the compensator bolt before you remove it, as it is machined in and can be tricky to take out. Worse, you could end up damaging the Loctite patch without proper heat, and it’ll harm the bolt threads.
You should then lock the drive so that it doesn’t turn when you’re releasing the compensator sprocket bolt with either a drive locker or a piece of metal that holds the drive. Once you’ve done that, a breaker bar can easily remove the bolt.
Now comes the point where you’ll be able to thoroughly inspect the compensator. Once the nut and spring pack have been removed, the inside of the compensator will be visible for inspection. You’ll know straight away whether the compensator is in good or bad condition. This will depend on how damaged, torn, or frayed the compensator is.
A compensator will start wearing if there isn’t a proper lubricant, which tends to occur after a long period of time. Make sure that you’re checking other parts of the primary mechanism and see if they need fixing or replacing. For instance, the rotor between the interior plate and the spring pack will have to be removed once it is time to replace a compensator.

While you’re having the cover off and the Harley compensator disassembled, it’ll be the best time for cleaning. You can clean different parts of the primary mechanism as a part of routine maintenance and proactive measures for your bike’s safety.
How to diagnose a Harley-Davidson bike’s compensator
Many Harley-Davidson bikers face issues with the bike’s compensator that need to be diagnosed. The compensating sprocket buffers torque from the engine, but the limitations will be most obvious in newer engines. A part that was enough for an 82-cubic-inch engine might not be enough in a 103-cubic-inch engine.
The symptoms of a bad Harley compensator are a loud clang during the start, trouble shifting into neutral or first, and a gravel-like sound in the front of the primary sound. The only way of knowing for sure that you have this problem and diagnosing it would be after pulling the primary cover off.
Step 1
You should start by removing the primary chain case drain plug at the bottom of the chain case under the clutch cover. You’ll be using a socket wrench and an Allen socket. Then, drain the primary chain case fluid into a pan.
Step 2
Inspect the magnetic end of the drain plug for any bits and pieces of metal. Dredge the drained primary chain case fluid with the magnetic probe. Moreover, inspect the probe for any bits of metal.
Step 3
Remove the five clutch cover screws using an Allen or Torx socket and a socket wrench. Then, remove the round clutch cover and gasket. Once you’ve removed the gasket, you should remove it.
Step 4
Remove the four screws in the oval inspection cover using an Allen or Torx socket and a socket wrench. Remove the gasket and cover. Now, discard the gasket.
Step 5
Remove the twelve primary chain case cover screws using an Allen or Torx socket and a socket wrench. Then, you should remove the primary chain case cover.
Step 6
Remove and discard the primary chain case tower gaskets and primary chain case cover gasket inside the primary.
Step 7
Inspect the compensation sprocket, the chain, the clutch, and the chain tensioner for wear or obvious defects.
Step 8
Heat the compensating sprocket nut using a heat gun to loosen the nut. Remove the compensating nut using a hex socket and a breaker bar.
Step 9
Remove the sprocket cover, spacer, compensator, and sliding cam. Clean and inspect the components for any wear. Repair or replace the components as needed.
Step 10
Inspect the shaft extension for any wear before you start reassembly. Clean the threads of the engine sprocket shaft and the internal threads of the sprocket nut using a cleaner/primer.
Step 11
Apply the thread locker to the threads of the engine sprocket. Apply engine oil to the sprocket nut’s underside.
Step 12
Replace the sliding cam, compensator, sprocket cover, and spacer. Then, you should hand-tighten the sprocket nut.
Step 13
Tighten the sprocket nut to 75 foot-pounds of torque using a torque wrench and a hex socket.
Step 14
Install new tower gaskets and a new primary chain case cover gasket. Then, replace the primary chain case cover.

Step 15
Tighten the primary cover screws to around 120 inch-pounds of torque using a Torx or Allen socket and a torque wrench in the same tightening sequence described in the user manual of your bike.
Step 16
Now, replace the inspector cover with a brand-new inspection cover gasket. Moreover, coat the threads of the primary drain plug with Teflon paste before replacing the drain plug.
Step 17
Pour the primary chain case lubricant into the primary chain case until the lubricant just about touches the bottom of the clutch. Then, replace the clutch cover with a brand-new clutch cover gasket.
Conclusion
Thank you for reading. Hopefully, now you know a lot more about Harley-Davidson compensators, what is a compensator, why is a compensator important, how to check Harley compensator, and how to diagnose a Harley compensator. To check the compensator, drain the primary oil and remove the cover to the primary mechanism. Heat the compensator bolt before removing it. Lock the drive such that it doesn’t turn when you release the compensator sprocket bolt.
Once you do that, a breaker bar can easily remove the bolt. You can then inspect the compensator, and you’ll know right away whether it is good or bad. It’ll depend on how damaged, torn, or frayed it is.

