If you own a Harley-Davidson Heritage Softail, then you know how important it is to keep it in top condition. Regularly checking your oil is a key part of that. But do you know how?
To check the oil on a Heritage Softail, warm the engine, place the bike upright, remove the dipstick, wipe it clean, reinsert it fully, and then remove it again to check the oil level.
This article provides a step-by-step guide on how to check your motorcycle’s oil level, so you can keep your Harley running smoothly. Whether you’re a novice or an experienced rider, this guide will help you get your oil checked quickly and easily – so let’s get started!
Overview of checking the oil on a Softail
For checking the oil of your Harley-Davidson Softail, you will first have to be well-versed in the user manual and how your bike functions. According to the manufacturer, it states in the service manual that you can easily check the engine oil whether the engine is cold or if it is warm.
Before you’re venturing out for your next long ride, you must always check that the engine oil level in your Harley-Davidson bike is okay. The Harley-Davidson bikes are designed in a way that you can easily check if the engine oil level is okay. The Harley-Davidson motorcycles are designed such that you can measure the oil levels when the engine is warmed up and when the engine is cold.
Some beginner bikers end up making the mistake of going by the pre-ride oil levels for adding oil rather than after you’ve already gone for the ride. You should add oil before the ride when the oil level is extremely low.
These are the times when you must always change the oil level in your Softail –
- At the scheduled service interval
- Each time you fuel your motorcycle
- As a pre-ride procedure
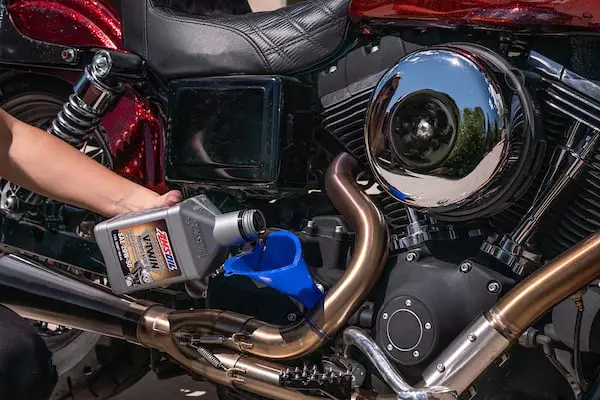
The oil that should be used for your Softail is authentic Harley-Davidson oil. However, if it isn’t available near you, only then you should look for aftermarket oil options. The best viscous oils for your Harley-Davidson Softail will be 20W50, 15W40, and 10W40 in that order.
Why is checking oil important on a Harley-Davidson Softail?
Warm weather tends to be the peak season for riding a Harley, and cleaning the outside of your Softail before heading out for a trip will be important. There are a number of checkups that you should be performing on your bike.

An important check for maintenance and verification will be the oil check. Just like cleaning the surface of the bike protects it from future damage, checking and changing the oil on your Softail will help ensure that your motorcycle will run smoothly in the coming months. Bikers must check the oil regularly and change it after a certain time. If you end up forgetting it for some reason, then you and your bike might be at risk of falling into trouble.
How to check oil on a Harley-Davidson Heritage Softail?
Owning a Harley-Davidson Softail happens to be a particular source of pride for many bikers. Regular maintenance of your bike will be crucial to keep it running smoothly and ensure your safety on the road. Checking the oil level on your bike will be an essential part of routine maintenance and with the right steps, it’ll be an incredibly easy thing to do. Checking the oil regularly is an extremely simple process that you can carry out on your own, and it’ll help you prevent any costly repairs.
Preparation
Before you check the oil level on your Softail, it will be important that you carry out the preparation properly. You will need to gather the necessary tools and materials to carry out the entire process properly. Some of the tools that you will require include an oil dipstick, a new oil fill cap (if needed), a rag or paper towel, and some free space to carry out this task.
After that, you will have to park your bike on a flat, level surface. This way, not only will you be able to get accurate readings, but you will also feel more comfortable operating your bike as you won’t have to stretch or position your body in uncomfortable positions to operate the bike. The bike should be parked in a leaning position on the kickstand, or also known as the “jiffy” position.
Lastly, you will also need to wear appropriate safety gear. Remember, as you’ll be checking the oil, there is bound to be dirt, grim, and other unwanted substances that might make the situation dirty. Further, if you are checking the oil in a warm bike, the engine and other components will be rather hot. So remember to wear protective gloves so that you can keep yourself clean while also protecting yourself from any hot motorcycle parts.
Locate the oil fill cap
Once you have carried out the preparations, your next step would be to locate the oil fill cap and remove it. For doing that, first, you will need to open the gas tank of your Softail. Carefully open the gas tank and look for the oil fill cap. Depending on the model of Softail, the oil fill cap might be on the left or right side of your bike. Usually, it comes marked with an “OIL” symbol or simply the word “OIL”.
Once you have located the oil fill cap, your next action would be to remove it. This will grant you access to the oil. For removing the oil fill cap, you’ll have to twist the oil fill cap counterclockwise until it is loosened before removing it from the tank completely.
Check the oil level
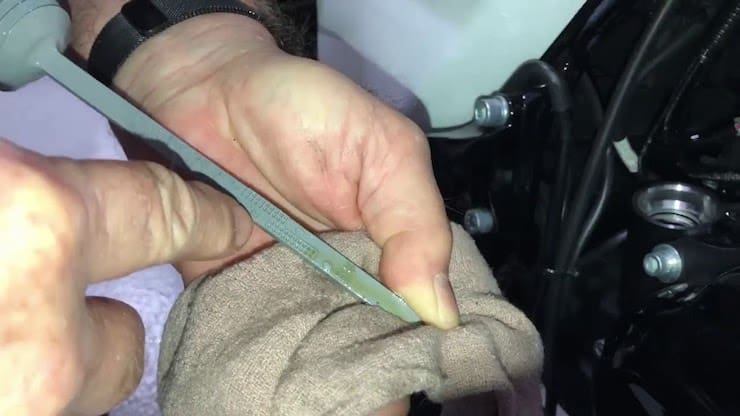
Once you have located and removed the oil fill cap, you’ll be in a prime position to check the oil level. Before doing anything, you should first wipe the dipstick clean with a rag or paper towel. After that, reinsert the dipstick into the oil tank. Wait for a few seconds before removing it. After that, check the oil level again. The oil level needs to be between the upper and lower marks on the dipstick. If the oil level is less than the lower mark, you will have to add more oil until it reaches the appropriate level.

Another thing to watch out for will be the color and consistency of the oil. The oil needs to be yellow or green, glossy, and semi-transparent. If the oil is black or dark brown, this means that the oil has been burnt and broken down. If this happens, it will signal that the oil needs immediate change. You should also check for the presence of thick sludge.
In extreme cases, you might even come across particles of metal in the oil. This indicates engine wear. If the oil has a milky look to it, it indicates that the coolant has gotten mixed with the oil. In either of these cases, you must consult a mechanic as soon as possible to find out if your engine has a serious problem.
Replace the oil fill cap
Once you have checked the oil level and added the necessary amount of oil to make it reach the appropriate level, you will need to put back the oil fill cap. You must replace the oil fill cap and then twist it clockwise until the cap is tight. But before you do that, make sure that you are cleaning the oil fill gap first. Lastly, you should also close the gas tank to finish the process.
Cleaning up
After successfully checking the oil level on your Harley-Davidson Softail, it will be important to clean up. Check for any potential spills or mess. Make use of a rag or paper towel for wiping off the excess oil from the oil fill cap and dipstick. If you spilled any oil, you must clean that too using a rag or a paper towel. Moreover, you should dispose of used oil properly. There are places where you can give the used oil for recycling purposes. Moreover, you should also dispose of any used rags or paper towels as it will be important for environmental reasons.
How to check the oil with a cold engine?
It is worth pointing out that a cold engine can never give deliver accurate oil measurements. For a pre-ride inspection, make sure that you’re having your bike lean on the kickstand or in a jiffy, as it is commonly known. Your bike needs to be on a level surface. The oil level will be registered between the two arrows found on the dipstick. As the owner’s manual states, you should not top the oil based on the readings from a cold engine.
- Start off by parking your Harley-Davidson Softail on a flat surface and then put it on the kickstand
- Then, unscrew the oil cap for the engine oil before removing the dipstick
- Have a clean cloth handy with which you’ll be able to wipe the dipstick after you remove it
- Wiping the dipstick will help you read the stick accurately while also helping keep the bike clean
- Reinsert the dipstick before turning it clockwise all the way in
- Now, unscrew the cap once more and remove the dipstick
- The readings on the dipstick needs to be on the halfway mark
- If the oil level is below the lower-end mark of the dipstick, then you must add the recommended oil to reach the halfway mark
- Replace the dipstick before fastening the engine oil cap
How to check the oil with a warm engine?
Many motorcycle enthusiasts and mechanics recommend that you should only check the engine oil once the engine is warmed up. It is said that you’ll need to start the engine and allow it to run for around 3–5 minutes. Even the Harley-Davidson owner’s manual states that you should idle your bike for at least 2 minutes before you check the oil level. Some people also recommend that you should take your bike out for a 20-minute spin before checking the oil level. Taking your bike for a spin will ensure that the engine is warmed up properly, and the oil has thoroughly circulated.
- Allow your Softail to cool for around 15 minutes after the ride such that the viscous oil flows down to the oil pan
- Park your bike on a level surface and allow it to lean on the kickstand
- Unscrew the engine oil cap before removing the attached dipstick
- Now, wipe the dipstick to clean it
- Insert the dipstick once again, then turn it clockwise until it cannot be fastened anymore
- Take the readings after unscrewing the cap
- The readings on the dipstick must be on the third mark that is closest to the cap
How to read the oil dipstick?
Unlike many bikes, Harley-Davidson bikes are designed differently when it comes to engine oil-checking procedures. Your bike must be leaning on the jiffy, whether the engine is cold or warm. This will also be mentioned on the dipstick of the bike.

The dipstick can be found on the lower side, under the tranny of the motorcycle, and somewhere around the area of the jiffy. You will find it attached to the engine oil cap. For removing the dipstick, you will have to turn the engine oil cap anticlockwise. Unlike most dipsticks, the dipsticks for Harley-Davidson bikes allow you to get the accurate readings, irrespective of whether the oil is warm or cold.
On the far end of the dipstick, you’ll find “ADD QT” and an arrow pointing toward you. There will be threads on the dipstick where three levels have been marked. Your engine is extremely low on oil, in case the oil level is at the lowest level next to “ADD QT”.
The second and third marks on the dipsticks will be used on cold and warm engines respectively. The second mark will mean that all the oil is not in the pan, which is why it will be used only when the engine is cold. The third mark will be used when the engine is hot as all the oil must be used in the oil pan after the engine has warmed up and turned off.
If you find that the oil level is below the third mark even after you have driven the bike, it’ll be time to top up. There are certain instances when you may end up overfilling the oil as you’ve read the dipstick wrong.
You should make sure that the engine is warmed up adequately so that all the oil can go to the pan. For that reason, some experts and bikers prefer going for a short ride instead of letting the bike idle. If you’ve read the dipstick wrong, you’ll risk overfilling, which can result in many issues.
How often should oil changes be made on a Softail?
Checking the oil is extremely important for every biker. Determining the quality or level of oil will result in a much smoother ride experience. Many people love riding bikes. They have no worries regarding the quality or level of oil. After they run 1000+ miles, they become conscious of checking the oil levels, but by then, it is already to have. The engine might have already suffered tremendous damage. It is important that you check and change the oil to prevent major damage to the different parts and components of the engine.
The frequency of oil changes on your Softail will depend on how often you take out your bike for a drive. If you’re a casual rider, you can ride around 1000 miles or so before needing an oil change. If you travel long distances regularly, you’ll need to check and change the oil more frequently.
Tips to remember when checking the oil on a Softail
Harley-Davidson Softail bikers understand the importance of regular maintenance to keep their motorcycles in top shape. Checking the oil level is an important part of motorcycle maintenance and must be done regularly for ensuring that the engine runs smoothly. Here are a few tips to keep in mind when checking the oil on a Harley-Davidson Softail –
#1. Check the oil level after the engine has been running
After your bike’s engine has been running for a few minutes, you need to turn it off. Then, wait for a few minutes so that the oil settles down. Now, you’re in the perfect position to check the oil level to make sure that it is at the appropriate level.
#2. Check the oil level once the engine is cooled down
Before you check the oil level, ensure that the engine is cool so that you can avoid any injury. Checking the oil level when the engine is hot could cause the oil to expand, while also giving inaccurate readings.
#3. Use the right type of oil
Always make use of the recommended type of oil for your Harley-Davidson Softail. Using the wrong type of oil could damage the engine and might even void the warranty. Check the owner’s manual for the recommended type of oil.
#4. Wipe the dipstick before taking readings
Before you check the oil level, you must wipe the dipstick clean using a rag or paper towel. This will help ensure that the readings are accurate and aren’t contaminated by old oil or debris.
#5. Check the oil level with the bike on level ground
It is important that you park your bike on a flat, level surface when you’re checking the oil levels. This will help you ensure accurate readings while also preventing the oil from sloshing around.
#6. Avoid overfilling the oil tank
Overfilling the oil tank could result in damage to the engine while also reducing the performance. You should ensure that you add oil slowly and keep checking the oil level frequently to avoid overfilling.
#7. Replace the oil fill cap securely
After you have checked the oil level, ensure that you replace the oil fill cap securely for preventing any oil leaks.
FAQs
What type of oil should I use for my Harley-Davidson Heritage Softail?
Harley-Davidson recommends using a 20W-50 viscosity engine oil for the Heritage Softail. It is also recommended to use a synthetic oil to ensure optimal performance and protection. Be sure to check your owner’s manual to make sure you are using the recommended oil for your motorcycle.
What is the best way to check the oil on my Harley-Davidson Heritage Softail?
The best way to check the oil on your Harley-Davidson Heritage Softail is by using the dipstick located on the right side of the engine. First, make sure the motorcycle is parked on level ground. Then, remove the dipstick, wipe it clean, and reinsert it. Be sure to wait a few seconds before removing it again to get an accurate oil level reading.
How often should I check the oil on my Harley-Davidson Heritage Softail?
It is recommended to check the oil on your Harley-Davidson Heritage Softail at least once a month, or every 1,000 miles. Checking the oil regularly can help ensure that your motorcycle is running properly and safely. It’s also important to check the oil before and after long rides.

