Do you own a Harley-Davidson Sportster but don’t know how to check its transmission oil? If so, then you’re definitely in the right place.
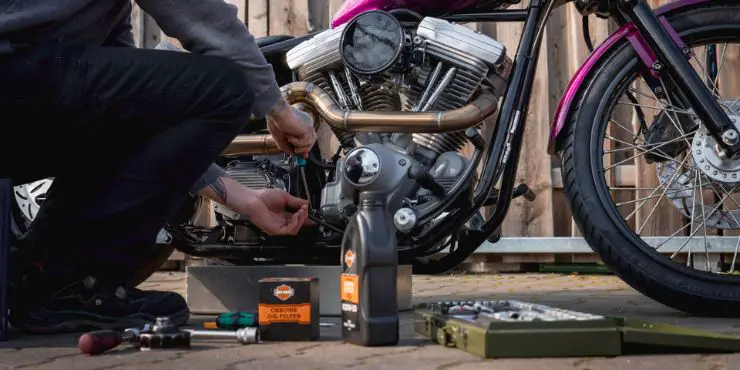
To check the transmission oil on a Sportster, remove the derby cover on the primary case, with the bike upright. The oil should be just below the clutch basket. If low, add the recommended oil and reinstall the cover.
In this article, you’ll get to know all about transmission oil in Sportster, the type of oil Harley-Davidson Sportster uses, and how to check Sportster transmission oil. Continue reading to get all the answers that you’re looking for.
Transmission oil change in Harley-Davidson Sportster bikes
Harley-Davidson is one of the most iconic brands in the motorcycle world, with the Harley-Davidson Sportster being one of the most popular bikes. Once you’ve purchased the bike, you’ll need to learn to maintain it and get it serviced from time to time. Since visiting a mechanic is a costly affair, you’ll need to learn about the basic maintenance tasks like checking the transmission oil and changing it if needed.
The Harley-Davidson Sportster is a popular bike by Harley-Davidson. The transmission fluid is a part of the bike’s oil system. You’ll need to regularly check the transmission oil level to ensure that the engine is running smoothly. The job takes a bit of time as it isn’t readily accessible. You’ll need to open up the primary housing and look for the transmission oil levels. In your Harley-Davidson Sportster, the transmission oil must be changed every 10,000 miles. Changing the transmission fluid will be a straightforward procedure.
How to check Sportster transmission oil?
If you own a Harley-Davidson Sportster bike, it’s important to know how to locate the duct for transmission oil and how to check the dipstick. With the right tools and within a few easy steps, you’ll be able to manage it on your own.
Tools for checking Harley-Davidson Sportster transmission oil
- Allen wrench
- Torque wrench
- Allen key drill bit (H4 metric)
- Thread lockers
- Manual
Steps to check Sportster transmission oil
Checking the transmission oil on your Harley-Davidson Sportster is something you must know for maintaining your bike. There are the steps on how to check Sportster transmission oil –
1. Position and temperature
Ensure that your Harley-Davidson Sportster is on ground level and on the side stand. This is due to the section of the transmission fluid sad being positioned in a manner that you can get proper reading only once your bike is on the side stand. For avoiding under or overfilling the transmission oil, you should ensure that the bike is tilted.
Bring your motorcycle to ambient temperature. Do it by ensuring that your bike has been idle for a while before checking the transmission fluid level.
2. Get to the dipstick
Now, you’ll have to reach the dipstick that, if you notice carefully, will be in an inconvenient position. You’ll need to bypass the rear shock adjuster and gain access to the dipstick. To achieve that, you should prepare your tools and be ready for a little physical work.
3. Remove the outer layers
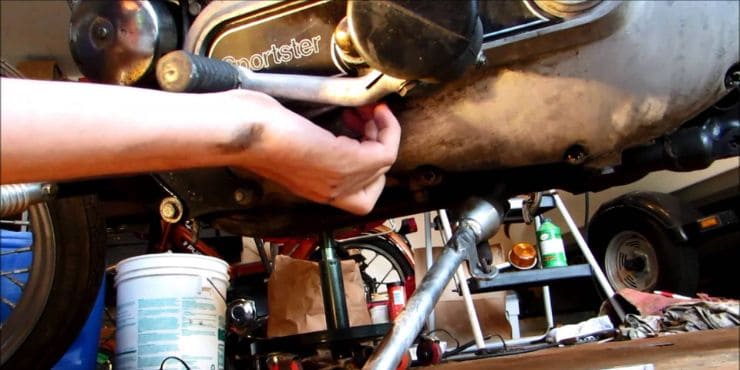
Take the Allen wrench and attach an Allen drill, a bit of size H4 metric. Use it to unscrew the main screw of the electrical side cover that can cover the inner machine of the bike and then the little plate.
Use the torque wrench to remove the screws. Put the screws away safely and then carefully remove the panel. After you’ve removed the main panel, you’ll notice a tiny, flimsy cover at the bottom that’s barely attached to anything. Remove it and keep it away too.
4. Final unscrewing
Now, you should unscrew the main preloaded adjuster. It’ll allow you to gain access to the dipstick over the transmission oil to check the oil level. To achieve that, you’ll require a torque wrench and an imperial size Allen key for unscrewing the preloader adjuster.
In some situations, there might be screws present in different directions. Depending upon if the screws are lined in the vertical or horizontal direction, the size of the torque wrench will change.
- For horizontal torque gratings, you’ll need a torque of 60 to 84-inch pounds (6.8 to 9.5 Newton meters)
- For vertical torque gratings, you’ll need a torque of 24 to 36-inch pounds (2.7 to 4.1 Newton meters)
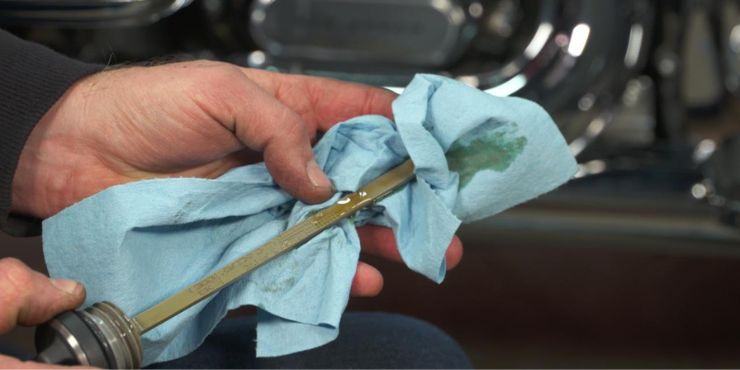
Once you’ve unscrewed it, you should remove the dipstick and wipe it clean using a washcloth. Then, put it back into the transmission fluid. However, you should ensure that you aren’t screwing it back. You should lightly put it on top of the block until the ring is touching the base of the hole.

5. Perform the reading
Now, you’ll need to remove the dipstick for the second time and read it to check the transmission oil level. The dipstick will give you one of the three readings – A, X, and F. “A” is empty and it means that the oil must be filled. “X” stands for neutral, which means that you don’t have to fill the transmission fluid. Meanwhile, “F” will stand for full.
Based on these readings, you’ll need to decide what course of action you should be taking next. If the reading is close to the “A” mark, then the oil must be filled. If the marking is close to the “F” mark, then it means you can leave things be. However, if you feel that the fluid must be added, there are a few things that you should ensure before buying new transmission oil.
6. Put things back in their place
After you’ve checked the fluid level, you’ll need to put everything back in its place. Take the torque and then screw the preloaded adjuster back to how it was originally positioned. Similarly, you should put the plastic cover and the electrical panel properly using screws.
Apart from screws, you’ll also require a thread lock for ensuring that it’s placed safely and won’t come off easily. If you don’t have a thread lock, you can just use an alternative like a thread for covering it up temporarily.
How to choose the right transmission oil for your Harley-Davidson Sportster
It’s always better to be careful when choosing the appropriate transmission oil for your Harley-Davidson Sportster. There are multiple factors that you need to keep in mind. As a rule, you should never mix oils or use different brands.
If you’re residing in a place where the temperatures are soaring, it’s recommended that you should go for oils that are heavier and thicker with greater viscosity levels. This will help maintain the temperatures in the bikes, as the transmission oil will last longer under intense heat. For colder climates, you should be using thinner lubricants that are comparatively less viscous. Even if the weather is freezing, the lubricant will not freeze and spoil your bike.
Depending on your preferred levels of viscosity, you can look for brands that fall in line with the following qualities –
- Protects the engine
- Reduces wear and tear
- Great shear resistance
- Great shear stability
- Anti-friction properties
- Protects against extreme temperatures
- Good wet-clutch performance
Different types of oil used by Harley-Davidson Sportster
There are two different types of lubrication oil for 4-stroke engines – dry sump and wet sump. When thinking of separate engine oil and transmission oil, you’ll likely think of 2-stroke engines. However, there are certain 4-stroke models where the engine and transmission get lubricated with separate oils.
Is the transmission separate, as it’s a dry sump?
There are two different types of lubrication systems for 4-strong engines. The wet sump circulates the oil in the oil pan of the crankcase. Meanwhile, the dry sump collects the oil by pumping it from the oil tank located separately from the engine. Most motorcycle manufacturers make use of the wet sump system. The engine and transmission get lubricated with separate oils, which is one of the unique characteristics of Harley-Davidson bikes. The same will be true for 2-stroke engines. The combustion and transmission chambers here are separate. The engine oil that burns and the one that lubricates the clutch and transmission will have different roles.

In a four-stroke engine, the basic performance requirements for engine oil and transmission oil aren’t very different. This will be evident in wet-sump engines, where the pistons and crankshaft are lubricated with the same oil as the clutch and transmission.
Many wonder whether Harley-Davidson bikes lubricate their transmissions and engines with different oils, since they are dry sump. The examples of bikes like Honda CB750 Fords and Yamaha SR400, which are also dry sump and lubricate their transmission and engine with the same oil, show that it’s not always true.
A simple reason why the engine and transmission get lubricated with different oils might be due to the reason the engine and transmission cases are separate. The majority of motorcycle engines today have the transmission and crankshaft in a single crankcase. Meanwhile, the power from the crank gets transmitted by gears.
If the transmission and engine are separate units, it means that each one will require its own oil for lubrication. Additionally, the primary chain that connects the crankshaft to the gearbox also requires lubrication. It means that bikes like a Harley-Davidson Big Twin require three different oils – engine oil, primary oil, and transmission oil.
Oil maintenance in Harley-Davidson bikes is very different
Harley-Davidson bikes are known for their iconic air-cooled 45° engine. However, Harley-Davidson engines are largely classified into two lines – Sportster and Big Twin. Both of them share the same engine format – a 45° V-Twin and an OHV valve drive. However, they differ in crankcase configuration and lower engine.
In the Big Twin, the engine part, the primary chaincase, and the gearbox are independent of each other. The Sportster, on the other hand, makes use of the separate engine and transmission oils. However, the crankcase is a combination of the engine, gearbox, and primary chain case. On the other hand, the primary chain and crank chamber are lubricated with different oils in the integrated crankcase.
Specifically, there’s a wet multi-disc clutch at the rear of the primary chain towards the left-hand side of the engine and the gearbox behind it. The chain, gearbox, and clutch are lubricated with the same oil.
The Harley-Davidson bike engines are dry sump lubricated, but there are certain exceptions. The liquid-cooled V-ROD released in 2001 is wet sump, unlike the Sportster and Big Twin. The Street 750 is a wet sump, with the gearbox and crankcase completely integrated. Both the engine and gearbox get lubricated by a single type of oil. As it’s not a dry sump, there isn’t any oil tank under the seat.
It might not be common to observe a Harley-Davidson bike from an oil maintenance point of view. However, if you classify them in terms of oil maintenance, then it can be stated that there are three types of engines – Sportster, Big Twin, and Street 750. They have different oil requirements and different lubrication methods, and it’s a characteristic point. You won’t have to remove the primary cover for changing the transmission oil. You should only do it for reference of primary drive by primary chain.
Transmission oil management in different Sportster models
For the Sportster, the specified transmission oil capacity will be 946ml for the 883 and 1200 engine types. The factory oil will be used for distinguishing between the engine and the transmission oil. However, the base oil will be synthetic oil. The oil can be used for both transmission and engine components. Meanwhile, the original oil that used to be preferred for lubricating the primary chain and transmission for Sportsters has evolved from the oil trans fluid to Formula Plus.
Genuine oil is definitely a safe bet. However, you can also choose your preferred brand of normal 4-stroke oil for lubricating your clutch and transmission. In that case, it’ll be safe to choose 20W50 of the same viscosity as genuine oil. When draining old transmission oil, it’ll be slightly obvious as there’s a drain bolt at the bottom of the engine. However, when filling in, the Sportster can get confusing as to where to start. Generally, there should be a screw-on cap on the primary cover, which you should look for.
The oil should be poured from the gap of the clutch release after you’ve removed the large inspection cover at the rear of the primary cover. It might be a culture shock for bikers who have only touched Japanese Harley-Davidson bikes to pour oil from here.
As this opening is located fairly low in the cover, if the bike is tilted to the left, the oil might overflow from the cover before reaching the specified 946ml amount. You must keep the bike’s body vertical when filling the oil. Transmission oil is usually checked and changed less frequently than engine oil. However, the primary chain and clutch that receive the torque of the V-twin engine have to be lubricated by good quality oil frequently. If you want to make the transmission last longer, you should carry out proper maintenance of the transmission oil.
Conclusion
Thank you for reading. Hopefully, now you know a lot more about transmission oil in Sportster, the type of oil Harley-Davidson Sportster uses, and how to check Sportster transmission oil. You’ll need to regularly check the transmission oil level to ensure that the engine is running smoothly. Checking the transmission oil in your Harley-Davidson Sportster involves about placing the bike in an upright position, removing the bolts from the engine’s primary housing, looking through the derby cover port, taking note of the transmission fluid level, and replacing the primary housing cover before re-attaching the bolts.

