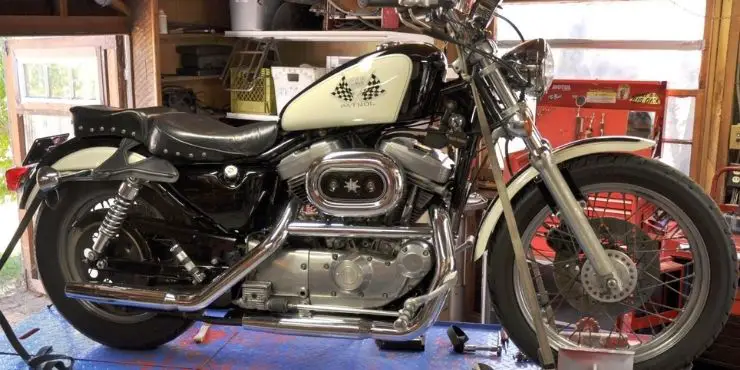
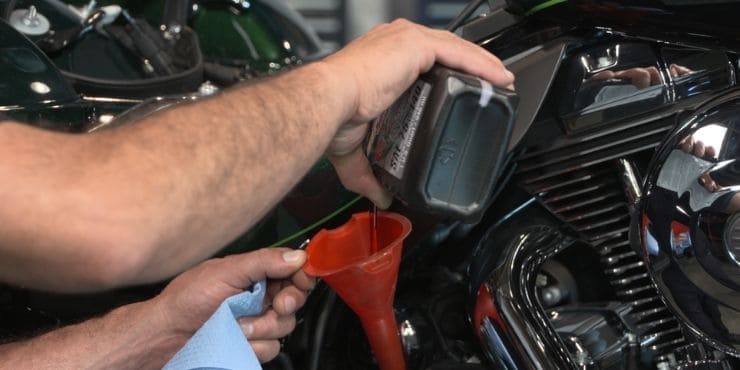
Do you often find your Harley-Davidson motorcycle giving you inconsistent performances after prolonged running periods? This might be because of the transmission fluid issue in your bike. You can always check the transmission fluid within minutes and get your bike running smoothly again.
To check the transmission fluid on a Harley-Davidson, ensure the bike is on a level surface and at operating temperature. Locate the transmission dipstick, usually near the right side of the bike behind the exhaust. Remove the dipstick, wipe it clean, reinsert it fully, then remove it again to check the level. The fluid should be between the “Full” and “Add” marks.
The aforementioned tools, you’ll need to gather by yourself and the instructions, you’ll find in this article. Continue reading and find out how to check transmission fluid in Harley-Davidson and how to resolve this potential problem.
Why you should regularly check the transmission fluid on your Harley-Davidson motorcycles?
One of the most important methods to keep your Harley running smoothly is by performing maintenance checks regularly. You need to know how to check transmission fluid in Harley-Davidson, especially after prolonged running periods. If you drive in your city, you should ensure that you check the fluids on a monthly basis. Too little or too high transmission fluid levels can damage your bike seriously. Further, the damage will likely happen before the transmission hints that something is wrong or the bike feels off. You don’t necessarily need to be a mechanic to check the transmission fluid on your Harley-Davidson.

How to check transmission fluid in Harley-Davidson motorcycles?
Whether you’re new to the Harley-Davidson club or you’re a seasoned Harley-Davidson rider, you’ll need to know the significance of checking transmission fluid. You should be able to locate the duct for transmission fluid and then check the oil dipstick. With the simple steps that you’ll find below, you can easily manage the entire process on your own.
Before beginning, there are a few tools you’ll need to gather so that you can check the transmission fluid easily.
Tools needed to check transmission fluid
- Allen Wrench
- Allen Key Drill Bit
- Thread Lockers
- Torque Wrench
- Owner Manual
Step-by-step instructions to check transmission fluid
Checking transmission fluid is something that you must carry out after every long driving session. Here are the instructions to check the transmission fluid in your Harley-Davidson bike –
Position the bike and adjust the temperature
Firstly, you should ensure that your motorcycle is on ground level and on the side stand. This is important as the section of the transmission fluid sac is positioned in a way that only allows accurate reading if the bike is on the side stand. For avoiding underfilling or overfilling the fluid, ensure that your bike is tilted.
Now, bring your motorcycle to ambient temperature. You can do this by ensuring that your motorcycle has been idle for a while before checking the fluid level.
Get to the oil dipstick
After that, you’ll need to reach the oil dipstick. If you notice carefully, it’ll be in a slightly inconvenient position. You will have to bypass the rear shock adjuster before gaining access to the oil dipstick. To do that, you should prepare the tools and get down to work.
Remove the external layers
Take your Allen Wrench and attach an Allen Drill Bit having size H4 metric to the wrench. Use it to unscrew the main screw in the electrical side cover covering the inner machine of the bike. Now, do the same for the little plate.
Then, use the torque wrench and remove the screws. Keep those screws in a safe place and remove the panel slowly and carefully. Once you’ve removed the main panel, you’ll notice a tiny cover at the bottom barely attached to anything. Remove this cover and put it away safely as well.
Unscrew the preloaded adjuster
Once you’ve removed the cover, unscrew the preloaded adjuster. This will give you access to the oil dipstick over the transmission fluid. To do that, you’ll need a torque wrench and an imperial size Allen Key for unscrewing the preloaded adjuster.
In some cases, there may be screws in different directions. The size of the torque wrench will change depending on whether these screws are in vertical or horizontal directions.
- For horizontal torque gratings, you will require a torque of 60 to 84-inch pounds (or 6.8 to 9.5 Newton-meters)
- For vertical torque gratings, you will require a torque of 24 to 36-inch pounds (or 2.7 to 4.1 Newton-meters)
Once you’ve unscrewed it all, you should remove the dipstick. Now, wipe it thoroughly using a washcloth. Now, put the dipstick back into the transmission fluid. Before you do that, ensure you’re not screwing it back. Lightly place it on top of the block with the ring touching the base of the hole.
Perform the reading
Now, you’ll need to remove the oil dipstick once again for performing the reading and checking the fluid level. The dipstick will have three readings – A, X, and F.
- A signifies empty and it means the fluid needs to be filled
- X signifies neutral and it means you don’t have to fill the transmission fluid
- F signifies full and it means the fluid is full
Depending on these dipstick readings, you’ll be able to decide which action should be taken. In case the reading is close to the A mark, you need to fill up the fluid. In case it is close to the F mark, you should leave the fluid alone. If you feel that you need to add fluid, there are some things to ensure before you buy new fluid. You’ll get to know about them later in the article.
Put everything back in place
Once you’ve checked the transmission fluid level, you should put everything back in its place. Take the torque and screw the preloaded adjuster back to where it was positioned tightly. Similarly, do the same for the plastic cover and electric panel using the screws.
Other than the screws, you’ll also need a thread lock for ensuring that it is placed properly and will not come off easily. In case you don’t have a thread lock, you can use an alternative like a thread for temporarily covering it.
Different types of transmission fluids that you can use in your Harley-Davidson bikes
There are two types of transmission fluid that you can use in your Harley-Davidson bikes. The two choices that you’ll have are –
1. Natural oil
Natural oil is primarily a petroleum-based oil that is also known as crude oil. This type of transmission fluid is liquefiable with appurtenances and largely inexpensive. This type of oil can be used in a wide variety of Harley-Davidson bikes. However, the problem with this one is that it won’t provide good performance in high-temperature. Since natural oil is highly soluble, it’ll break down quickly and change quite often.
2. Synthetic oil
Synthetic oil is the best possible choice for Harley-Davidson bikes as it is a reformed petroleum compound. Synthetic oil will make sure that your bike gets more mileage than standard oil. This way, you’ll be able to travel thousands of miles before the transmission fluid needs to be changed.
The best bit about synthetic oil is that it’ll efficiently lubricate the gears and alleviate noise and wear with appropriate additives. As a result, it’ll give better gear shifting as compared to natural oil.
Synthetic oil is the best option for extreme weather conditions. This type of oil will ensure flawless transmission during both cold and hot weather conditions. The only potential drawback to this type of oil is that it is expensive as compared to natural oil.
Important tips to consider when choosing the best transmission fluid
Choosing the best possible transmission fluid will be difficult if you do not know the different things to consider. Different Harley-Davidson models will require different types of fluid. For that reason, you’ll need to go through the necessary points.
1. Viscosity
Viscosity will indicate the thickness of the transmission fluid. If the transmission fluid comes with low viscosity, the fluid will run faster and more smoothly. In contrast, fluid that has high viscosity will release better surface tension.
The viscosity level can be measured using two different numbers. The first one will refer to how viscous the transmission is in a cold engine and it comes with the letter “W”. “W” stands for Winter. The second will show the fluid flow at an extreme temperature level.
For instance, having 10W-40 viscosity will indicate that the fluid holds an index of 10 for cold and goes to 40 for extreme temperature conditions. Viscosity ranks as one of the most crucial factors for transmission fluid as inaccurate viscosity may damage the gearbox components.
2. Types of transmission fluid
As mentioned above, there are two different types of transmission fluid. The first option is natural oil and the second option is synthetic oil. The more recent Harley-Davidson motorcycles require synthetic oil. It is important to determine which option will work best for your bike. You can consult the owner manual to know which type of oil will be best for your bike.
3. Additives
Additives are another important factor that you’ll need to consider as they have multiple benefits. For instance, additives will play a key role in keeping the bike’s gearbox neat and clean. They will extract the metallic parts, acid, and any debris. Apart from that, the additives will also keep the transmission cool while also playing the role of a friction modifier. Remember that different metal parts inside the transmission will work respectively, be careful when picking the oil with additives.
4. Compatibility
Compatibility is another crucial factor that you simply cannot ignore. One of the most common problems with bikes is that the engine starts leaking after a few days of purchase. This usually happens when you use the wrong that isn’t compatible with your engine. You should remember to check the owner manual of your Harley-Davidson motorcycle and the compatibility of the transmission fluid. This way, you’ll be able to make sure that you are using the right one. The wrong kind of transmission fluid will harm your motorcycle’s components while voiding the warranty.
Conclusion
Thank you for reading. Hopefully, now you have better knowledge of how to check transmission fluid Harley-Davidson. Checking the transmission fluid in your bike isn’t as tricky as some may think. You don’t even need to get in touch with your local dealers. All you need to do is have the right tools and the right instructions and you’re good to go. There is always the owner manual that you can resort to if you have doubts. The trick is all about measuring the dipstick properly and knowing what the readings signify. If you need to add transmission fluid, make sure that you add the option best for your bike.

