Thinking of buying a new Harley but don’t know how to drive a Harley-Davidson? Don’t worry, that’s not a big issue. The more important thing is that you’ve made up your mind that you want to buy a Harley-Davidson.
To drive a Harley-Davidson, start by familiarizing yourself with the clutch, throttle, and brake controls. Engage the clutch, shift into first gear using the gear shifter, and slowly release the clutch while rolling on the throttle to move forward. Use the foot brake for the rear wheel and the hand brake for the front. Shift gears by pulling in the clutch and moving the shifter up or down.
The thrilling experience of driving a Harley-Davidson
Once you get your first taste of Harley-Davidson riding, it’ll be hard to go back to another bike. The thrill of tearing through an empty road or hills on a 1,200cc Harley-Davidson will be nothing short of exhilarating. While Harley-Davidson’s aren’t known for being superfast, that’s the thing about these bikes. You don’t necessarily need to go fast on a Harley-Davidson to enjoy and have fun.

Riding a Harley-Davidson is one of the most magical things that you can have. There aren’t many experiences quite like driving a Harley-Davidson. However, despite being a great experience, it is equally dangerous if you don’t know the right procedure. If you hop on your Harley-Davidson, you’ll need to know the right way of driving it. Continue reading and by the end of the article, you’ll know the right way of driving a Harley-Davidson.
How to drive a Harley-Davidson as a beginner?
Step 1: Choosing the right Harley-Davidson model
For beginners and novice drivers who are looking to buy a new Harley-Davidson, choosing the right bike is essential. There are many exceptional Harley-Davidson models in the market. However, you should look for a Harley-Davidson model comfortable and fairly easy to handle. Purchasing a brand-new Harley-Davidson from a dealership is very helpful, especially for novices. This will help you avoid scams or buying bikes inappropriate for your skill levels.
It would be wise to wait until you’ve got the basics down before upgrading to a complex touring bike. Start out with a smaller bike that is convenient and easy to ride. This makes learning the basics of Harley-Davidson driving safer and easier.
Step 2: Get the necessary safety gear
Harley-Davidson gear will do more than just make the rider look cool. It’ll protect you from any accidents while providing a safety net during a crash. At a minimum, you’ll need to buy –
- A leather, abrasion-resistant jacket
- A well-fitted helmet
- Gloves that cover your whole hand
- Boots that have ankle support and non-slip soles
Having the necessary safety gear is important for all Harley-Davidson bikers. For beginners, it is even more essential. It is common for beginners to slack in this department. They also experience a few minor tumbles before they get a feel for the controls, weight, and handling.
Step 3: Get familiar with your Harley-Davidson bike
Every Harley-Davidson motorcycle comes with a different personality and different features. Take time to explore your bike and get to know all about it. Only then should you head out to ride on your bike. For mounting it, get on from the left side. This will make it easier for you to get a grip on the breaks and on the handlebars. Moreover, the kickstand is also located on the left side.
After mounting the bike, you should start it and take time to warm the engine. Carefully listen to the sound of the engine and get a feel for the motorcycle.
Step 4: Learn to control your Harley-Davidson
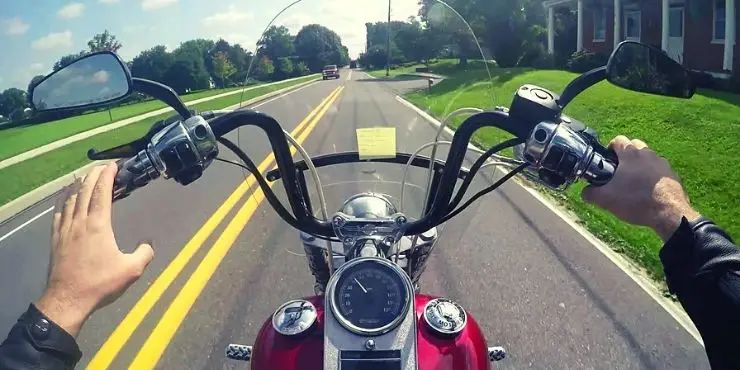
Every Harley-Davidson bike is different from the rest. However, all of them follow the same principles. Before you start to ride the bike, you should get familiar with the controls and the system.
- Dash – Every model’s dashboard is slightly different. However, Harley-Davidson bikes come with a speedometer and an RPM meter. You should keep the RPM out of the red zone, as it’ll help you protect the motorcycle’s engine.
- Turn signals – Every Harley-Davidson motorcycle after 1973 come with turn signals. Most Harley-Davidson models come with one turn signal on each handlebar. They can easily be activated using the thumb. You should remember that unlike cars, not every bike comes with automatic self-cancels. These will not automatically kick in once the turn is completed.
- Mirrors – The drivers must check the side mirrors for ensuring they offer a better view of the road. You shouldn’t set the mirrors and then forget about them. Instead, you should continuously check them every now and then, preferably before each ride.
- Kill switch – A Harley-Davidson bike’s kill switch is essentially an emergency shut-off. It is normally found on the right handlebar. You will have to set the switch to the run position before starting the bike.
- Starter – Most Harley-Davidson bikes come with a starter button next to the kill switch. It’s very easy to identify as it normally feature a circular arrow and a lightning bolt.
- Brake levers – Each bike comes with two brake controls. The front brake will be on the handlebar’s right-hand side. As for the rear brake, it’ll be foot-operated. You shouldn’t try and use the front brake without actually engaging the rear brake first.
- Throttle – A Harley-Davidson bike’s throttle will control the speed. The throttle is usually present on the right end of the handlebar. The driver can easily increase how much gas the engine is getting. You can do this by turning the throttle toward you, or decreasing it by turning it away.
- Clutch – Normally, the clutch lever is found on the left handlebar. Like in manual transmission cars, it needs to be used for disengaging power when shifting gears. The shift lever is located near the left foot of the rider and should be engaged alongside the clutch.
Step 5: Find a road or a route to ride your bike
The best roads for first-time rides are the ones in great condition, traffic-free, and straight without many turns. It would be smart to take your bike to a parking lot to drive for the first time. Many safety-conscious drivers hesitate in jumping on their bikes in public places. They start driving only after they have taken and passed training courses.
Step 6: Try driving and practice until you’re comfortable
Once you’re familiar with your Harley-Davidson bike, you must find a place to test your abilities. Once the engine has warmed up, shift your bike into first gear, and ride away. Start by driving in straight lines, and then downshift until your Harley-Davidson comes to a slow stop. Many drivers prefer using their left foot for stabilizing the bike as it stops. Moreover, you should get used to the bike as steering will take time. It is far more intuitive than you may think. You need to lean slightly in one direction while pushing the corresponding handgrip. Initially, start with turns at 10mph before you take them at full speed.
Important things to remember when driving your Harley-Davidson
The best thing about riding a bike is that there is never a shortage of reasons to ride your bike. Use your Harley-Davidson to commute, go for long rides, or even plan a motorcycle trip with your friends. Once you’ve become comfortable driving your Harley-Davidson, there are no limits. However, there are some important tips you need to keep in mind.
1. Know your comfort zone
Know your capabilities and ensure that neither the chosen bike nor the chosen route is out of your comfort zone. Your preferred bike has to fit you and be convenient to use. You should be able to rest your feet flat on the ground even when you’re seated. In case you feel that the bike is a bit too heavy, then it probably is.
2. Inspect your bike
Give your Harley-Davidson a thorough inspection before you hit the road. Some of the things to check each time you get on your bike include the mirrors, lights, and tire pressure. Further, taking a walk around your Harley-Davidson will let you know if there are leaks, loose bolts, or mechanical hazards.
3. Use your head
Although mirrors are there for a reason, you shouldn’t rely on them to keep you aware of what is in the immediate vicinity. To be cognizant of the surroundings and your position in relation to the things around you. This can be done by using your head.

Experienced Harley-Davidson drivers know how important it is to use your head and eyes. This is even more important when rounding corners. Moreover, the safest way of changing lanes is to turn and look over your shoulders and ensure that you’re clear. You’ll also get a feeling for whether others on the road are paying attention to you or not.
4. Watch the road
As a Harley-Davidson rider, you should pay attention to the road that you’re driving on. Be on the right side of caution when going into curves. You must be vigilant for unstable road conditions or gravel on the road. When you’re crossing railroad tracks, be careful as the paint can be slippery. The same will apply to the white lines at the stoplights.
5. Know the forecast before going out
Weather is an important factor in perfect driving conditions. There are a lot of dangers when you’re driving on wet, rainy roads or icy alleys. Not only will you have less stability, but the lack of windshield and exposure to rain adds to the risk. Lack of visibility is the worst nightmare of a rider. Until you’ve gotten caught on your motorcycle in the rain, you won’t understand how much it hurts to be pelted by raindrops at several miles per hour.
Conclusion
Thank you for reading. Hopefully, now you’ll have a better idea of how to drive a Harley-Davidson. The secret lies in preparing yourself and only going on the road once you’re comfortable. Have the necessary safety gear and learn the basics of your Harley-Davidson bike’s system. Leave the rest to the step-by-step guide mentioned above.

