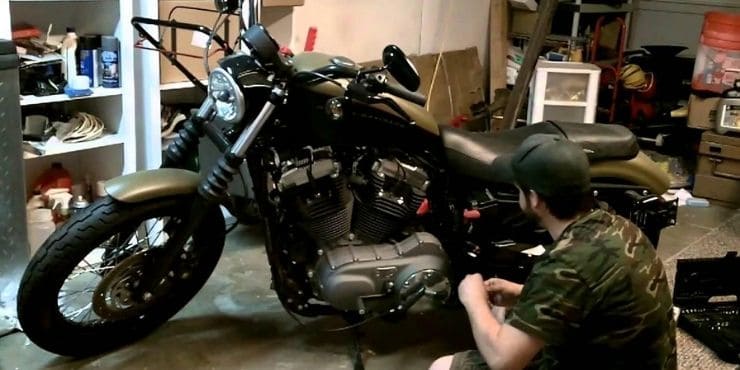
Have you been looking for ways to install a Harley-Davidson Sportster battery after having removed it for some reason? If so, then you’re definitely in the right place. By the end of this article, you’ll know how to install a Harley-Davidson Sportster battery.
To install a Harley-Davidson Sportster battery, remove the seat to access the battery compartment. Disconnect the negative terminal first, followed by the positive terminal. Remove the old battery, install the new one by connecting the positive terminal first, then the negative, and reattach the seat.
In this article, you’ll get to know all about how to install a Harley-Davidson Sportster battery. The step-by-step guide will make the entire process easier every step of the way.
How to install a Harley-Davidson Sportster battery?
The Harley-Davidson Sportster is one of the most popular high-end motorcycles of Harley-Davidson. Despite being a highly expensive and sought-after bike, just like other bikes, it’ll also need a battery to properly function. Without a battery installed, your Harley-Davidson Sportster is largely worthless.
Installing a new or a replacement battery in your Harley-Davidson Sportster might seem like a daunting task at first. Once you know the procedure, you’ll find it to be incredibly easy. In this step-by-step guide, you’ll get to know the right way.
1. Read the owner’s manual
The most important tool that you’ll find in your toolbox will be the owner’s manual. Many users think that know more the manual and try doing everything on their own. Sure, there might be some instances where the job may be familiar enough that you won’t need the manual. However, when installing a Harley-Davidson Sportster battery, you’ll need to read the owner’s manual first. This will have key information that you need to know before starting.
2. Find the battery location
The location of your battery will be mentioned in the owner’s manual. In the Harley-Davidson Sportster, the battery will be located at the back of the seat. For accessing the battery, you’ll need to remove the motorcycle’s seat. At the back of the seat, there will be a screw that you should unscrew. Do this by using a Phillips screwdriver.
Once you have completely unscrewed it, simply slide your motorcycle seat backward before completing removing the seat. Then, disconnect the straps keeping the battery covered. After that, remove the straps and battery cover by simply removing the bolt and the washer on the right side of the battery cover.
3. Disconnect the negative terminal of the battery
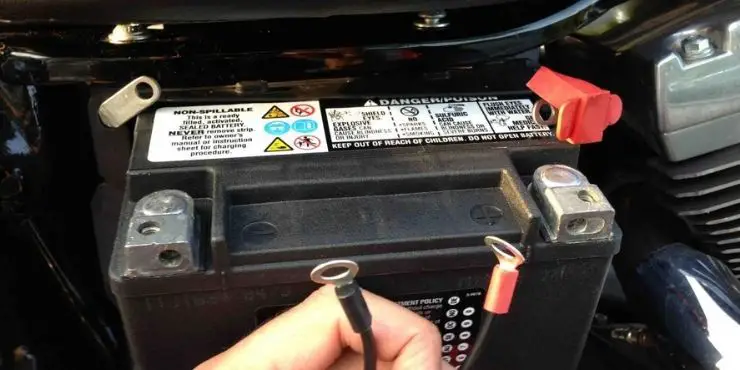
Before removing the battery, access the terminals of the battery and unscrew the bolts connecting them to the battery. When you’re removing the battery, make sure that you disconnect the negative cable first. It is normally black and the corresponding terminal in the battery. Moreover, it’ll be marked with a ‘-‘ sign. If you switch the order, nothing bad will happen as long as you aren’t making any contact between the positive side and the ground. Many motorcycles use the frame as a ground. This means that any metal part near the positive could be a route for electricity to travel.
By removing the negative side first, you’ll be able to minimize any chances of grounding out the battery. If the removal tool bridges the gap between the positive terminal and the frame after the negative cable has been removed, nothing will be affected. If you cannot disconnect the negative side first and end up accidentally bridging the gap, you might pop a fuse. Further, you might even burn yourself in the worst-case scenario. If you’re working on a model that isn’t properly fused, you’ll even risk starting a fire. Make sure that you’re taping out the cable such that you don’t make any accidental contact with the battery terminal.
4. Now, remove the positive cable
Once you’ve broken the circuit, remove the positive cable. This cable will likely be in red, but this isn’t the case always. The battery will be marked ‘+’ on this terminal.
5. Remove the battery
Now, you’ll need to remove any hold-downs that keep the battery secured. It could be a rubber strap or foam blocks, or a metal piece retaining the battery. In any case, you’ll have to get them out such that you’re able to pull the battery out. Remember to be cautious when pulling out the battery. This is the case as batteries will have “hollow” terminals. These terminals house nuts that the bolts retaining the cables will thread into.
They can easily fall out. In case you don’t have a spare set, they might fall into a crevice into the bike, making them irretrievable.
6. Install the new Harley-Davidson Sportster battery
Before installing the new battery, you need to first clean the positive and negative cables using a wire brush. Moreover, check for potential rust or acid corrosion. You will need to examine the situation. If you are using a new battery, you should ensure that the physical size of the battery is the same. Moreover, ensure that the battery comes with similar power to the one that your bike requires. Lastly, ensure that the positive and negative terminals aren’t reversed.
If the battery has to be filled with acid, you must fill it before putting it on the bike. This way, you won’t risk spilling acid on the bike. Some batteries don’t come with acid. For such batteries, the best option is to consult a local motorcycle shop and tell them to fill the battery. This happens as the acid will be sold in larger quantities than you’ll require for a lone battery.
Some of the batteries will come with acid. Meanwhile, others are simply big containers and you’ll need to fill the six cells by eye. Others will feature six separate chambers that have the appropriate amount of acid within them. If you’re using this type of acid pack, simply invert the battery and then place it on the pack. Make sure that it is sealed. Once the battery is locked together, flip the whole thing over and let it drain. Doing things this way will prevent any potential chances of acid spilling if you cannot puncture the nozzles evenly.
Follow the filling instructions mentioned by the manufacturer. You should be extra careful and try doing it in a well-ventilated place or outside. Hydrogen gas will be produced as the by-product of this chemical reaction, and it is highly flammable.
Moreover, you should charge the battery as well. You need to be extra careful around the acid as it can result in nasty burns. Lastly, make sure that you keep baking soda and soap water nearby, as it’ll neutralize stray acid.
Once it has been fully charged, reinstall it. If you’re installing a battery with a different footprint in comparison to the factory design, it’s time to be creative. Now, show creative engineering and fabrication with rubber and foam to locate the battery such that it cannot move. Lithium batteries will need this step as they’re smaller than compared to lead-acid batteries. Moreover, they’ll come with foam spaces to help with this step.
7. Connect the cables
Once you’ve put back the battery, you will have to connect the cables. Insert the lead nuts back into the terminal before putting the battery back into place. Reattach the positive and negative terminals the way you found them. Connect the positive cable to the positive terminal. Then, connect the negative cable to the negative terminal. Brush them off in case they’re corroded or have any powder on them. A wire brush will help you with this.
The installation will be the exact reverse of the removal. The order will be key here. First, you should attach the positive cable and then hook the negative cable. Remember to double-check that you’re connecting the correct cable to the correct terminal. Failure to do this could potentially end up popping fuses, frying electrical components, and general heartache.

If you’re looking to protect your investment, paying a bit extra for a battery terminal spray can keep corrosion away. Ensure that the terminals are snug and proper but not too tight.
Sometimes, the little bolts fastening the cables could be too short to pick up the lead nuts they’re tightening into. At other times, the battery needs to be tilted sideways for installing it and the nuts can fall out. In such cases, you should either take a piece of the old battery vent hose or vinyl tubing. Then, cut off a piece to act as the spacer to lift the nut to the top of the terminal. If you have to tip the battery sideways, the pressure will help keep it from falling out.
Here is another tip for Harley-Davidson Sportster riders – you might find that the terminals on the new battery are offset from the edge of the battery. However, you’ll need the terminals to be flush. Keep in mind that this isn’t the wrong battery, this is just an additional step that you have to tackle. Many battery manufacturers include a set of brass or aluminum spacers, taking up space for bikes whose cables need them. If you need them but don’t have them, you will need to buy a set immediately.
8. Test the new battery and finish up
Before you finish up, you should put together everything and flip the key to ensuring you’ve got the power. If the lights switch on, then great. Turn it off again. If they don’t, you’ll need to do some investigation. Ensure that the connections are proper and connected to the correct terminals. If you’ve reversed them, you might need to do some electrical work, at minimum a fuse replacement or maybe more.
Lastly, for finishing up, you’ll have to reinstall any of the items that you have removed for accessing the battery. Give your Harley-Davidson Sportster with the new battery a throttle to see if you notice any difference. You will get better performance and more power from your bike’s new battery.
Conclusion
Thank you for reading. Hopefully, now you’ll have a better understanding of how to install a Harley-Davidson Sportster battery. The key here will be to pay attention to the positive and negative terminals. Make sure that you remove the negative cable first, then the positive. After installing the battery, connect the positive first and then the negative. Make sure that you take proper care of the battery as it can extend the lifespan of the battery.

