Are you dreaming of riding a Street Glide with ape hangers? Installing ape hangers on your motorcycle can give it a stylish, custom look that is sure to turn heads. But if you’re not a mechanic or don’t have experience with motorcycle maintenance, the task may seem daunting.
To install ape hangers on a Street Glide, remove the fairing and disconnect the wiring. Swap the handlebars, feed wiring through the new bars, and reattach all connections. Adjust the cables and reassemble the fairing securely.
Don’t worry – this step-by-step guide will make the installation process simple and easy. Whether you’re new to the world of motorcycle customization or an experienced rider, you’ll be able to install ape hangers on your Street Glide like a pro. So let’s get started!
Overview of Ape Hangers on a Harley-Davidson Street Glide
Ape Hangers are a popular handlebar style among motorcycle enthusiasts, and they are known for their distinctive and eye-catching appearance. When it comes to the Harley-Davidson Street Glide, installing ape hangers can enhance the motorcycle’s style, comfort, and overall riding experience.
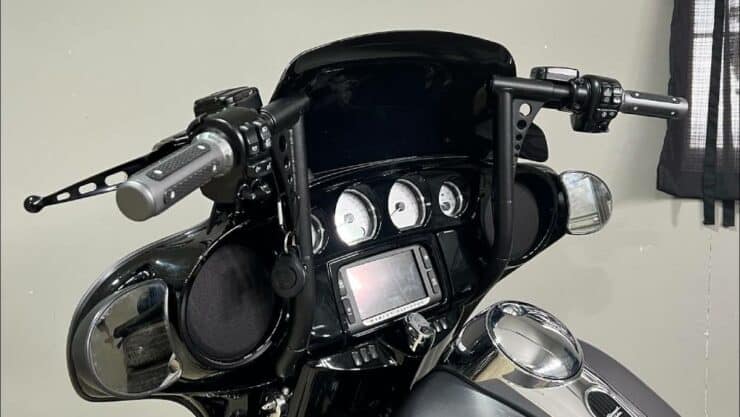
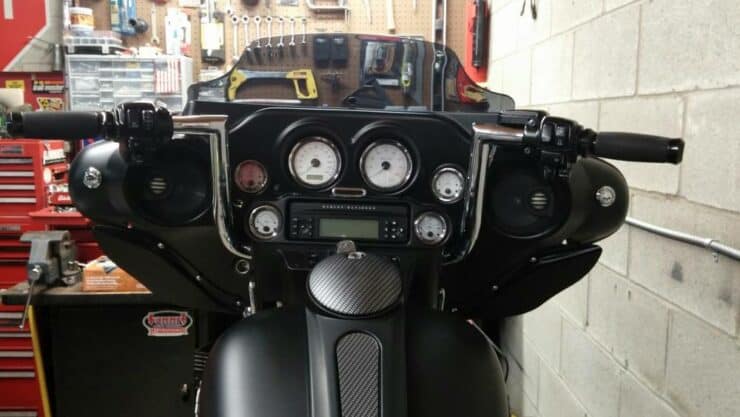
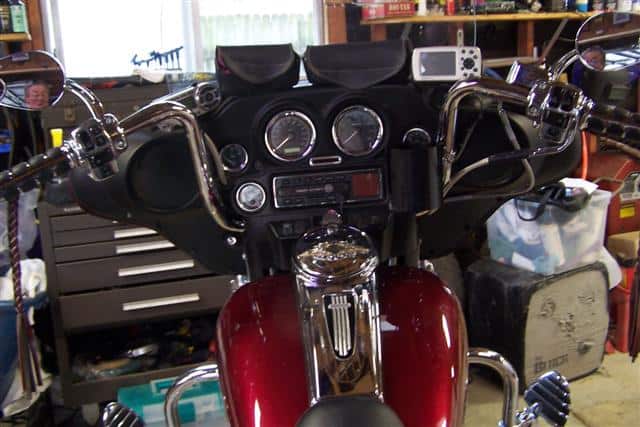
Ape hangers are tall, upright handlebars that extend above the biker’s shoulders, resembling the arms of an ape hanging from a branch. These handlebars come with a unique and aggressive look, making them an extremely popular choice for bikers seeking a bold and customized aesthetic.
Ape hangers can easily transform the visual appearance of the Street Glide, giving it a distinctive and head-turning look. They provide a sense of individuality and customization, allowing riders to express their personal style.
Ape hangers also offer a much more relaxed and upright riding position, reducing the strain on the rider’s back, shoulders, and wrists. The increased height and pullback of the handlebars will provide a comfortable and ergonomic riding posture, especially on long rides.
Contrary to popular belief, properly installed ape hangers don’t negatively impact the handling and comfort of the bike. In fact, they can help improve maneuverability and responsiveness by providing better leverage and control over the bike.

Gather tools and components necessary to install ape hangers
Installing ape hangers on a Street Glide can transform the look and feel of your Harley-Davidson Street Glide. However, it is essential that you choose the right handlebars, have the necessary tools and equipment, and choose the appropriate parts in the right order to make sure you can carry out a successful installation. But before you can get on with the installation, it’ll be important to gather the necessary tools and components. Here are the steps to take that –
Choosing the handlebars
The first thing to consider will be comfort and ergonomics. Ape hangers come in different heights, so you should choose one that offers a comfortable riding position without causing any excessive strain on your back, shoulders, and wrists. Further, you should also determine the style. Ape hangers come in different styles, such as classic or fat bars. You must consider the aesthetics and match them with your bike’s overall design. Lastly, you should also check the compatibility. Ensure that the handlebars you’re selecting are compatible with your Street Glide’s model year and have the appropriate measurements for fitment.
Purchase the necessary tools and equipment
- Hex wrenches – A set of hex wrenches that come in different sizes will be important for loosening and tightening various bolts
- Torque wrench – Invest in a torque wrench for ensuring proper tightening of bolts without over-tightening or damaging the components
- Wire cutter/stripper – You might also require these tools for handling any wiring modifications that may be necessary during the installation process
- Allen keys and socket set – You must have a comprehensive set of Allen keys and sockets to handle different bolt sizes during the installation
Select and order other necessary parts
There are a few more necessary parts that you will require before you can carry out the installation. Here are those parts –
#1. Cable extensions
Ape hangers typically need longer control cables and wiring for accommodating the increased height. You need to measure the required extension length and order compatible cable extensions.
#2. Brake line extension
Determine if your Harley-Davidson Street Glide’s brake line requires extending to accommodate the new handlebar height. If needed, you should order a brake line extension kit that is specifically designed for your Street Glide’s make and model.
#3. Clutch cable extension
Some Street Glides might require a clutch cable extension if the new handlebars increase the distance between the handlebar and clutch assembly. Check your bike’s specifications and order a compatible clutch cable extension if necessary.
#4. Handlebar installation kit
To ensure a handle-free installation, you should consider buying a handlebar installation kit that includes items like clamps, risers, and necessary hardware for mounting the handlebars securely.
Once you’ve chosen the handlebars, purchased the necessary tools, and ordered the right parts, you can proceed with the installation process. It’ll be important that you follow the manufacturer’s instructions carefully and take time to ensure a safe and secure installation. If you’re unsure about any step, consult a professional motorcycle mechanic or refer to reputable installation guides and videos.

Prepare your Street Glide for installing Ape Hangers
When you are installing ape hangers on a Street Glide, it’ll require you to prepare your Harley-Davidson Street Glide first. Proper preparation will be important for ensuring a smooth installation process. Here are the steps that you will need to take to prepare your Harley-Davidson Street Glide for ape hanger installation –
#1. Remove the fairing and fairing support
First, you should gather the necessary tools. You will require tools like hex wrenches, a socket set, a torque wrench, and more. Then, start by disconnecting the negative battery terminal for preventing any electrical mishaps. Remove the outer fairing by loosening the screws or bolts securing it. You could refer to your bike’s owner’s manual for specific instructions. Once the outer fairing has been removed, you should locate and remove the fairing support brackets using the appropriate tools. Keep the hardware in a safe place for reinstallation later.
#2. Disconnect the cables and wires
You need to start by identifying the cables and wires connected to the stock handlebars. These might include throttle cables, brake lines, clutch cables, and various electrical connections. Carefully disconnect the cables and wires one by one, making sure that you remember their original positions for reassembly. Make use of cable ties or tape for securing the disconnected cables and wires, preventing them from dangling or getting tangled during the rest of the installation process.
#3. Remove the stock handlebars
Loosen the screws or bolts securing the stock handlebars to the risers. Utilize the appropriate tools like hex wrenches or a socket set. Once the bolts have been loosened, you should carefully lift the stock handlebars out of the risers, making sure that you do not damage any cables or wires that might still be attached. You must take note of any additional components like clamps or risers that might have to be removed to fully detach the handlebars.
You must remember that you take your time during this time and keep track of various components and hardware you remove. It is advised that you should label or take pictures of the cable and wire connections for easy reference during reinstallation.
As you proceed with the installation, you could refer to the manufacturer’s instructions for installing the ape hangers and any required cable extensions or additional components. Make sure that all the connections are secure and that the cables and wires are routed properly to avoid any interference or pinching.
How to install ape hangers on a Street Glide
Once you have gathered the necessary tools and equipment and prepared your Street Glide, you will be able to get on with the installation. Installing ape hangers on your Street Glide will involve assembling and securing the handlebars, reconnecting the cables, and aligning the handlebars before the final bolting. This is an important phase of the installation process that ensures proper functionality and safety. Here are the steps that you will need to follow to install ape hangers on your Harley-Davidson Street Glide –
#1. Assemble and secure handlebars
Start off by sliding the ape hangers onto the risers, making sure that they are properly aligned and at the desired height and angle. Apply a small amount of Loctite or thread locker to the bolts or screws that secure the handlebars to the risers. This will help prevent them from loosening over time. Then, you should carefully thread the screws or bolts through the handlebars and into the risers, making sure that they are tightened securely. Use appropriate tools and equipment like a torque wrench for achieving the recommended torque specifications.
#2. Reconnect cables and wires
Refer to the labels or the picture you previously took after the step where you disconnected the cable and wire. Start off by reconnecting the cables and wires to their respective ports on the handlebars. Pay close attention to the routing and make sure that they are not twisted or pinched. Take extra care with electrical connections, making sure that they are plugged in and secured properly. Then, you should double-check the connections to avoid any potential electrical issues.
#3. Align the handlebars and bolt them
Before you fully tighten the handlebar bolts, you should make sure that the handlebars are aligned with the bike’s front wheel. Sit on the motorcycle and grasp the handlebars, making slight adjustments as necessary for comfort and optimal control. Once you are satisfied with the handlebar alignment, you should tighten the handlebar bolts securely. Make use of a torque wrench for achieving the recommended torque specifications, avoiding over-tightening or damaging the components.
It is important that you exercise caution and pay keen attention to detail during this process. Moreover, double-check all connections, alignments, and tightening to make sure you can carry out a safe and secure installation. Once you have completed these steps, take time to inspect all connections, cables, and wires once again. Make sure that they are properly secured and free from obstructions or potential hazards.
Once you are confident about the installation, you should reconnect the negative battery terminal and conduct a final test for verifying that all controls, cables, and wires are functioning correctly. Turn on the motorcycle and test the throttle, brakes, clutch, and other controls to ensure smooth operation.
Finalizing the installation of ape hangers on your Street Glide
Once you have successfully installed ape hangers on your Harley-Davidson Street Glide, you will need to finalize this installation by fitting and securing the fairing and support, checking alignment, and tightening the bolts. Lastly, you should also test the handlebars for potential adjustments that need to be made. This critical phase will ensure that you get a secure and functional installation. Here are the steps you will need to follow to finalize the installation of ape hangers on your Street Glide –
#1. Fitting and securing fairing and support
First, you will need to retrieve the fairing support brackets and hardware that you removed earlier. Align the fairing support brackets with the appropriate mounting points on your Street Glide’s frame. Carefully install the fairing support brackets and secure them using the original hardware or new bolts if necessary. After that, you need to tighten the bolts securely but avoid over-tightening.
#2. Checking the alignment and tightening the bolts
Make sure that the fairing is aligned properly and evenly on both sides. You have to make any necessary adjustments to achieve a balanced appearance. Then, you have to check the alignment of the handlebars in relation to the motorcycle’s front wheel. They should be straight and parallel to the wheel.
If you have to make any adjustments, you should loosen the handlebar bolts slightly and make the necessary alignments. Once aligned, you must tighten the bolts securely with the help of a torque wrench according to the manufacturer’s specifications.
#3. Testing handlebars and making adjustments
Once the fairing and handlebars are secured in place, you need to reconnect the negative battery terminal if you disconnected it during the installation process. Start your bike and test the functionality of the handlebars, including the clutch, throttle, brakes, and other controls. Pay close attention to any binding, interference, or unusual resistance while operating the controls. If any problems arise, stop your Street Glide and inspect for potential causes, such as pinched cables or misaligned controls.
If any adjustments are necessary, you need to loosen the handlebar bolts and make the necessary changes. Test the controls once more after each adjustment until they operate smoothly and without any problems.
During this process, it will be important that you are thorough and meticulous. Double-check all the connections, alignments, and tightening to make sure there’s a safe and secure installation. Once you have completed these steps, take a moment to visually inspect the installation, pay attention to cable routing, wire connections, and the appearance of the handlebars and fairing. Make sure that they’re secure and free from any obstructions or hazards.

Troubleshooting issues with ape hangers
Troubleshooting issues with ape hangers on a Harley-Davidson Street Glide might involve resolving alignment problems, tightening the connections, addressing issues with cables and wires, and more. Issues can arise at any time. This is why proper diagnosis and resolution of these issues will be crucial to make sure you can carry out a safe and functional installation. Here is how you can troubleshoot and resolve common problems that might arise with ape hangers on your Harley-Davidson Street Glide –
#1. Alignment issues
If you notice any misalignment of the handlebars in relation to the motorcycle’s front wheel, start by loosening the handlebar bolts slightly.
You must also adjust the handlebars until they are straight and parallel to the front wheel. Take your time and make the adjustments as needed. Once the desired alignment has been achieved, you should tighten the handlebar bolts securely with the help of a torque wrench to make sure you get proper tightening. Remember that you shouldn’t over-tighten the bolts.
#2. Tighten the connections and bolts
You need to check all connections, including those of cables, wires, and components. You should make sure they are securely fastened and tightened. Make use of the appropriate tools such as a socket set or hex wrenches for tightening any loose connections or bolts. Be cautious that you don’t overtighten, as this might damage components or cause binding issues. Follow the manufacturer’s recommendations for torque specifications.
#3. Issues with cables and wires
Inspect the cables and wires for any signs of pinching, damage, or improper routing. Make sure that the cables and wires are properly contacted to their respective ports and securely fastened. If the cables or wires appear damaged, you should replace them with compatible replacements. It is important that you use high-quality OEM or aftermarket parts for maintaining proper functionality.
#4. Control issues
If you are experiencing any control problems, such as throttle sticking or difficulty in operating the clutch or brakes, you should carefully inspect the cables and their routing. Look for any signs of pitching, binding, or excessive tension in the cables. You must adjust the routing or reroute the cables if needed. Make sure that the cables are connected and securely fastened to the handlebars and control mechanism. Tighten any loose connections or bolts. If any control issues persist, you need to consider replacing the affected cables or seeking assistance from a professional motorcycle mechanic.
#5. Cable length and routing
You must check the length of the cables and wires for ensuring that they are appropriate for the increased height of the ape hangers. In case the cables are too short or tight, they might restrict the movement of the handlebars and cause issues. You must consider installing cable extensions or longer cables if needed.
Moreover, you should verify that the cables and wires are routed properly and that they don’t interfere with any other components or moving parts. Adjust the routing as needed to ensure smooth movement and prevent binding.
#6. Clearance and interference
You need to carefully inspect the area around the handlebars, fairing, and other components for signs of interference or contact. Look for any marks, scratches, or signs of rubbing that might indicate clearance issues. Moreover, you should make any necessary adjustments, such as repositioning cables, wires, or components, to ensure proper clearance and prevent potential damage.
#7. Test and verify
Once you’ve addressed alignment, tightened conditions, and resolved any cable or wire issues, it’ll be time to test the handlebars. Start your Harley-Davidson Street Glide and test the functionality of the handlebars, including the throttle, brakes, clutch, and other controls.
Pay close attention to any unusual resistance, binding, or irregularities while operating the controls. If there are any issues, you should stop your Street Glide and carefully inspect the affected areas for potential causes, such as misaligned controls, pinched cables, or damaged components. Repeat the troubleshooting steps as necessary, making adjustments, tightening connections, or replacing damaged parts as needed.
Take professional assistance if needed
If you aren’t able to resolve the issues or if you aren’t sure about any troubleshooting steps, it is recommended that you seek assistance from a professional mechanic. A professional will provide expert guidance, diagnose any complex issues, and ensure a safe and proper resolution to the problem.
Remember that safety should always be your top priority. It is important that you address any issues with ape hangers prompting for ensuring a safe and enjoyable riding experience with your Street Glide.
FAQ
What tools do I need to install ape hangers on a street glide?
To install ape hangers on a street glide, you will need a set of wrenches, a socket set, a wire stripper, a drill, and a set of drill bits. Additionally, you will need a set of handlebar risers and the appropriate length of cables for your motorcycle.
What is the process for installing ape hangers on a street glide?
The process for installing ape hangers on a street glide involves first removing the stock handlebars and risers, drilling the holes for the new ape hangers, and then installing the new handlebars and risers. Additionally, you will need to cut and route the cables, adjust the clutch and brake levers, and attach the cables to the new handlebars.
How do I ensure that the ape hangers are installed properly?
To ensure that the ape hangers are installed properly, you should double-check that all the bolts are tightened securely and that the cables are routed correctly. Additionally, you should check that the handlebars are level and that the brake and clutch levers are adjusted properly. Finally, you should verify that all the components are working properly, that the handlebars are not loose

