Do you own a Harley-Davidson bike, but you’re unsure about how to install the exhaust gaskets properly on your bike? If so, then you’re definitely in the right place.
To install exhaust gaskets on a Harley, remove the old gaskets from the cylinder heads using a pick. Insert the new gaskets carefully into place. Reattach the exhaust pipes, ensuring the flanges are evenly tightened to prevent leaks.
In this article, you’ll get to know about exhaust gaskets on a Harley, how do exhaust gaskets work, how to install exhaust gaskets on a Harley-Davidson bike, the alternative method of installing an exhaust gasket, and more. Continue reading to get all the answers that you’re looking for.
Install exhaust gaskets on your Harley-Davidson bike
Owning a Harley-Davidson bike requires you to take special care of your precious motorcycle. If it’s a higher CC bike with additional powerful features, it’ll give you trouble if you don’t take proper care of it. Installing exhaust gaskets on your Harley-Davidson bike will let you take better care of it.
Moreover, it’ll keep the bike running for extra miles without odd sounds. When your motorcycle has issues with exhaust gaskets, you’ll face issues like backfires, low engine power, absurd sound, etc. Removing the old gasket and installing a new one is the best way of replacing a defective gasket yourself. It isn’t as complicated as it might seem. This article will give you on how to install exhaust gaskets on a Harley-Davidson bike.
How does a Harley-Davidson exhaust gasket work
The gasket is essentially a joint connecting seal between the cylinder head and the manifold. It works similarly to a sealant. In most cases, you won’t require an extra sealant to install it. However, you can still use one for making better bonding. It’ll play a major role in sealing the exhaust gas exit through a catalytic converter. If you fail to use it properly, or it isn’t working, you’ll pollute the environment, which is extremely harmful to your health.
What will happen if you don’t install the exhaust gasket at the right time? Harley-Davidson motorcycles are among the most powerful and high CC motorcycles. They tend to generate massive power when driving on the road. If the exhaust gasket isn’t working, it might cause issues like misfires, polluted gas leakage, etc. When you’re facing any issue, it would be best to replace the gasket as soon as possible. If you’re not confident enough to install an exhaust gasket yourself, you can always take help from a mechanic and use a Harley-Davidson exhaust gasket kit to get it done.
How to install exhaust gaskets on a Harley-Davidson bike
Installing an aftermarket exhaust gasket is a simple and rather inexpensive way of personalizing your bike. Granted, the job might look a bit daunting, especially if your only prior mechanical experience is dropping off your Harley-Davidson bike at the local mechanical shop. In reality, it’s neither difficult nor a lengthy procedure, and it requires minimal tools or mechanical experience. This makes it a remarkable do-it-yourself project.
If you’re facing any issues with the exhaust gasket, you must go for immediate replacement. If you don’t replace the damaged exhaust gasket, the exhaust pipe might start acting abnormally. As a result, your riding experience will be heavily affected. The damaged gasket might even cause the exhaust to become loose. It’ll increase the vibration of your bike. You must take immediate action and replace an old gasket from the exhaust system.

You can make use of OEM Harley-Davidson parts as they don’t require many skills for installation. Moreover, it’ll save you from added costs of purchasing installation parts. Put it in the freezer for a couple of hours. This keeps the exhaust gasket at the right temperature for longer durations for quick and easy installation.
Step 1
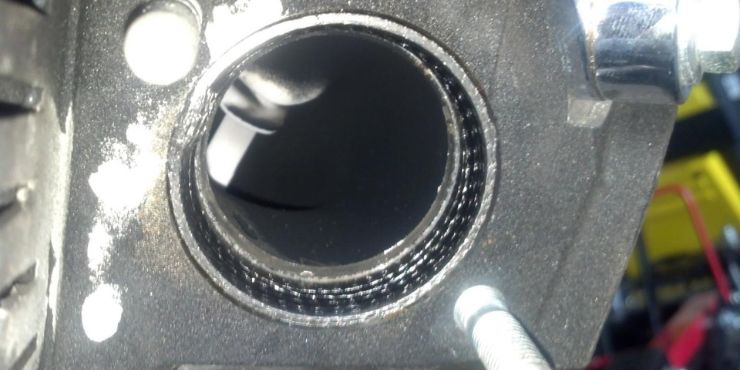
Located the older gasket under the exhaust pipe of your bike. You’ll need to raise the bike to find the pipe and its connecting gasket. You can even follow the user manual for better understanding.
Step 2
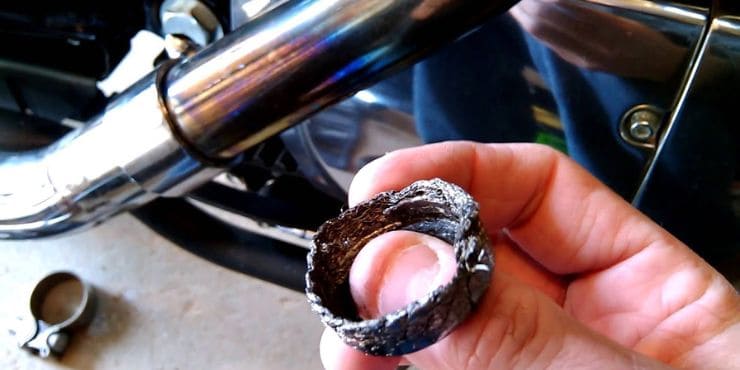
Once you’ve found the old gasket, make use of a screwdriver or your finger for removing it. You should make sure that you don’t end up hurting the exhaust pipe, and otherwise you could damage its color.
Step 3
After that, install the new exhaust gasket with the help of a screwdriver and then press the edges slowly. You should fasten the screws properly without damaging the threads.
Step 4
Use a sealant for connecting and sealing the edges accurately to get better performance. It’ll be useful for protecting the gasket from damage for a long time.
Step 5
Finally, you should use a hot gun for drying the glue properly. You should be using a high-quality adhesive, as the gasket often becomes hotter and damages low-quality glues.
Once you’ve finished installing the new gasket, you should check the motorcycle. Drive the Harley-Davidson bike for 10-20 miles to see whether the new exhaust gasket is working properly or not.
An alternative way to install an exhaust gasket on your bike
Similarly, there’s another way you can install an exhaust gasket too. Although it’s a similar process, you can try it out as well. Moreover, this method will work well in a few Harley-Davidson models.
Step 1
Shrink the new gasket in the freezer for 7-8 hours. It’ll help the new exhaust gasket to remain in its perfect shape during the installation.
Step 2
Remove the older exhaust gasket with Drexel and a wire brush, and then clean off the edges. As you’re removing the old gasket, you will also need to clean the entire exhaust system with detergent and lukewarm water. It’ll help you in maintaining your Harley-Davidson bike better.
Step 3
Then, you should take the new gasket soft with lubricant. You need to use A-grade lubricants to get better results, and otherwise it may not work.
Step 4
After that, you need to install it with an exhaust. Look screwing options and then tighten them properly. It’ll help you maintain the gasket’s tightness with the exhaust.
Step 5
Then, attach it softly and then check in case there are any gaps or not. Then, you should use a sealant for keeping the edges strong. The sealant prevents the edges from wearing out due to weather and other external elements.
Once you’ve finished the installation, you must keep the motorcycle idle for a few minutes. After that, run the engine for a few minutes to heat it up and check for installation. This is how you will be able to get the exhaust gasket installation done and move with your regular riding.
Remember, when you’re working with the exhaust system, including the gasket, always work carefully. Make sure that your bike is in idle condition. It’ll cool off the exhaust pipe otherwise, you might experience scalding on your skin because of the heat of the exhaust pipe.
How much will it cost to change the exhaust gasket
It’ll help if you’ve tried it out yourself, as it’s an incredibly easy process. If you’re replacing the exhaust gasket yourself, it’ll cost you little to no money. Moreover, you’ll be able to finish the job within minutes. If you aren’t confident enough to replace the exhaust gasket yourself, you can take your motorcycle to your nearest local mechanic. They will fix the exhaust gasket situation within a matter of minutes. However, it’ll set you back a few hundred dollars, as installing a new exhaust system costs between $250 to $350.
What is the best material for a Harley-Davidson exhaust system?
According to motorcycle experts, copper is the best material that can tolerate heat and matches all the requirements. Other conventional materials are incompatible or good enough to be used on the exhaust. Motorcycle manufacturers checked the standard of copper while also measuring the conductors. From numerous tests, it was found that copper gasket results in the best performance.
Moreover, you should use sealant to improve the bonding. Generally, gaskets are made for fitting by themselves. You may have to shrink a bit while installation, which means they will not need any extra sealant. This can end up being a money-saving deal. On the other hand, some of the gaskets come with their own sealants. If you can fit it properly, it won’t require any extra sealant. So, why should you use extra sealant in the guide? The guide mentioned above will make it as easy as possible to install by yourself. Therefore, in that process, you may need extra sealant for strengthening the bonding.
Conclusion
Thank you for reading. Hopefully, now you know a lot more about exhaust gaskets on a Harley, how do exhaust gaskets work, how to install exhaust gaskets on a Harley-Davidson bike, the alternative method of installing an exhaust gasket, and more. Installing exhaust gaskets on a Harley-Davidson bike is a relatively simple process. All you need to do is find the old gasket, remove it, install the new gasket, use a sealant to seal the edges accurately, and then hot glue the new gasket. Drive your Harley-Davidson bike for 10-15 minutes to confirm that everything is working fine.

