Have you been trying to install a heel-toe shifter on your bike but struggling to do it? Don’t worry, this article is just what you need.
To install a heel-toe shifter on a Harley-Davidson, first remove the existing shift lever by loosening the bolt that holds it in place. Slide the new heel-toe shifter onto the shift shaft, ensuring proper alignment. Tighten the bolt to secure it. Test the movement of both the toe and heel levers to ensure smooth operation before riding.
In this article, you’ll get to know all about how to install heel-toe shifter Harley-Davidson, how does it work, how to use it, its advantages and disadvantages, and a lot more.
What is a heel-toe shifter on Harley-Davidson bikes?
Harley-Davidson heel-toe shifters have been in use for almost decades. In fact, not many Harley-Davidson users know this, but Harley-Davidson began manufacturing bikes with heel-toe shifters in the 50s. Since then, this useful yet good-looking design has become incredibly popular amount touring bikes and cruisers. Through the years, more and more manufacturers have started offering heel-toe shifters. Although not many drivers prefer using heel-toe shifters, a lot of the stock cruiser and touring bikes still do not feature this key component. But what exactly is a heel-toe shifter?
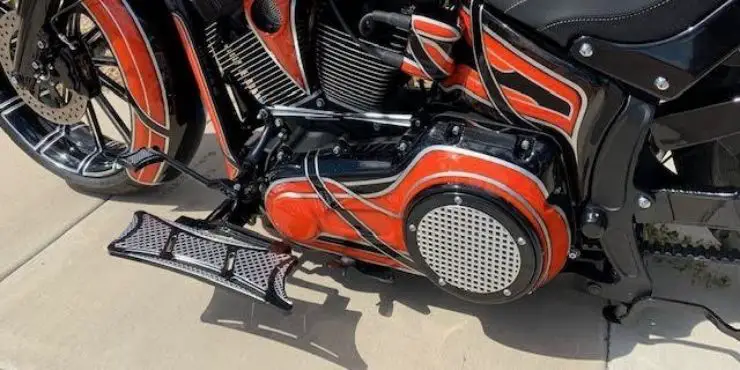
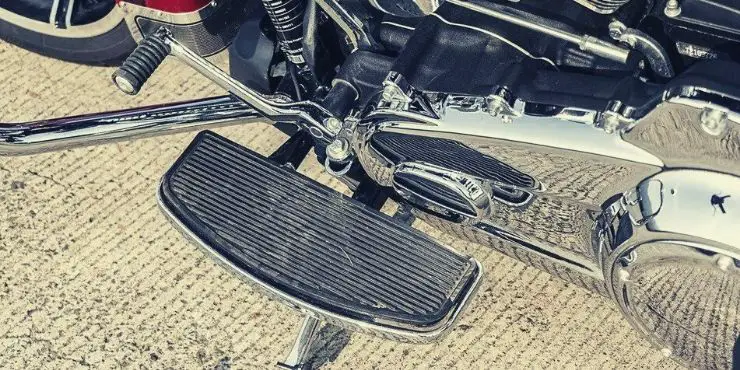
A heel-toe shifter essentially acts as a second shift lever that is mounted right behind the regular toe shift lever. There are two different designs of heel-toe shifters. In many cases, there are separate shift levers mounted on the gear shift shaft. The heel shifter will be backward while the toe shift lever will face forward. Often, the two levers come as a single unit.
In your Harley-Davidson bikes, a heel-toe shifter will act as a special type of shift lever. As the name suggests, it’ll allow you to easily shift gears on your motorcycle with your heel. If your bike features a heel-toe shifter, it’ll mean that you can easily get two shift levers on the motorcycle bolted on the same shaft. If you’re looking to find out how heel-toe shifters work, how to install them, and more, you’re in the right place.
How to install heel-toe shifter Harley-Davidson?
You can easily install a heel-toe shifter on your Harley-Davidson motorcycle by bolting it onto the gear shaft. Ultimately, the exact method of installing the heel-toe shifter will depend upon the design of the heel-toe shifter you have bought.
In case you’ve bought a complete heel-toe shifter kit, you’ll need to remove the current toe shift lever completely. Then, replace the shifter with the new levers. If you have bought a separate heel shift lever, it needs to be mounted on one end of the gear shaft. Then, move the current toe shift lever towards the engine in the shaft.
Complete heel-toe shifters will come in two designs. Some kits will feature two separate shift levers, one heel shift lever, and one toe shift lever. Meanwhile, other heel-toe shifters will come as a unit, which means having a big V-shaped lever that has two pegs on the ends. Both of the designs will need you to remove the current toe shift lever before bolting the new lever onto the shaft. Sometimes, heel shifters are sold as a single unit, which means that they need to be attached beside the toe shift lever. In many cases, you need to mount the heel shift lever onto the end of the shaft.
Each aftermarket heel-toe shifter kit will come with an installation manual. You should make sure that you read the manual carefully and remember to follow the brand’s recommendations. Keep in mind that not every aftermarket heel-toe shifter comes compatible with factory floorboards.
Further, ensure that the heel-toe shifter you’re looking to purchase fits on your Harley-Davidson bike before ordering it. Besides aftermarket heel-toe shifter kits, manufacturers also offer OEM heel-toe shifters. It would be a wise choice to do ample research and find out the best options available. For instance, you can always go for the stock Harley-Davidson heel-toe shifters in the market for almost all models.

Another important detail to keep in mind is the presence of a toe shifter. In case it is installed a bit too low, you will struggle to get your toe under it to shift into a higher gear. In case it is too low, it will hit the floorboard when pushing down, and you’ll not be able to shift to a lower gear. Also, installing the heel-toe shifter the wrong way might mean you have less space to maneuver your legs. Further, if the heel-toe shifter is installed too low, it’ll prevent you from shifting into a higher gear while accidentally damaging your floorboard during a fall.
What is the purpose of a heel-toe shifter on a Harley-Davidson bike?
The key idea behind using heel-toe shifters on your Harley-Davidson bikes is that these will allow you to easily shift gears by using your heels. A heel-toe shifter comes with a lot of advantages, as shifting the gear this way will be far more convenient.
Moreover, it’ll result in less fatigue during long rides. Besides, it won’t scuff your boots. When comparing Harley-Davidson bikes with other motorcycles, one of the differences is that they come with different riding positions. Moreover, they feature floorboards instead of the conventional footpegs.
When shifting using a regular toe shifter, you’ll need to move your left foot under the bike’s toe shifter’s peg. While it is very easy on street and dirt bikes, it’ll be very tricky on Harley-Davidson touring motorcycles. This is the case because the floorboards on the bikes are mounted under the shifter, leaving limited space for your feet.
Another potential issue will be the riding position, as the position on Harley-Davidson bikes will be different from sports bikes. This is where the heel-toe shifter will come in handy. Due to this handy little component, you don’t need to place your foot under the toe shift peg. Instead, you can simply shift up with the heel-toe shifter.
Advantages of using heel-toe shifters on Harley-Davidson motorcycles
There are many advantages that Harley-Davidson bike owners can enjoy if they use heel-toe shifters. Some of them are –
- Incredibly easy to use
- Heel-toe shifters will allow you to downshift even if the toe lever is low
- Very convenient and will cause less fatigue
- A great option for disabled or injured riders
- It won’t scuff your boots
Disadvantages of using heel-toe shifters on Harley-Davidson motorcycles
With so many advantages, there are a few disadvantages of using heel-toe shifters on Harley-Davidson bikes too. Some of them are –
- Limited floorboard space
- Comes with the risk of accidental shifting
- Hassle to install and costs extra for repairs
- It can be hard to find neutral
- You’ll need to move your foot up for shifting
How does a heel-toe shifter work?
A heel-toe shifter on a bike will work in a simple way. It consists of two parts – the heel shift lever and the toe shift lever. The two of them face opposite directions and will act like a seesaw. It means that pressing the heel shifter down will move the toe shifter up.
If you wish to shift into an upper gear, you should press down on the heel shift lever using your heel. It’ll turn the shift shaft in the same direction as it would if you were moving the toe shift lever up. It’ll be incredibly convenient as you’ll be able to control the transmission by simply pressing down the levers without having to place your feet under the toe shifter.

You should remember that shifting using your heel is optional. You can always upshift by lifting the toe shifter up. But ultimately, it’ll depend upon the design of the shifter. On a few models, the toe shifter will be too low, which means there isn’t enough space under it for your feet.
The heel-toe shifter will essentially work on two shifting methods – shifting up and downshifting.
Shifting up
Shifting up can be done by simply pressing down with your heel or by lifting the front shifter. If you’re using a traditional toe shifter, the Harley-Davidson driver will first have to place their left foot below the lever. After that, you will have to lift the shift for going to the higher gear.
For drivers using a heel-toe shifter, you will be able to press down using your heels on the gear lever. It’ll shift the gear into the next higher gear. The lever then gets ejected in a way that it’ll reset and make itself available for the next shift.
Downshifting
The other one is downshifting. It is normally done by pressing the toe shifter down. Switching to a lower gear is a similar process to a standard heel-toe shifter. It can be done by pushing the shift lever forward with your left foot. Then, you should re-engage your bike’s clutch. The shift lever will automatically be ejected, and it’ll be reset for the next shift.
How to remove a heel-toe shifter from your Harley-Davidson bike?
For removing or uninstalling a heel-toe shifter from your bike, you’ll need to loosen up the bolts. Do this for both the heel and toe shift levers. Then, you should slide off the levers from the shaft before putting the toe shift lever back to the end of the shaft.
In this step, you are essentially bringing the toe shifter to an outside position and then removing the heel shifter. Make sure that you keep your safety in mind. It is recommended that you need to install a heel shift eliminator. It will help you keep the toe lever on the shaft.
It is pretty simple to remove the heel-toe shifter from your Harley-Davidson bike. All you’ll need to have is the right-sized Allen key. Some Harley-Davidson bike owners prefer removing only the peg from the heel shift lever while leaving the arm intact. The main idea behind this method is that it’ll leave the floorboard empty while making use of the shift arm for shifting. Although it isn’t a very common practice, in some cases it could work. Another little trick to save space on the floorboard would be to replace the pegs on the shift levers with smaller ones.
Conclusion
Thank you for reading. Hopefully, now you know a lot about heel-toe shifters, including how to install heel-toe shifter in Harley-Davidson bikes. You’ll be able to install the heel-toe shifter on your bike by simply bolting it onto the gear shaft. However, the installation method will depend upon your bike’s model and which type of shifter you’ve bought.

