Are you looking to add a personal touch to your beloved Harley Davidson motorcycle? Installing passenger foot pegs is an easy and affordable way to do just that. In this article, we’ll explain how to easily install passenger foot pegs on your Harley Davidson motorcycle. Whether you’re a beginner or a seasoned pro, you’ll find this tutorial helpful in getting your bike looking just the way you want it. So, let’s get started and make your Harley Davidson even more unique!
To install passenger foot pegs, locate the foot peg mounts, secure the foot pegs with mounting bolts, and tighten them according to the specified torque.
Tools needed for installing passenger foot pegs on your Harley-Davidson bike
Adding passenger foot pegs to your Harley-Davidson bike is a great way of enhancing the riding experience for your pillion passenger. Whether you are planning a long road trip or just want to accommodate a passenger for shorter rides, having the right tools for installing passenger foot pegs will be important. If you’ve got the necessary tools and equipment needed for installing passenger foot pegs on your Harley-Davidson bike, you’ll be able to ensure a secure and comfortable ride for you and your passenger.
#1. Socket set
A socket set is an important tool for any motorcycle enthusiast and comes in handy for a variety of tasks, including installing foot pegs. Make sure that you have a socket set that includes a range of socket sizes to fit the various bolts and fasteners on your Harley-Davidson bike. This will allow you to loosen and lighten bolts with ease during the installation process.
#2. Wrenches
In addition to a socket set, having a set of wrenches will be important. Depending on the specific foot peg mounting brackets or hardware, you might require open-end wrenches, combination wrenches, or box wrenches to access and tighten bolts in tight spaces. Make sure you have a range of sizes to accommodate different bolt sizes on your bike.
#3. Hex keys
Many foot peg mounting brackets and hardware on Harley-Davidson motorcycles also use Allen screws or bolts. To remove or install these, you will require a set of Hex keys or also known as Allen wrenches. Make sure that you’ve got a set that includes a variety of sizes to match the specific Allen screws on your foot pegs.
#4. Torque wrench
To ensure proper tightening of bolts during the installation process, a torque wrench is indispensable. Different foot pegs might have specific torque specifications and using a torque wrench will help you achieve the correct level of tightness without overtightening or risking damage to the bolts or threads.
#5. Threadlocker
Using a threadlocker is a recommended practice to prevent bolts and screws from loosening due to vibration during rides. Having a bottle of threadlocker like Loctite will help ensure that the foot pegs remain securely attached to your Harley-Davidson motorcycle.
#6. Ratchet straps or bungee cords
After installing the foot pegs, you might have to secure the bike to ensure stability during the installation process. Having ratchet straps or bungee cords will allow you to secure your bike in an upright position, providing a safe and stable working environment.

Preparation to carry out before installing passenger foot pegs
Installing the passenger foot pegs on your Harley-Davidson bike is an important upgrade that enhances the riding experience for you and your pillion passenger. However, before you dive into the installation process, it’ll be important to take some preparatory steps to ensure a smooth and successful installation. Here are some of the key preparatory steps you will need to follow before you can start installing passenger foot pegs on your Harley-Davidson bike.
#1. Consult the owner’s manual
Before you start out the installation process, you will need to carefully explore and familiarize yourself with the instructions and information provided in the owner’s manual of your bike. Your Harley’s owner’s manual will also tell you the information about removing/installing foot pegs, including bolt sizes, torque specifications, and more. The owner’s manual will help you understand the instructions beforehand while making the entire process a breeze.
#2. Inspect the foot peg kit
Thoroughly inspect the foot peg kit and its components to make sure everything is present and in good condition. You need to check for any missing parts, damage, or defect in the foot peg kit. If you notice any issues, you must contact the manufacturer or retailer to address them before proceeding with the installation.
#3. Prepare the work area
You will have to choose a clean and well-lit area where you can perform the installation. Make sure that you have enough space to maneuver around the bike comfortably. If needed, you will have to remove any accessories or components that might obstruct access to the foot peg mounting points. Clearing the work area of debris and organizing your tools will make the installation process much more efficient.
#4. Secure your bike
To ensure stability and safety during the installation process, you will have to secure your Harley-Davidson motorcycle in an upright position. You can use ratchet straps or bungee cords to secure the bike to a stable object or use a motorcycle stand or lift if available. This will prevent your motorcycle from tipping over or shifting during the installation, allowing you to work with confidence.
#5. Identify the mounting points
Examine your motorcycle’s frame or designated mounting locations for the foot pegs. Identify the mounting points and ensure that they are clean and free of debris or any obstructions. Check for any existing foot pegs or brackets that have to be removed before installing the new ones.
#6. Plan the installation process
Before starting the actual installation process, take a moment to plan out the step-by-step process. Refer to the instructions and visualize every step of the installation. This will help you understand the sequence of actions needed and prevent any mistakes or rework.
How To Install Passenger Foot Pegs On Harley-Davidson Softail: Step-By-Step Process
How to remove the existing passenger foot pegs on a Harley-Davidson bike
If you are looking to replace or upgrade the stock passenger foot pegs on your Harley-Davidson motorcycle, it is important to know how to remove them properly. Removing the existing foot pegs is a rather straightforward process and by following a few simple steps, you’ll be able to easily detach them and prepare for the installation of the new ones. Here are the steps you’ll need to follow to remove the existing foot pegs from your Harley-Davidson bike.
Step 1: Arrange the foot pegs kit and read the instructions
Before you can start the removal process, you must gather the necessary tools and materials. These typically include a socket set, wrenches, hex keys, a torque wrench, and additional parts or hardware specific to your foot pegs. Make sure you’ve got the correct sizes and types of tools to match the fasteners and components of your bike.
Once you have arranged the kit, read and familiarize yourself with the manufacturer’s instructions provided with your new foot pegs. Each set might have specific requirements and recommendations for installation. Understanding the instructions beforehand will help you gather the necessary tools and materials and follow the correct procedure.
Step 2: Locate the mounting bolts
Locate the mounting bolts that secure the stock passenger foot pegs to your Harley. These bolts are typically found near the lower frame or the passenger foot peg brackets. Depending on your specific Harley model, you might have to remove any covers or accessories that might obstruct access to the bolts.
Step 3: Loosen and remove the bolts
Using the appropriate socket or wrench, loosen the bolts that secure the stock foot pegs. Turn the bolts counterclockwise to loosen them. Once they’re sufficiently loosened, you should remove them completely from the mounting points. Keep track of the bolts as you might need them for the installation of new foot pegs or brackets.
Step 4: Remove the stock foot pegs
With the bolts removed, you must carefully slide the stock foot pegs out of the mounting brackets. Apply gentle pressure to detach them from the brackets or any retaining pins or clips that might be present. Wiggle the foot pegs back and forth but be cautious not to force them or cause any damage to the bike’s frame or components.
Step 5: Inspect and clean the mounting points
Take a moment to inspect the mounting points after removing the stock foot pegs. Make sure that there is no damage or wear that could affect the installation of new foot pegs. If necessary, clean the mounting points using a soft clock or a mild cleaning solution to remove any dirt or debris that might have accumulated.

How to install passenger foot pegs on Harley-Davidson bikes
Once you have removed the existing foot pegs on your Harley-Davidson motorcycle, it’ll put you in a better position to install the new ones and give a pleasant riding experience to your passenger. Whether you are replacing worn-out foot pegs or upgrading to a different style, knowing how to install passenger foot pegs on your Harley-Davidson bikes ensures a secure and comfortable fit. Here are the steps you will need to follow for installing new passenger foot pegs on your Harley-Davidson bike.
Step 1: Install the new foot pegs
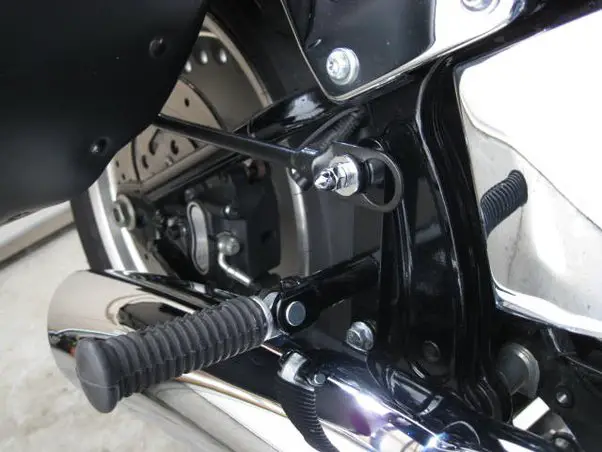
Start off by positioning the new foot pegs or brackets onto the mounting points. Align them properly and ensure a secure fit. Insert any retaining pins or clips if needed to hold the foot pegs or brackets in place. Check that the mounting holes on the foot pegs align with the holes on the brackets or mounting points.
Step 2: Attach and tighten the bolts
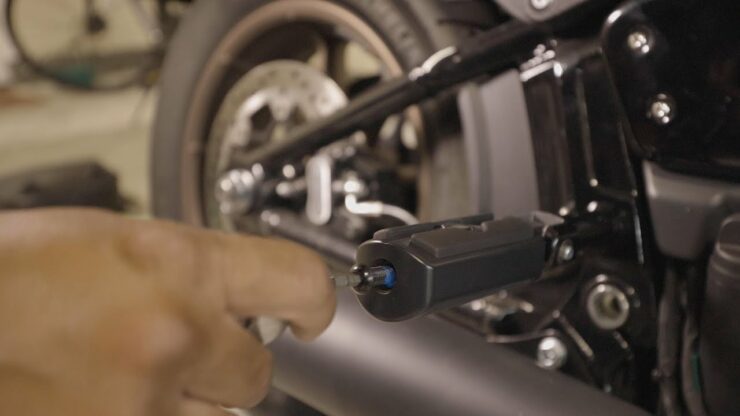
Using the appropriate socket or wrench, you should insert and tighten the bolts that secure the new foot pegs or brackets. Turn the bolts clockwise to tighten them, making sure that you’re following the manufacturer’s recommended torque specifications. If you’re using a torque wrench, make sure that you’re applying the correct amount of torque without overtightening.
Step 3: Apply threadlocker
To prevent the bolts from loosening due to vibration, you should apply a small amount of threadlocker (like Loctite) to the bolt threads. This will help you secure the foot pegs in place during rides. Make sure that you’re following the mentioned instructions on the proper application and drying time for the threadlocker.
Step 4: Double-check and test the bolts
Once the bolts are securely tightened, double-check the foot pegs to ensure that they’re properly installed and aligned. Give them a gentle tug to confirm their stability. Test the foot pegs by applying a bit of pressure to ensure they can withstand the weight and movement of the passenger.
How to test and align the newly installed passenger foot pegs
Once you have successfully installed the new foot pegs on your Harley-Davidson motorcycle, it is important to make sure they are properly aligned and securely attached. Proper alignment and secure installation will not only ensure your safety and comfort but also enhance your riding experience. Here are the steps you’ll need to follow to test the newly installed foot pegs on your Harley-Davidson bike.
Step 1: Visual inspection
Begin by visually inspecting the foot pegs. Stand behind the bike and observe the alignment of the foot pegs relative to each other. They need to be at an equal height and parallel to the ground. Make sure that both foot pegs are positioned symmetrically and that they provide balance and stability.
Step 2: Check for clearance
Verify that the foot pegs have adequate clearance from other parts of the bike, such as exhaust pipes, saddlebags, or any other accessories. Make sure that there is enough space for the rider and passenger’s feet without any interference or risk of contact with other components.
Step 3: Sit on the bike
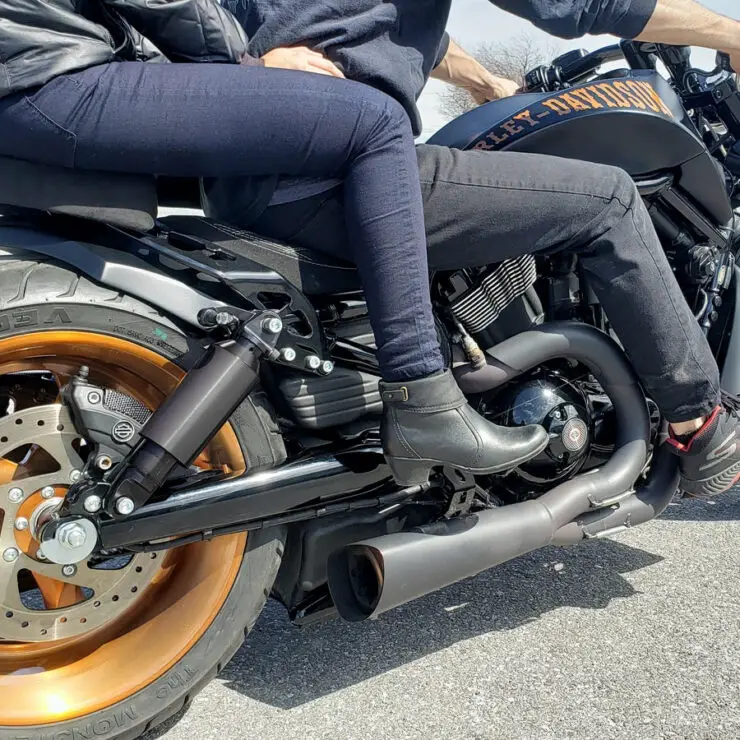
Then, you should sit on your bike and place your feet on the foot pegs. Get a feel for their position and comfort. Make sure that your feet can rest comfortably on the foot pegs without any strain or discomfort. The foot pegs must be positioned at a natural and ergonomic angle that allows for easy reach and control.
Step 4: Test for stability
While sitting on the bike, apply a bit of pressure to the foot pegs using your feet. Test their stability and resistance to movement. The foot pegs must remain securely in place and not shift or rotate during the application of pressure. A wobbly or unstable foot peg indicates improper installation or alignment.
Step 5: Adjusting the alignment
If you find any issues with alignment or stability during the initial testing, adjustments might be needed. Loosen the mounting bolts of the foot pegs slightly to allow for realignment. Gently adjust the foot pegs to the desired position, ensuring that they are level and parallel to each other. Double-check the alignment and symmetry before tightening the bolts securely.
Step 6: Retest and confirm alignment
After making any necessary adjustments, repeat the testing process. Sit on the bike, apply some pressure to the foot pegs, and assess their comfort and stability. Make sure that the foot pegs remain securely in place, aligned properly, and provide a comfortable foot position.

Common troubleshooting tips when installing passenger foot pegs
Installing new foot pegs on your Harley-Davidson motorcycle is an important customization option that enhances the comfort levels of your passenger. However, no matter how honestly you try to carry out the installation, you could end up making a mistake or two. Here are the common troubleshooting tips you’ll need to keep in mind so that you can overcome the issue.
Mastering the Art of Tight Turns on a Harley-Davidson Motorcycle
#1. Inspecting the mounting bolts
Before you install the foot pegs, make sure that the existing mounting bolts are properly tightened. Use the appropriate tools, such as a socket set or wrench to tighten the bolts securely. Loose bolts can result in instability and potential accidents while riding.
You need to check the mounting bolts for any signs of corrosion or rust. Corrosion can end up weakening the bolts and compromising their ability to hold the foot pegs securely. If you notice any significant corrosion, you should consider replacing the bolts to ensure a reliable attachment.
If there’s the prospect of thread damage, you need to examine the threads of the mounting bolts for any signs of damage, such as stripping or wear. Damaged threads could result in difficulty tightening the bolts or cause them to loosen over time. If the threads are compromised, you should replace the bolts with new ones that match the correct specifications.
#2. Examining foot pegs
If there are any cracks or breakage, carefully inspect the foot pegs for any visible cracks, fractures, or breakage. These issues could compromise the structural integrity of the foot pegs and pose a significant safety risk. If you’re noticing any damage, it is recommended that you replace the foot pegs before installation.
Look out for signs of excessive wear and tear on the foot pegs, such as deep scratches or worn-out surfaces. Excessive wear can affect the grip and stability of the foot pegs, which can make them less secure for the rider. You need to consider replacing the foot pegs if they show significant signs of wear.
Make sure that the foot pegs are compatible with your Harley-Davidson bike model. Check the dimensions and attachment points to verify a proper fit. Using foot pegs that aren’t specifically designed for your motorcycle can result in compatibility issues, instability, and potential damage.
#3. Utilizing an adjustable wrench
An adjustable wrench is a highly versatile tool that can be quite beneficial during the installation of foot pegs on your Harley-Davidson motorcycle. To do that, you must consider size adjustment, proper technique, and accessibility.
Make sure that the adjustable wrench is adjusted to the appropriate size to fit the bolts or nuts you’re working with. This will ensure a secure grip on the fasteners, minimizing the risk of slipping and damaging the bolt heads or nuts.
Use the adjustable wrench with the correct technique. You should be positioning the wrench at a right angle to the fastener and apply firm, even pressure. Avoid overtightening as it might strip the threads or damage the fasteners.
In some cases, the foot pegs might be positioned in tight or hard-to-reach areas. An adjustable wrench with a slim profile can help you navigate confined spaces and offer better access to mounting bolts.
#4. Replacing foot pegs
There are possibilities that you might run into issues with the stock foot pegs. If you’re encountering any issues with the existing foot pegs or want to upgrade to a different style, replacing them is a viable solution. There are certain troubleshooting tips to remember when replacing foot pegs.
Make sure that the new foot pegs are compatible with your Harley-Davidson bike’s model. Check the dimensions, attachment points, and compatibility specifications provided by the manufacturer. Choosing the food pegs specifically designed for your motorcycle ensures a proper fit and secure installation.
Use the appropriate tools, such as the adjustable wrench or socket set to remove the existing foot pegs. Loosen the mounting bolts or nuts and carefully detach the foot pegs from your bike. Keep track of any retaining pins, clips, or washers that might be present.
Align the new foot pegs with the mounting holes on your motorcycle and insert the mounting bolts or nuts. Use the adjustable wrench for tightening the fasteners securely, making sure you’re following the recommended torque specifications provided by the manufacturer. Make sure that the foot pegs are level and aligned correctly for optimal comfort and safety.
#5. Seek professional assistance
If you’re encountering any significant damage, difficulty, or uncertainty during the installation process, it is advised that you should seek professional help from a qualified Harley-Davidson technician. They will offer expert advice, diagnose potential issues, and ensure a proper and safe installation.
FAQ
What tools do I need to install passenger foot pegs on a Harley Davidson?
To install passenger foot pegs on a Harley Davidson, you will need an adjustable wrench, a screwdriver, and a socket wrench with the appropriate-sized socket. You will also need the mounting hardware that came with the foot pegs.
How do I prepare the motorcycle for installation?
Before installing the foot pegs, you should inspect the mounting points on the motorcycle to make sure they are clean and free of debris. You should also ensure the mounting hardware is compatible with your motorcycle.
What is the best way to install passenger foot pegs on a Harley Davidson?
The best way to install passenger foot pegs on a Harley Davidson is to follow the manufacturer’s instructions. It is important to use the correct tools and mounting hardware, and to pay close attention to the torque specifications. You may also want to use thread locker to ensure the bolts are securely fastened.

