Are you a Harley-Davidson enthusiast looking for a step-by-step guide to removing wheel bearings from your bike? If so, look no further!
To remove Harley wheel bearings, remove the wheel and use a bearing puller to extract the bearings carefully. Apply heat if necessary to loosen them, but be cautious not to damage the wheel hub.
This article will provide you with a comprehensive guide to safely and efficiently remove wheel bearings from a Harley-Davidson motorcycle. By following this guide, you can be sure to get the job done right and save yourself time, money, and hassle. So read on and get ready to remove those bearings!
Overview of Harley wheel bearings
The wheel bearings of a Harley-Davidson motorcycle are a key component that helps keep the wheels of the bike rolling smoothly and safely. The wheel bearings play an important role in supporting the weight of the motorcycle and help in distributing the load evenly across the axles. Harley-Davidson bikes typically have two types of wheel bearings – ball bearings and tapered roller bearings. Ball bearings are commonly used in the front wheel of the motorcycle, whereas tapered roller bearings are used in the rear wheel.
Ball bearings consist of a metal ball housed in a circular track. The ball rotates freely within the track, which allows it to support the weight of the bike and reduce friction. Ball bearings are generally low-maintenance and long-lasting, but they can also be prone to failure if they aren’t properly installed or lubricated.
Tapered roller bearings, on the other hand, consist of two tones and a cup. The cones are tapered, which means they are wider at one end than the other. This allows the bearings to support both axial and radial loads. Tapered roller bearings are generally more durable compared to ball bearings, but they need more maintenance, and they’re also more complex to install.
Proper maintenance of wheel bearings is also important for the safe and smooth operation of Harley-Davidson motorcycles. Regular inspections and lubrication can help prevent any wear and damage to the bearings. Additionally, it is also important to make sure that the bearings are installed properly and tightened to the appropriate torque specifications.
Some Harley-Davidson motorcycles also use sealed wheel bearings, which are designed for preventing dirt and debris from entering the bearing and causing damage. Sealed bearings typically need less maintenance compared to unsealed bearings but they’re also more expensive to replace.

Tools required for removing Harley wheel bearings
Removing wheel bearings from a Harley-Davidson bike is a task that needs specific tools for ensuring that the job is carried out safely and efficiently. Having the right tools on hand and knowing where to find them will make it easier to remove the wheel bearings smoothly and safely.
Here are the tools that are needed for removing wheel bearings on a Harley-Davidson motorcycle –
#1. Bearing puller
This tool is used for removing the bearing from the wheel hub. A bearing puller comes designed to grip the outer race of the bearing and pull it out of the hub without damaging the hub or the bearing.
#2. Press
A press is required for installing the new bearing into the wheel hub. It will apply even pressure to the bearing, making sure that it is installed correctly and securely.
#3. Bearing race driver
A bearing race driver is another tool needed for installing the bearing race onto the wheel hub. It will ensure that the race is aligned correctly and that it does not get damaged during installation.
#4. Torque wrench
A torque wrench is used for tightening the axle nut to the manufacturer’s specifications. This will ensure that the wheel is secured properly and prevents the axle from coming loose during operation.
#5. Socket set
A socket set is used for removing the axle nut and other fasteners on the wheel hub.
The tools for removing Harley wheel bearings can be easily found at most motorcycle parts and accessories stores. Here are some of the places where you can find the tools mentioned above –
#1. Harley-Davidson dealerships
Many Harley-Davidson dealerships offer a wide variety of tools and equipment for servicing and maintaining Harley-Davidson motorcycles.
#2. Motorcycle parts and accessories stores
Stores that specialize in motorcycle parts and accessories often have a wide selection of tools for maintaining and repairing bikes.
#3. Online retailers
Online retailers like Amazon and eBay also offer a variety of tools for removing wheel bearings on Harley-Davidson motorcycles.
Regardless of where you buy the tools from, it is important to make sure that the tools you’re purchasing are high-quality and designed for use with Harley-Davidson motorcycles. If you use the wrong tools or low-quality tools, it can easily result in damage to the motorcycle and compromise your safety while riding.
Preparation before removing wheel bearings
Once you have arranged the tools and equipment needed for removing Harley wheel bearings, your work is not done yet. Before you begin the actual process of removing the wheel bearings, it is important that you carry out the preparation by taking certain safety measures and preparing the area properly. As you will be dealing with repair work, accidents can happy at any time. That’s why it will be better to remain on the safer side. Further, by preparing for the job, you’ll have a better chance of removing the Harley wheel bearings safely and efficiently.
Safety precautions to consider
#1. Wear protective gear
Before you start, it’ll be important that you wear protective gear, including eye protection, gloves, motorcycle chaps, sturdy work boots, and more. Wearing protective gear will protect you from any fluids or debris that might be released during the process.
#2. Secure your Harley
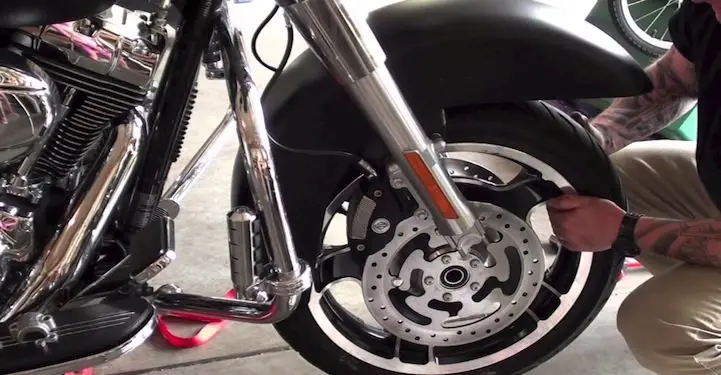
You should ensure that your Harley-Davidson motorcycle is securely supported before you start the process. Use a motorcycle jack or lift for raising the motorcycle and support it with stands.
#3. Disconnect the battery
For avoiding any electrical accidents, it’ll be important that you disconnect the battery before you start.
#4. Follow manufacturer guidelines
You should always follow the manufacturer guidelines and specifications for removing wheel bearings mentioned in the owner’s manual.
Prepare for the process by cleaning the area
#1. Clean the wheel hub
Before you start removing the wheel bearings, it’ll be important to clean the wheel hub thoroughly. Make use of a degreaser or brake cleaner for removing any dirt or debris that might be present.
#2. Clean the bearing housing
The bearing housing should also be cleaned thoroughly. Remove any dirt, debris, or old grease from the housing before you remove the bearings.
#3. Use a clean workspace
You must ensure that the workspace is clean and free from any dirt or debris. A clean workspace will help prevent any dirt or debris from entering the bearing housing during the removal process.
#4. Always use clean tools
It is important that you only use clean tools during the removal process. Dirty or contaminated tools could cause damage to the bearings or the wheel hub.
#5. Dispose of waste properly
Dispose of any waste like dirt, old bearings, dead insects, and more properly. You shouldn’t leave any waste lying around your workspace.
By taking proper safety measures and cleaning the area, you can prepare yourself for the removal job easily. Further, it’ll also ensure that you’re able to carry out the process safely and efficiently. Although this is just the preparation stage, you must always adhere to manufacturer guidelines and use the appropriate tools and equipment for the job. If you aren’t sure of any aspect of preparation, you must consult the owner’s manual or talk to a professional or a Harley-Davidson dealership for advice.

How to remove Harley wheel bearings
Properly maintaining your Harley will not only keep you and your bike safe but it’ll also mean that your bike performs at its best. One of the important parts of maintenance is checking the condition of wheel bearings. To achieve that, you’ll need to know how to remove Harley wheel bearings first. Once you have gathered the tools and carried out the preparation, you’re in the ideal position to start the removal work. Here are the instructions that you’ll need to follow –
Step 1: Removing the axle
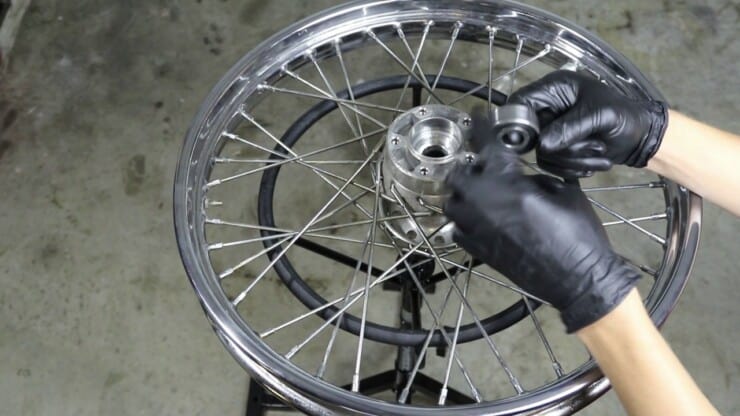
The first step in removing wheel bearings on a Harley-Davidson bike will be removing the axle. Start by loosening the axle nut and any retaining clips or bolts holding the axle in place. Once they are removed, you should slide the axle out of the wheel hub and set it aside.
Step 2: Unscrewing the bearings
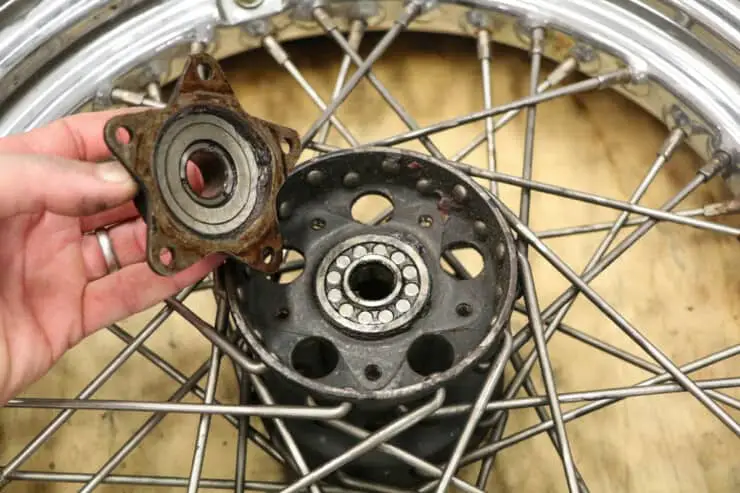
Next up, you will have to locate the bearings on the wheel hub. Generally, they are located on both sides of the hub and held in place with retaining rings or clips. Use a suitable tool such as a bearing puller for unscrewing the bearings from the wheel hub. Make sure that you’re removing any retaining rings or clips before you attempt to remove the bearings.
Step 3: Take out the bearings
Once the bearings are unscrewed, you can easily remove them from the wheel hub. You might have to tap them gently using a hammer or make use of a bearing puller for removing them from the hub. It is essential that you remove the bearings carefully to avoid damaging the wheel hub or other components.
Before you install new bearings, it’ll be important to clean the wheel hub thoroughly. Make sure that you remove any dirt, debris, or old grease from the hub using a degreaser or brake cleaner. Also, ensure that you inspect the wheel hub for any signs of wear or damage that might need repairing before installing the new bearings.
How to install the new Harley wheel bearings?
Once you have removed the old bearings from a Harley-Davidson bike, it’ll be important that you prepare the new bearings properly before you install them. Here are the steps to follow when installing the new wheel bearings on a Harley-Davidson bike –
Step 1: Prepare the new bearings
Before you install the new bearings, it is important that you inspect them for any damage or defects that might have occurred during shipping or handling. Check for any possible nicks, cracks, or other signs of wear or damage. Moreover, ensure that the bearings match the specifications of your Harley-Davidson bike’s model and year.
Step 2: Grease the bearings
Once you have inspected the new bearings, it’ll be time to apply grease to them. Make use of high-quality bearing grease that is specifically designed for Harley-Davidson motorcycle bearings. Apply the grease evenly to the inner and outer surfaces of the bearings. This way, you can ensure that it covers the entire surface. Applying too little grease could cause premature wear. Meanwhile, applying too much grease can create resistance and friction in the bearings.
Step 3: Fit the new bearings and install them
Before fitting the new bearings, you should find a socket that is large enough to not just press on the outer edge, but just fits into the wheel. If you haven’t got a suitable socket, you could end up grinding down the outer edge of the old bearings, so they’ll simply drop in and out of the wheel.
If the bearings you are trying to fit do not have a dust seal covering the balls, you should pack them with grease on both sides. At least one side of the wheel needs to have a lip to help determine the depth of the bearing. Find it and place the wheel on the lengths of the wood with the lip on the top.
Take the new bearings and lay them on top of the opening. If it drops in, then it’s a sign that you either have the wrong size or the wheel is knackered. Some people prefer laying another piece of wood on top of the bearings and hammering them down until they’re flush with the edge of the rim. This ensures that the brings are going in absolutely straight.
To prevent damaging the new bearings, you can make use of the old bearing laid directly on top and hammer it. However, you should only hammer the outer edge. You should ensure that you do not drive the new bearings down all the way, as you could have the old one stuck there as well.
Once the new bearing is flush with the wheel face, you should hit the socket with a wooden mallet. Hit it to drive the bearing to the bottom of the recess. Ideally, you will hear the tone of the hammering change as it hits the bottom.
Step 4: Reinstall the axle
Once you have installed the new bearings, it’ll be time to reinstall the axle. You should gently slide the axle back through the wheel hub, making sure that it is properly aligned. Tighten the axle nut as per the manufacturer’s specifications and reinstall any retaining clips or bolts.

Finishing touches after removing Harley wheel bearings
Once you have removed and replaced the wheel bearings on your Harley-Davidson bike, you will need to apply a few finishing touches before you end the process. These finishing touches should be performed to ensure that your motorcycle is safe to ride. Here are the finishing touches to apply after removing the Harley wheel bearings –
Step 1: Secure the axle
Once you have installed the new wheel bearings, it’ll be time to make sure that the axle is properly secured. Make use of a torque wrench for tightening the axle nut according to the manufacturer’s specifications. This will help prevent the wheel from wobbling or coming loose while you’re riding.
Step 2: Clean the area
Before you test the wheel, it’ll be a smart idea to clean the area around the wheel hub. Make use of a degreaser or cleaning solution for removing any dirt or debris that might have accumulated during the bearing replacement process. This will help ensure that the area is clean and free of any contaminants that could end up causing problems with the new bearings.
Step 3: Test the wheel
After the new bearings are properly installed, it’ll be important that you test the wheel to make sure that everything is working correctly. Spin the wheel and listen for any unusual noises or vibrations. If the wheel is spinning smoothly and quietly, then you can be assured that the new bearings are working correctly.
If you notice any issues with the wheel or the bearings, you will have to recheck the installation or seek professional assistance. Riding a Harley with faulty bearings will be dangerous, so it is important to make sure that everything is in good working order before you hit the road.
How to know if the wheel bearings on your Harley need replacing?
Wheel bearings are an important part of any Harley-Davidson motorcycle’s maintenance. Wheel bearings support the weight of the motorcycle and ensure that the wheels spin smoothly and efficiently. Over time, wheel bearings can wear out and start causing problems. This is where you’ll need to remove and replace the Harley wheel bearings. Here are the signs that the wheel bearings on your bike need replacing –
#1. Unusual noises
One of the most common signs of worn-out wheel bearings is unusual noises coming from the wheels. You might hear a grinding or rubbing noise when you try turning the wheel, or a whirring noise when you’re riding the bike. Typically, the noises are caused by metal-on-metal contact as the bearings wear down.
#2. Rough or uneven ride
If you notice that your Harley is riding rougher than usual, or you feel unstable when you ride, it might be a sign that the wheel bearings are worn out. The bearings might not be able to support the weight of the bike properly. This can lead to a bumpy or uneven ride.
#3. Vibration
Worn-out wheel bearings could cause vibrations in the bike, especially at higher speeds. If you notice that your bike is vibrating excessively or feels shaky, it might be a sign that the bearings have to be replaced.
#4. Loose or wobbly wheel
If you notice that the wheel on your bike is loose or wobbly, it is a clear sign that there’s an issue with the wheel bearings. This can be dangerous as it could cause the wheel to come loose or detach from the bike while riding.
#5. Mileage
Lastly, the mileage on your Harley-Davidson motorcycle can also be a sign that you need to replace the wheel bearings. It is recommended that you should replace the bearings once every 20,000 to 30,000 miles. If you haven’t replaced the bearings in this time frame, it’ll be the right time to do so.
FAQs
What tools are required to remove wheel bearings on a Harley?
To remove wheel bearings on a Harley, you will need a bearing race remover, bearing separator, wheel bearing puller, and a wheel bearing press. You will also need a socket set, a torque wrench, and an adjustable spanner.
What is the process for removing wheel bearings from a Harley?
The process for removing wheel bearings from a Harley is as follows:
1. Raise the wheel off the ground and secure it on a stand.
2. Remove the wheel from the axle and remove the axle from the hub.
3. Use a bearing race remover to remove the bearing race from the hub.
4. Use a bearing separator to remove the bearing from the hub.
5. Use a wheel bearing puller to remove the wheel bearing from the hub.
6. Install the new wheel bearing in the hub with a wheel bearing press.
7. Replace the axle, wheel, and bearing race.
8. Reinstall the wheel to the axle and torque it to the correct specifications.

