Are you a Harley-Davidson biker looking to test your bike’s Harley voltage regulator, but don’t know how to? If yes, then you are in the right place at the right time.
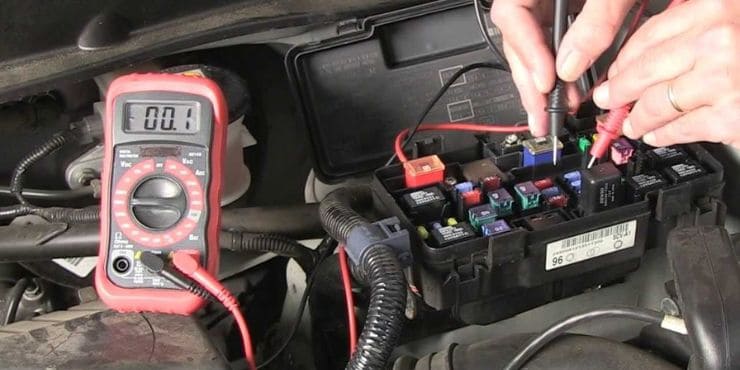
To test a Harley voltage regulator, use a multimeter. Set it to DC voltage, start the bike, and measure the voltage at the battery terminals. A properly functioning regulator should output around 13.5 to 14.5 volts at idle. If the voltage is too high or low, the regulator may be faulty.
In this article, you’ll get to know all about Harley-Davidson voltage regulators, how to test Harley voltage regulator, understand how the voltage regulator works, common causes of voltage regulator failure, and more. Continue reading to get all the answers that you are looking for.
Testing Harley-Davidson voltage regulators
Some Harley-Davidson bike owners like to fix their own motorcycles, thereby saving time, money, and riding time. A Harley-Davidson bike can experience electrical problems at any time. One of the most common causes of electric problems on your Harley-Davidson bike is the voltage regulator.
Voltage regulators are commonly found in motorcycles and other electronic equipment. A voltage regulator can limit the maximum amount of voltage from a power source while preventing the device or alternator from shorting or overheating. It’s effortless to spot a bad voltage regulator, as your bike may have dimming or pulsing lights or a dead battery.
If you have got a Harley-Davidson bike that won’t turn on, this can also indicate a bad voltage regulator. The regulator can either be letting no power through or letting through too much power. Luckily, testing whether the voltage regulator works easy as long as you’ve got a multimeter and follow the correct procedure.
How do voltage regulators work
Internal voltage regulators
An internal voltage regulator is a component that regulates the voltage output of the alternator. Internal voltage regulators are generally used in newer vehicles having computer-controlled electrical systems.
Internal voltage regulators come with two wires – the first one goes to the alternator, while the other one goes to the ground. Sometimes, the ground wire is omitted, and the internal voltage regulator is grounded through its case. Internal voltage regulators are usually less expensive compared to external voltage regulators. They are comparatively easier to install, and they can also be more reliable.
External voltage regulators
An external voltage regulator is a component that regulates the voltage output of the alternator. External voltage regulators are generally used in vehicles with older-style electrical systems. They are also used in racing applications where weight can be a concern.
External voltage regulators usually have three wires. The first one goes to the alternator, the second one goes to the battery, and the third one goes to the ground. Sometimes, the ground wire is omitted while the external voltage regulator is grounded through its case.
External voltage regulators are usually much more expensive compared to the internal voltage regulators. They’re also very difficult to install, and they are less reliable.
What types of regulators do Harley-Davidson bikes use
Harley-Davidson bikes generally use external voltage regulators. External voltage regulators are used in vehicles that have older-style electrical systems. This is the case because Harley-Davidson bikers prefer having a more traditional motorcycle, while the simpler designs are also easier to service.

Harley-Davidson voltage regulators are quite different compared to regular voltage regulators. They’re designed to withstand vibrations and high temperatures of the motorcycle engine. Moreover, Harley-Davidson voltage regulators are typically more expensive than regular voltage regulators.
What are the signs of a bad Harley-Davidson voltage regulator
Harley-Davidson bikes are known for their durability and high quality. However, like other vehicles, they can also experience problems from time to time. One potential issue with these bikes is a bad voltage regulator. There are a few signs that indicate a problem with the voltage regulator on Harley-Davidson bikes. The most common symptom of this issue is dim or flickering lights.
It can be caused by spikes or electrical surges that the regulator isn’t able to cope with. Another common symptom is strange engine behavior, such as hesitating or stalling. This can be due to the engine not getting enough power from the electrical system.
In case you notice any of these symptoms, it’ll be worth having your bike checked by a qualified mechanic. A bad voltage regulator could result in serious damage to the electric system of your Harley-Davidson bike if it isn’t fixed.
How to test a Harley-Davidson voltage regulator
There are multiple ways of testing your voltage regulator.
With a multimeter, you should check the DC voltage at the output of your voltage regulator. With the engine running, the DC voltage will be within specific limits. If they aren’t, the voltage regulator could be faulty.
Another way of testing the voltage regulator will be by checking the AC ripple on the DC voltages. With the engine running, you’ll need to connect an oscilloscope to the output of the voltage regulator and then measure the AC ripple. The AC ripple needs to be within specific limits. If it isn’t, the voltage regulator could be faulty.
Another way of testing voltage regulators is by load testing. It can be done by easily connecting the load (a light bulb) to the output of the voltage regulator and measuring the DC voltages. The load has to be within specific limits. If it isn’t, the voltage regulator might be faulty.
How to test Harley voltage regulator with a multimeter
1. Purchase a multimeter
A multimeter can be easily purchased at a hardware store, online, or at an automotive store. With this meter, you’ll be able to read the voltage running through the battery, and it’ll indicate whether your voltage regulator is working properly. A multimeter is comparatively less expensive than other diagnostic tools, and it can cost you anywhere from $14 to more than $100.
2. Open the hood of your bike
Pull the lever on the inside of your bike to pop the hood. After that, unhook the bar present under the hood and use it to prop the hood up. You’ll see your engine and the bike’s battery.
3. Set the multimeter to voltage
Either turn the dial or press the button on your ohm or multimeter, setting it to voltage. The voltage setting would look like V or have a V with lines above it. If you aren’t sure about which setting is voltage, you should read the instruction manual provided with the multimeter. The voltage read must never be done with Ampere or Ohm position set as you might damage your device.
4. Attach the clamps of your multimeter to the battery terminals
The battery is generally near the engine and looks like a plastic box. There will be 2 nods with a “+” and “-“ symbol near them. Your multimeter will have a red and black cord, with clamps or leads attached to the ends of the cords. You’ll need to attach the black clamp to the negative terminal and the red clamp to the positive terminal of the battery. The battery might also come with a plastic cap over the battery terminals. You’ll need to lift the plastic cap if you have to see the negative and positive nodes.
5. Read the numbers on the display
With your Harley-Davidson bike off, you’ll have a little more than 12V if your battery is working properly. In case the multimeter reads less than 12V, it’ll most likely mean that the batter is weak and must be replaced soon. Meanwhile, if the multimeter doesn’t read anything, it could mean that the batteries in the meter are dead. It can also mean that the meter is not properly connected to your bike’s battery.
6. Put the bike in park and turn it on
Ensure that your Harley-Davidson bike is in park such that you don’t move forward/backward while you’re testing the regulator. Engage the parking brake for safety precautions. You should turn the key in the ignition for starting the vehicle or press the ignition button if your bike has one. Have a look at the multimeter. The reading would have increased to 13.8 while your bike was idle. If the multimeter reads 13.8, it means that the alternator is charging your battery properly.
7. Rev the bike’s engine
You’ll require someone else to rev the engine such that you can look at the multimeter. With the bike still in park, you should press on the gas until your bike reaches 1,500 to 2,000 RPMs.
8. Read the output of the multimeter
The regulator needs to cap the amount of the battery at around 14.5. In case the voltage reads more than 14.5, it’ll probably mean that you have a faulty regulator. If the voltage reading is below 13.8 volts, you’ve got a weak battery, and you’ll need to replace it soon.
Conclusion
Thank you for reading. Hopefully, now you know a lot more about Harley-Davidson voltage regulators, how to test Harley voltage regulator, understand how the voltage regulator works, common causes of voltage regulator failure, and more. Testing a Harley voltage regulator involves disconnecting your bike, switching the multimeter to the diode, inserting the positive lead into the motorcycle’s positive diode, connecting the negative lead to the stator inputs, connecting the positive diode to the negative lead, and connecting the positive lead to the stator inputs. Repeat the same steps for the negative diode by connecting the positive lead to the negative diode and then connecting the negative lead and stator inputs.
To check the voltage regulator, connect the meter leads to the motorcycle’s battery as it is running. The reading must not be lower than 13.5 volts or higher than 14.5 volts. In case the reading is higher, then it means the battery is overcharged, and you’ll need to replace the regulator rectifier.

