Do you own a Harley-Davidson motorcycle but the charging system is giving you problems, and you don’t know how to test stators? If so, then you are definitely in the right place at the right time.
To test the stator, use a multimeter. Set it to AC voltage, start the bike, and measure the voltage between the stator pins. The stator should produce AC voltage that increases with RPM. Check for continuity between the stator pins and ground to ensure there is no short.
In this article, you will get to know all about a Harley-Davidson motorcycle stator, what does a motorcycle stator do on a bike, how to test stator on Harley-Davidson bikes, symptoms of a bad Harley-Davidson engine, how to use stator for testing the battery system of a Harley-Davidson bike, and more. Continue reading to get all the answers that you are looking for.
What is a Harley-Davidson motorcycle stator
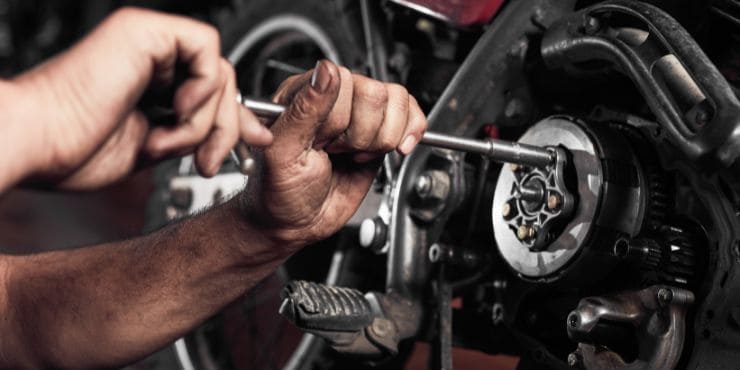
A Harley-Davidson motorcycle stator is one of the most essential components of a motorcycle. It generates the power needed to move the motorcycle. Bikes generate power similar to a car; however, they do so in a slightly different fashion. Instead of being an externally mounted unit, a motorcycle stator is positioned in the engine. It’s essentially a wire that travels through the engine case to an external rectifier, and it converts alternating current into direct current.
Meanwhile, the rectifier/regulator is responsible for maintaining the proper current to avoid overcharging the battery and other dangerous issues. As the engine speed increases, the stator will start putting out more and more power. If it has left unregulated, it could cause damage.
What does a motorcycle stator do on a bike
A motorcycle stator works together with a rectifier regulator to accomplish the same outcome as the alternator. Its job is to generate the DC power needed to operate the motorcycle, ATV, side-by-side, and more. The stator is essentially the coil of wire housed in the engine case. The magnet on the shaft will spin within the stator, creating AC (Alternating Current). This current travels along heavy gauge wire through the case and in the regulator/rectifier, converting it to DC power, and at a consistent output.
How to test stator on Harley-Davidson bikes
If a dead motorcycle battery is causing the stator starting issue, it’s often assumed that the battery is faulty. Typically, this would be the right path to take, as motorcycle batteries fail much more frequently than stators fail. However, before you assume that the battery is at fault and install a new one, an experienced technician would rule out the battery charging as the cause of the problem.
If the bike charging system isn’t properly charging the battery, merely replacing it will not resolve the issue. Additionally, a discharged battery will have to be brought to full charge before static or load testing it.
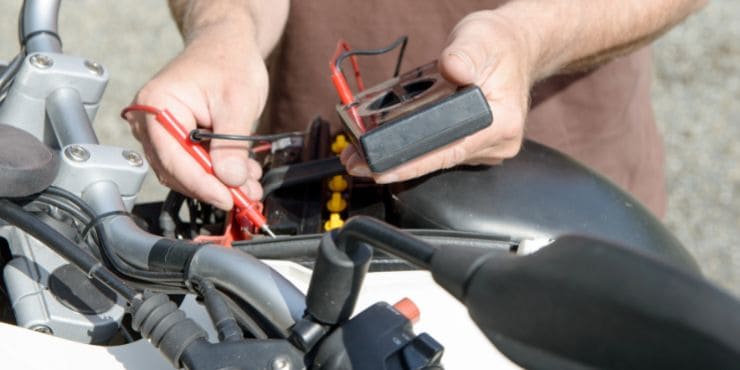
An experienced technician makes use of a multimeter for testing a stator, either with or without a running engine. With the engine off, the technician will test for a broken winding wire. With the motorcycle engine running, the technician can test for the voltage going into the battery. By making use of tests and chronological steps, the technician will rule out faults in the charging system, determining whether the battery is the cause of the no-start scenario or not.
Motorcycle and powersports technicians work with and test electrical system components regularly. Understanding how the components are interacting with each other is critical for effective diagnosis and repair. Technicians do not always see automotive-style alternators on bikes. However, understanding how they work is extremely valuable information to have.

Motorcycle stators, on the other hand, are a component that requires testing and a thorough understanding of how they work. As with any charging system on a vehicle, once you peel back the mystery and understand how they work, and how they typically fail, an experienced technician would be more confident and comfortable diagnosing, servicing, and replacing components.
Equipment needed for testing a stator and motorcycle charging system
You will need a few tools and equipment if you’re going to test the stator and battery charging systems. Some of the main ones include –
A Multimeter
Any household multimeter will do. Decent quality but affordable options like Fluke Automotive Multimeter would do. It’s a combination of a resistance meter, a voltage meter, and a continuity tester.
A Battery Charger
Your Harley-Davidson bike will have to be fully charged before you can do these tests. You’ll be able to use a Battery Tender (the 0.75A “Junior” one would charge a bike battery overnight) while also using it to maintain your battery.
Besides that, you’ll also be needing a few regular tools, like the ones present in your toolkit. You’ll need to get to the battery and unplug a few things.
- Needle-nose pliers for undoing a few clips
- Working gloves as your hands could get filthy when testing
- Allen keys to undo and redo bolts and stuff
Before you do any tests on your stator or motorcycle charging system, you’ll have to use a trickle charger. Leave it on overnight. You’ll need to charge the batter before doing any other tests or the results might not be meaningful. For charging the battery, you’ll have to remove the seat and the fairings, if you’ve got them.
How to test the battery system using the stator coil
You’ll have to figure out if your stator coil is capable of producing enough power. You’ll be able to see if it is doing so by testing the output voltage. The stator coil is essentially a coil or a series of coils that sit around the rotor. The rotor is a magnet that is connected to the crankshaft of your Harley-Davidson bike.
When the bike’s engine is turning (i.e. when it’s on or if you’ve push-started it), the rotor magnets will turn. The magnets will turn inside the coils of the stator. The changing magnetic field that is caused by the turning magnets will induce a current in the coils. It’ll work the opposite way compared to how an electric motor does.
For testing the stator coil, you’ll have to test if it is producing enough voltage. In case it is, it’s usually a sign that it can carry the load. First, you’ll have to find the output of the stator coil. There is usually a plug that is coming out of the whole area. If you don’t know, where is the output of the stator coil?
On longitudinally mounted engines, such as the V-twins, you will find the clutch on one side of the engine and the stator on the other side. You’ll be aware of the clutch side as the clutch cable and actuator go to it. Meanwhile, the stator side is on the other side. On this side, you’ll also find the plug.
On transversely mounted engines or inline-four motorcycles, it isn’t so obvious. There, it’ll be easier to find the regulator/rectifier (under the seat) and check the voltage there. Once you have found the output of the stator coil, you need to perform these tests.
Check the resistance between each pin
You’ll need to check the resistance between each of the pins. In case there are two pins present, then check the resistance between the two of them. Use the multimeter on a low resistance scale. The resistance has to be low (0.2 to 0.5 ohms, roughly). In case it’s an open circuit, the coil has opened up. In case it’s a short circuit, it’s bad news as both coils are shorted to the ground.
Check the resistance between the earth and the pins
You’ll have to check the resistance between the pins and the earth (the chassis or negative terminal of the battery). This needs to be an open circuit. If it’s anything, then there is a malfunction. If you haven’t found any issues, you can do tests with the engine on. You’ve charged the battery, so it will be able to start up.
How to test the stator coil with the engine on
You should start by putting the multimeter in AC mode. You’ll now be able to test the voltage between the terminals on the stator coil at 3,000 RPM. Depending on your bike, you need to get a reading of anywhere between 20V and 50V. What voltage you’re getting isn’t essential (unless it is less than 15V at 3,000 RPM, you’ll definitely have enough voltage to charge the battery, i.e. more than 15). The more important thing is that there’s a voltage reading on all terminals, and they are all similar.
Older alternators are essentially two-phase and have just two output wires. With these, this is the only voltage that you can measure. Most modern alternators come with 3 phases and have 3 output wires. You’ll need to measure A-B, B-C, and A-C. In this case, your voltages will have to be similar.
Conclusion
Thank you for reading. Hopefully, now you know a lot more about a Harley-Davidson motorcycle stator, what does a motorcycle stator do on a bike, how to test stator on Harley-Davidson bikes, symptoms of a bad Harley-Davidson engine, how to use stator for testing the battery system of a Harley-Davidson bike, and more. Testing the stator on Harley-Davidson motorcycles involves using a multimeter, either with or without a running motorcycle engine.
With the engine off, the technician will test for a broken winding wire. If the engine is running, a technician will test the voltage going into the battery. Using a series of steps or chronological order, the technician will be able to rule out the faults in the charging system. This will allow you to determine if the battery is the cause of the no-start scenario.

