Are you a proud Harley Davidson enthusiast who is looking for a safe, step-by-step guide to transporting your bike? Look no further!
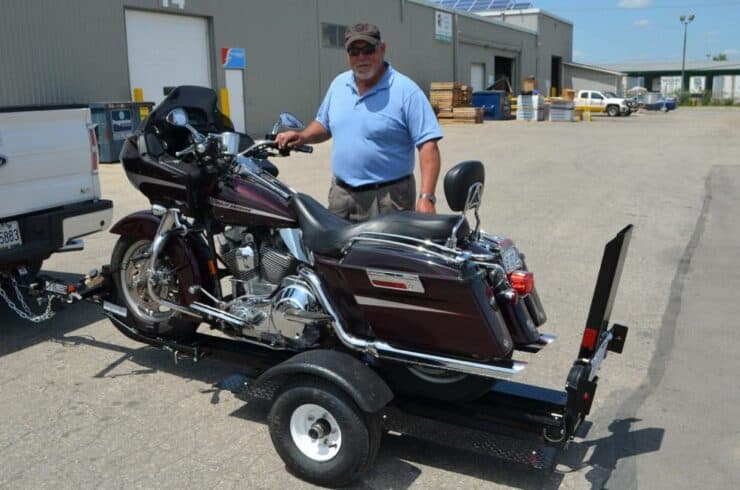
To transport a Harley-Davidson, use a motorcycle trailer or truck with a wheel chock and secure the bike with ratchet straps. Attach straps to stable points like the forks and rear frame, ensuring the bike remains upright and immobile.
In this article, we will provide you with a comprehensive guide on how to safely transport your Harley Davidson. From the preparation process to the actual transport of your bike, we will give you tips on how to keep your bike safe and secure throughout the entire process. So, if you’re ready to hit the open road and take your Harley Davidson with you, keep reading!
Preparation for transporting your Harley
If you own a Harley-Davidson motorcycle, there might be a time when you need to transport it from one place to the other. Regardless of the reason behind it, you will need to take the necessary precautions as it’ll allow you to ensure its safety and prevent any potential damage. Proper preparation can be key to maintaining the pristine condition of your prized possession during transportation. Here are some of the ways through which you can prepare your Harley-Davidson bike so that it can be transported safely and efficiently.
Check the manual
Before you even start the preparation process, it’ll be important that you consult your Harley-Davidson bike’s owner’s manual. The owner’s manual will provide specific instructions and guidelines on how you should prepare your bike for transportation, taking into consideration the model and year of your bike. You must familiarize yourself with the recommendations and any specific requirements for your particular bike.

Gather the necessary tools
Having the right tools at hand will make things simpler and much more efficient. Here are some of the essential tools and supplies that you might need to safely transport a Harley-Davidson bike.
#1. Wrenches and screwdrivers
These tools will help you remove any detachable components and accessories, such as windshields, mirrors, saddlebags, and luggage racks. You must refer to the owner’s manual for guidance on which components have to be removed.
#2. Soft blankets or bubble wrap
Make use of soft blankets or bubble wrap to cover delicate parts, such as the fuel tank, fenders, and handlebars. This way, you can protect them from any scratches or other damages during transportation.
#3. Straps and tie-downs
You must invest in high-quality straps and tie-downs specifically designed for motorcycle transportation. This equipment will allow you to secure your motorcycle to the transport vehicle and prevent any unnecessary movement or vibrations during transit.
#4. Wheel chocks
Wheel chocks are devices that keep your bike’s wheels in place and prevent them from moving during transportation. They’re important for maintaining stability and reducing the risk of damage.
#5. Cleaning supplies
Cleaning your motorcycle thoroughly before transport will not only keep it looking amazing but it’ll also allow you to inspect the condition of your bike more effectively. You must have cleaning materials such as soap, a sponge, water, and a microfiber cloth on hand.
Prepare your bike for transport
Once you have gathered all the necessary tools and equipment, you will need to prepare your bike for transport. The better the preparation, the safer and more efficient will be the eventual transportation.
#1. Clean your Harley
Begin by giving your bike a thorough cleaning. Remove any dirt, debris, or grime. Pay close attention to hard-to-reach areas. This step will ensure that you’ve got a clear view of your motorcycle’s condition and protect your bike from potential scratches caused by debris during transportation.
#2. Document the bike’s condition
Take photos or make a video recording of your motorcycle from various angles. This documentation will serve as evidence of your bike’s pre-transportation condition. It can come in handy in case of any disputes regarding damages during transit.
#3. Remove detachable components
You need to consult the owner’s manual to determine which detachable components have to be removed. Carefully use the appropriate tools to take off mirrors, windshields, saddlebags, luggage racks, and other accessories that could get damaged during transport. Wrap these detached components in soft blankets or bubble wrap and store them safely.
Then, you will need to cover the delicate parts of your Harley, such as the fuel tank, fenders, and handlebars with soft blankets or bubble wrap. This extra layer of protection will safeguard them from potential scratches or impacts.
#4. Secure your bike
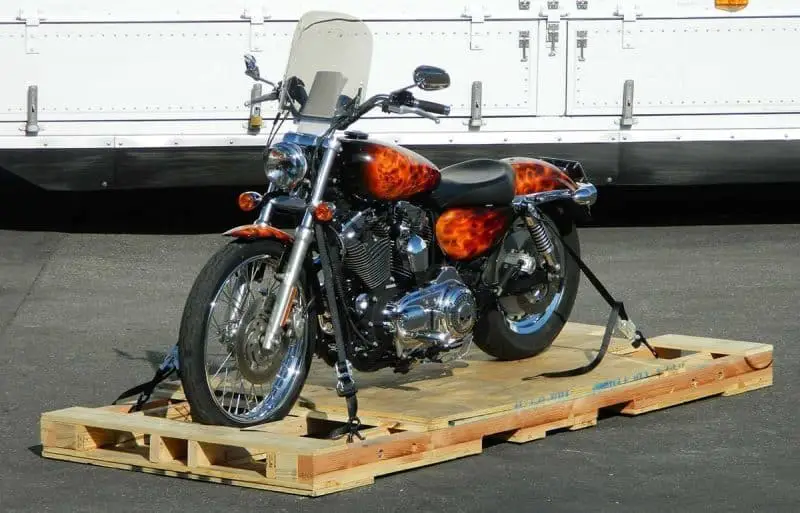
Position your bike in a sturdy and stable manner. Make use of wheel chocks to prevent any unwanted movement of the wheels. Use high-quality straps and tie-downs to secure your Harley to the transport vehicle. Follow the instructions mentioned in the owner’s manual to ensure the correct placement and tension of the straps.

Different methods to transport a Harley-Davidson bike
Transporting your beloved Harley-Davidson motorcycle requires careful consideration to ensure its safety and protection during transit. Whether you are moving to a new location, attending a rally, or sending your motorcycle for maintenance, choosing the most suitable transport method will be important. There are different methods of transporting your Harley-Davidson bike and only if you know about them will you be able to choose the best option for your specific situation.
#1. Professional motorcycle transport companies
Professional motorcycle transport companies specialize in moving your Harley-Davidson bike safely and efficiently. These companies offer different services tailored to meet your specific requirements. Some of the major advantages of hiring professional motorcycle transport companies include expertise, experience, insurance coverage, door-to-door service, and time-saving. Even Harley-Davidson offers shipping and delivery options, with prices depending on the plan you choose.
Motorcycle transport companies have extensive experience in handling Harley-Davidson bikes of different makes and models. They understand the specific requirements for secure transportation and employ specialized equipment. Reputable transport companies generally provide insurance coverage during transit, giving you peace of mind in case of any unforeseen incidents or damage.
Many companies offer convenient door-to-door service, picking up your Harley from your location and delivering it to the desired destination. This will eliminate the need for additional logistics on your part. Transporting your motorcycle through professionals will save you valuable time, allowing you to focus on other aspects of your move or travel.
#2. Enclosed trailer transport
Enclosed trailer transport involves using a specialized trailer to transport your Harley-Davidson motorcycle. It offers a wide range of benefits including protection from external elements, enhanced security, customized loading and unloading, and more.
Enclosed trailers will shield your motorcycle from adverse weather conditions such as rain, snow, or extreme heat. This protection will minimize the risk of damage caused by exposure to the elements. Further, they also offer increased security compared to open transport methods. You will get an additional layer of protection against theft, vandalism, and road debris.
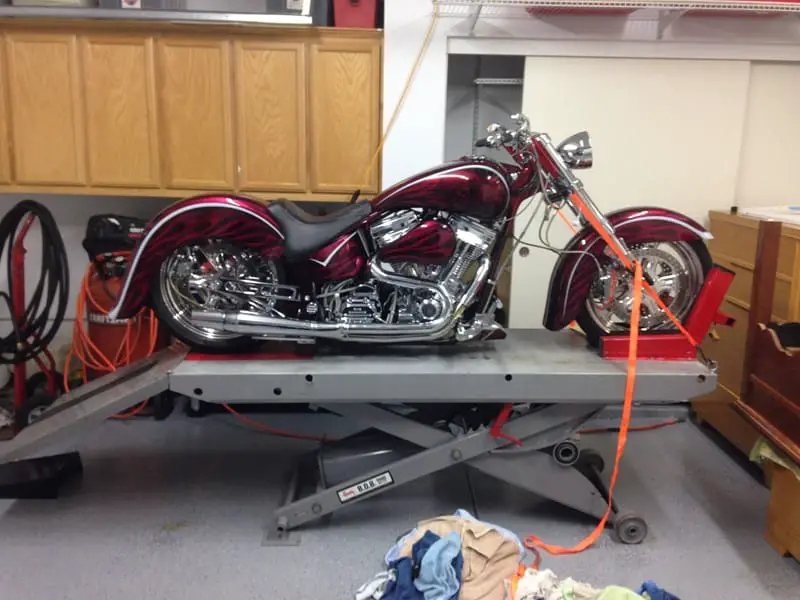
Enclosed trailers come equipped with ramps and hydraulic lifts, allowing for careful loading and unloading of your bike. This will ensure minimal stress and reduce the chances of accidental damage.
#3. Open trailer transport
Open transport involves transporting your Harley-Davidson motorcycle on an open trailer, typically pulled by a truck or SUV. When you’re opting for open trailer transport, you need to consider factors like affordability, availability, and visual inspection.
Open trailer transport is typically more cost-effective than enclosed trailer transport or professional transport services. It is a popular option for shorter distances or budget-conscious individuals. Moreover, open trailers are readily available and widely used, which makes them a convenient option for motorcycle transport.
With an open trailer, you’ll be able to easily monitor your motorcycle during transmit and visually inspect its condition at any time. This will allow for immediate identification of any potential issues or damages.
#4. DIY transport
For bikers who prefer a hands-on approach, transporting your Harley-Davidson motorcycle yourself is also an option. Some of the important considerations to keep in mind for a successful DIY transport include choosing a suitable vehicle for transport, having knowledge and experience, and time and effort.
Make sure that you have a vehicle capable of safely towing the weight of your Harley and an appropriate trailer or hitch-mounted carrier. You need to verify compatibility and load capacity to prevent accidents or damage. DIY transport will require a solid understanding of motorcycle securing techniques and the ability to properly load and unload your Harley safely. You should familiarize yourself with proper strapping and tie-down methods. You must remember that DIY transport can be time-consuming and physically demanding. You must plan accordingly and allocate sufficient time for loading, securing, and unloading your bike.
How to transport a Harley-Davidson motorcycle
Loading your cherished Harley-Davidson motorcycle onto a vehicle for transport demands careful attention to detail and adherence to proper techniques. Securing your motorcycle effectively will not only protect it from damage during transit but it’ll also ensure the safety of other road users. Here are the steps you’ll need to follow to safely load a Harley-Davidson motorcycle.
Step 1: Prepare the loading area
Before you start loading your bike, you must ensure that the loading area is clear of any obstacles and that it provides enough space for maneuvering. If you’re using a trailer or a truck bed, you should ensure that it is stable and level to avoid any accidents during the loading process.
Step 2: Test the loading process
Before you load your Harley-Davidson motorcycle, it is crucial that you familiarize yourself with the loading process. You will need to follow a series of steps to ensure a safe and successful loading experience.
First, you will need to set up the loading ramp securely, making sure it is aligned with the vehicle’s loading area. Double-check that the ramp is stable and it can support the weight of your bike. Then, you need to place the wheel chocks at the base of the loading area to prevent the bike from rolling backward during the loading process.
With the assistance of a helper, you should carefully push your bike up the ramp and maintain a controlled speed. Make sure that both feet are firmly planted on the ground to provide stability and balance. Once your bike is in the loading area, you should align it centrally to distribute the weight evenly. Keep your bike in an upright position, ensuring that it is balanced and secure.
Attach the straps and tie-downs to the designated secure points on your motorcycle. These are typically the handlebars, frame, or footpegs. After that, tighten the straps evenly, maintaining the motorcycle’s stability without over-compressing the suspension.
Step 3: Test the secure loading
After loading your bike, you need to perform a thorough check to ensure its stability and the effectiveness of the loading process. You must gently rock your Harley from side to side and front to back to confirm it is securely fastened and doesn’t wobble or move excessively.
Press down on the front and rear suspension to make sure it compresses and rebounds correctly. This will confirm that the straps aren’t overly tight, restricting the suspension’s movement. Inspect the straps and tie-downs for any signs of slackness, damage, or potential loosening. You must double-check that all the connections are secure and tight.
Once you have managed to load your Harley-Davidson motorcycle onto a vehicle for transportation, ensuring a safe journey will become the next priority. Driving with a loaded motorcycle will require careful attention and adherence to specific guidelines to maintain the security of your bike and the safety of both yourself and others on the road. Here are the steps that will help you know how to transport a Harley-Davidson bike.
Step 4: Drive safely
Driving with a loaded motorcycle will require extra caution and adherence to different safety measures. These safety methods will help you drive safely and keep your bike safe during transportation.
- Maintain a controlled speed and accelerate gradually to prevent any sudden shifts in weight, which could affect the stability of your loaded bike
- Allow for a greater following distance between your bike and the one in front of you as it’ll give you enough time to react and adjust to any changes in traffic or road conditions
- Apply the brake smoothly and gradually to avoid sudden stops, which may result in an imbalance or instability of the loaded bike
- Keep in mind that the additional weight of your loaded motorcycle when maneuvering and making wider turns
- Approach curves with caution to compensate for the extra mass
- Be prepared for any wind gusts or adverse weight conditions that might affect the stability of your loaded motorcycle
- Maintain control by reducing speed and keeping a firm grip on the steering wheel

Step 5: Monitor your bike
Throughout the transportation journey, it’ll be important to keep a vigilant eye on your loaded Harley-Davidson motorcycle to ensure its security and address any issues promptly. Here is how you can effectively monitor your loaded bike during transportation –
#1. Periodically check straps and tie-downs
Periodically, you must inspect the straps and tie-downs when securing your bike. Make sure that they remain taut and intact, and ensure any necessary adjustments if you notice any signs of loosening or shifting.
#2. Monitor for any vibrations or unusual noises
You must pay close attention to any unusual vibrations or noises that might indicate an issue with the securement of your motorcycle. Address any concerns immediately by pulling over safely to assess and rectify the situation.
#3. Visual inspection at stops
Take full advantage of rest stops or planned breaks to visually inspect your loaded motorcycle. Look out for signs of damage, shifting, or potential issues with the straps, tie-downs, or bike components. This will allow you to address any problems promptly.
#4. Regular communication with the driver
If you aren’t the one driving, you must maintain open communication with the driver. Relay any concerns or observations regarding the motorcycle’s stability or any changes in road conditions that might affect transportation safety.
How to unload your Harley-Davidson bike after transportation
Once you have successfully transported your Harley-Davidson motorcycle to its destination, you must know how to unload your bike. The unloading process will require careful attention and adherence to safety protocols. Properly unloading your motorcycle will not only ensure its safe removal but it’ll also minimize the risk of injury and damage. Here are the steps you’ll need to follow to safely unload your Harley-Davidson motorcycle after transportation.
Step 1: Follow the safety protocols
Your work isn’t done even after you have carried your bike to the desired destination. There is still work to be done and for that, you will need to prioritize your safety. To do this, you will need to follow the safety protocols.
You must make sure that the unloading area is clear of any obstacles or hazards, providing ample space for maneuvering your bike safely. Remove any potential trip hazards and secure the area to prevent unauthorized access.
You must also put on appropriate protective gear, including gloves, sturdy footwear, and a helmet. This will protect you in case of any unforeseen accidents or mishaps during the unloading process.
You must evaluate the area around the vehicle and the motorcycle’s planned path of removal. Take notes of potential obstacles, inclines, or uneven surfaces that might affect the unloading process. Address these factors to make sure you carry out a safe and smooth removal.
Step 2: Disassemble the loading equipment
Proper disassembly of the loading equipment will be important for preventing any damage to the bike and ensuring a safe unloading process. Once you know the right method of disassembling the loading equipment, you’ll be in a better position to unload your bike.
First, you must carefully release the straps and tie-downs securing your loaded Harley-Davidson motorcycle. Loosen and unfasten them, taking care to avoid any sudden movements that could cause the motorcycle to become unstable.
Once you have removed the straps and tie-downs, you should store them securely to prevent entanglement or damage. Use designated storage compartments or containers to keep the equipment organized and easily accessible for future use.
If you’re using loading ramps or lifts, you should follow the manufacturer’s instructions to disassemble them safely and efficiently. Store the disassembled parts securely to prevent loss or damage.
Step 3: Safely remove the bike
Once the loading equipment is disassembled, it’ll be time to remove your Harley-Davidson motorcycle from the vehicle. You must take certain steps to ensure a smooth and safe removal.
Slowly and carefully maneuver your Harley off the vehicle, ensuring control and stability. Maintain a balanced posture and walk alongside the bike as you guide it to the ground. Once on the ground, you should lower the ground gently and make sure that it is stable and secure. Make the necessary adjustments to its position to ensure proper balance and stability.
If possible, you must enlist the help of a second person to help you during the unloading process. Having an extra set of hands will provide additional stability and make the unloading process more manageable.
Also read: How to Change a Drive Belt on a Harley Softail?
FAQs
What materials should I use to transport a Harley Davidson?
When transporting a Harley Davidson, it is important to use materials that are strong and durable enough to support the motorcycle’s weight. The best materials to use are heavy-duty steel straps, ratchet straps, and tie-downs. It is also important to use a ramp or lift to safely and securely lift the motorcycle onto the trailer or truck bed.
What should I consider when transporting a Harley Davidson?
When transporting a Harley Davidson, it is important to consider the size and weight of the motorcycle, the size of the trailer or truck bed, and the available towing capacity. It is also important to check the vehicle’s suspension and steering to ensure they are in good working order and able to handle the weight of the motorcycle. Additionally, it is important to ensure the motorcycle is properly secured with straps and tie-downs to prevent it from shifting or falling off during transport.
What safety precautions should I take when transporting a Harley Davidson?
When transporting a Harley Davidson, it is important to take safety precautions to ensure the motorcycle is transported safely and securely. This includes using a ramp or lift to safely and securely lift the motorcycle onto the trailer or truck bed, making sure the motorcycle is properly secured with

